- 19 Nov 2024
- 2 Minutes to read
- Print
- DarkLight
- PDF
Managing Resources
- Updated on 19 Nov 2024
- 2 Minutes to read
- Print
- DarkLight
- PDF
Introduction
The Azure resources must first be associated with the Business Application before they can be managed and monitored.
It is possible for users to associate resources to Business Applications after they have created them by editing the relevant Business Application.
Resource Friendly Name
Users can provide a friendly name for the resources that is exclusively shown in the Turbo360 application for user convenience. This name will appear in all of Turbo360's major features like Monitoring, Service Maps, Dashboards, and Automated Tasks.
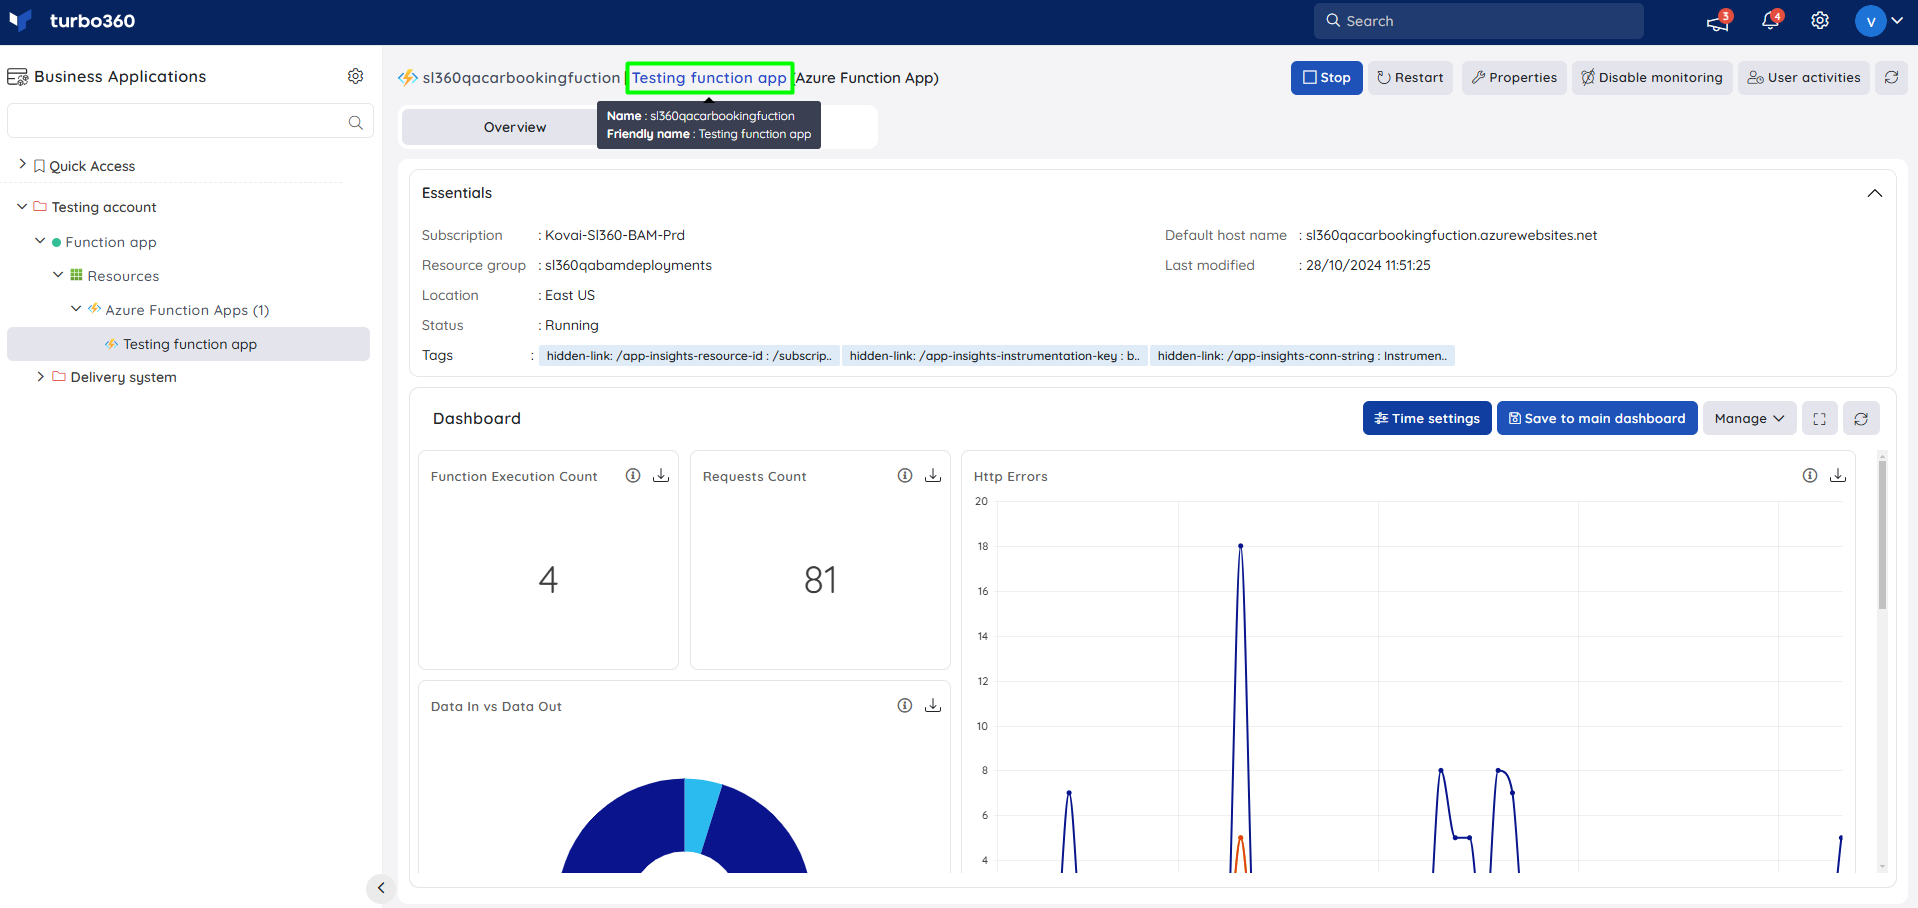
A friendly name can be provided by clicking on the Friendly Name icon next to them in the respective resources section or in the All Resources section.
![]()
When a resource that has been updated with a friendly name is hovered over, a tooltip containing the information of the original resource name and the friendly name is displayed. To avoid misunderstandings, the resource-friendly name should be unique at the level of the Business Application.
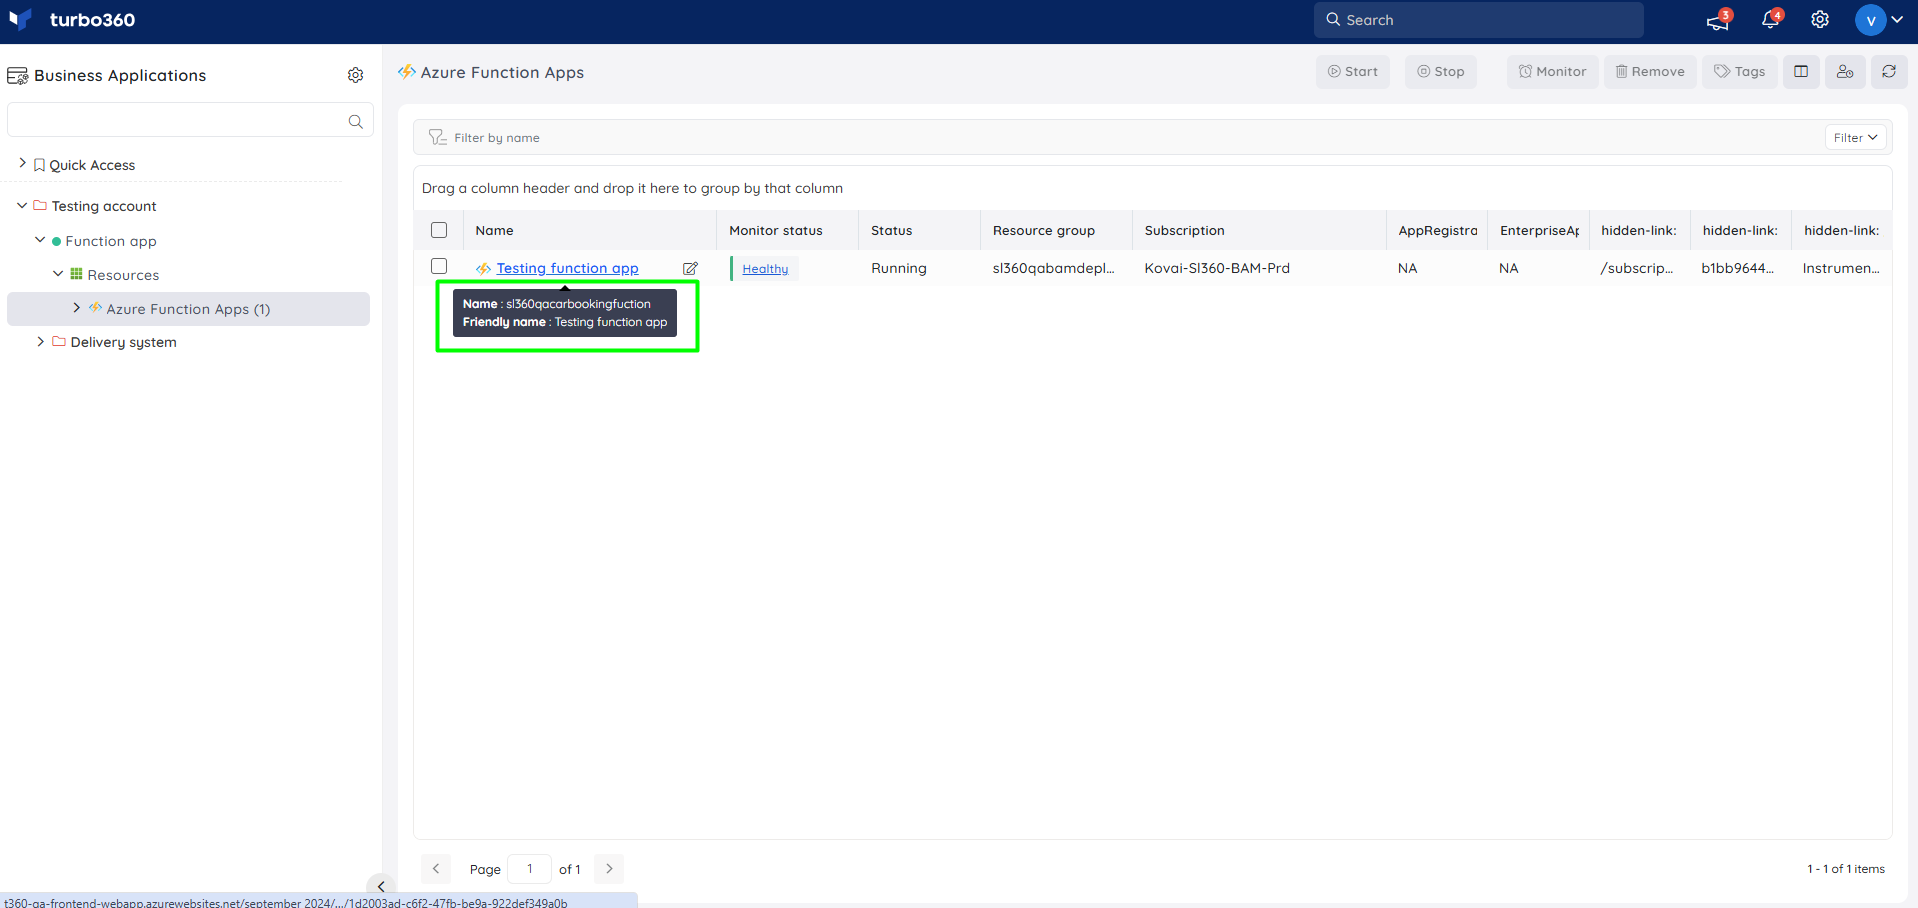
The friendly name of an Azure resource will not be reflected in the Resource selection section when creating a new Business Application.
A Reader user cannot change the friendly name of a resource.
Add resources
Azure resources are classified as Resources (Management & Monitoring) and All Resources during the resource association process. Feature-rich premium resource types that support both management and monitoring operations are listed under Resources (Management & Monitoring), while the recently added resource types, of which few support monitoring operations, are listed under All Resources.
- Click Add -> Resources in the Resources section of a Business Application.
- Select from the list of available Service Principals to associate resources available in it (or) add a new Service Principal.
- Click Next.
- Choose the Azure resources by clicking on their respective resource types and selecting them. The resources available in the child resource types will be pre-loaded when clicking upon a parent resource type. In parent resource types, the Associate all the child resources of the selected resources checkbox can select multiple child resources at once.
- Click Next to move onto the summary of resource association.
- Click Add to finish adding resources to the Business Application.
The below illustration depicts adding resources onto a Business Application
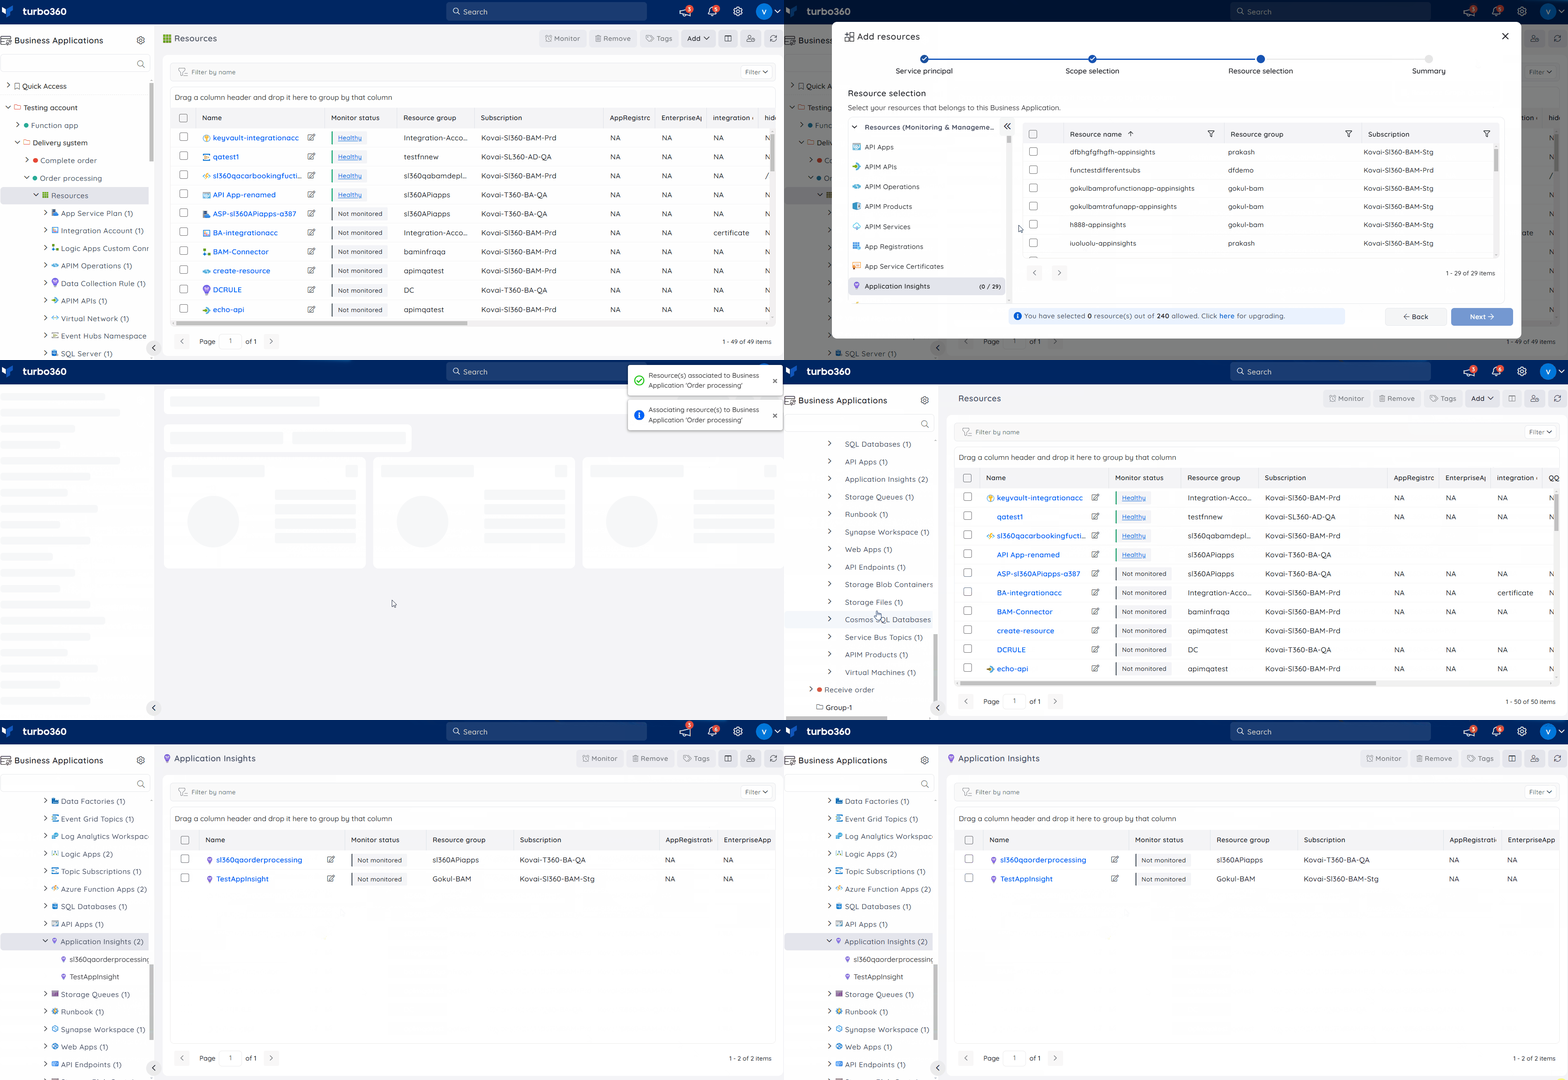
The licensing count is increased by one whenever a resource is added to a Business Application.
Remove resources
- Select the required resources from the Resources section of a Business Application.
- Click Remove button to remove them completely from the respective Business Application.
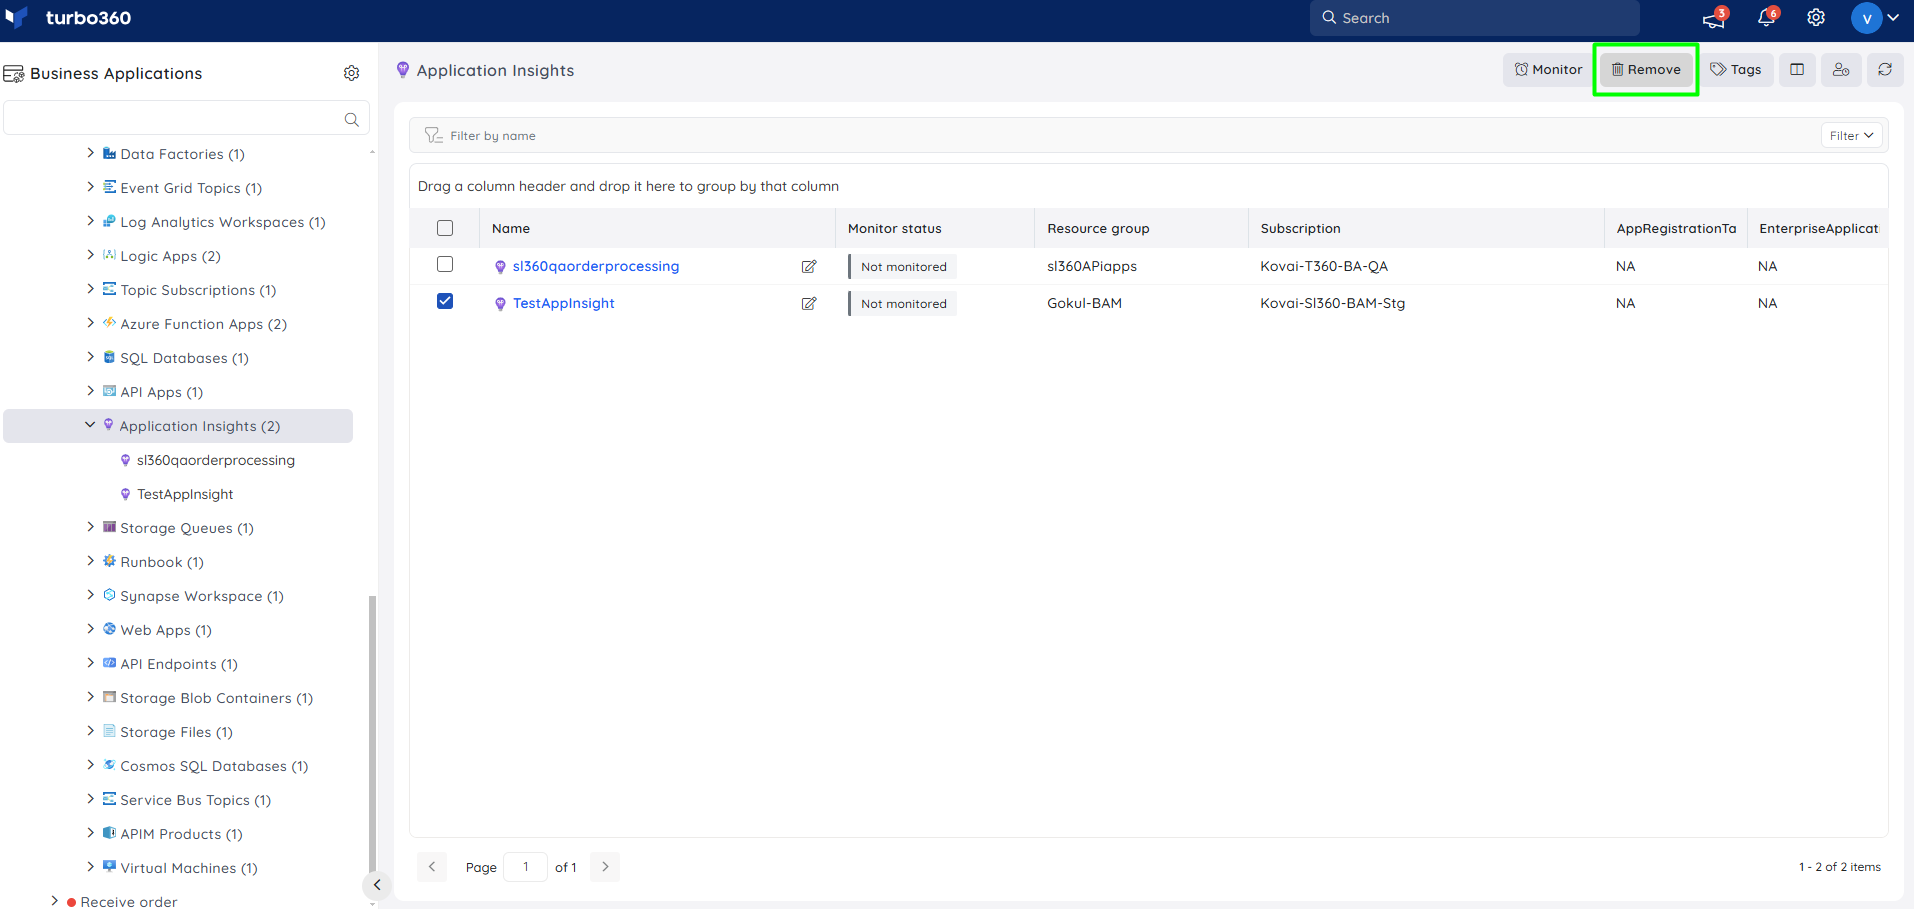
- Removing a resource from a Business Application decreases the licensing count by one. It is to be noted that the corresponding resource has to be removed from all the Business Applications for the license count to be decreased.
- The resources will be removed only from the selected Business Application. The removed resources can be added to the Business Application at any point in time.
Managing Azure Tags
Tags are name/value pairs that enable users to categorize resources and view the consolidated billing by applying the same tag to multiple resources and resource groups. Business Application provides an option to assign tags to the associated resources.
Perform the following steps to add tags to resources:
- Select the resource from the Resources section of a Business Application.
- Click Tags option.
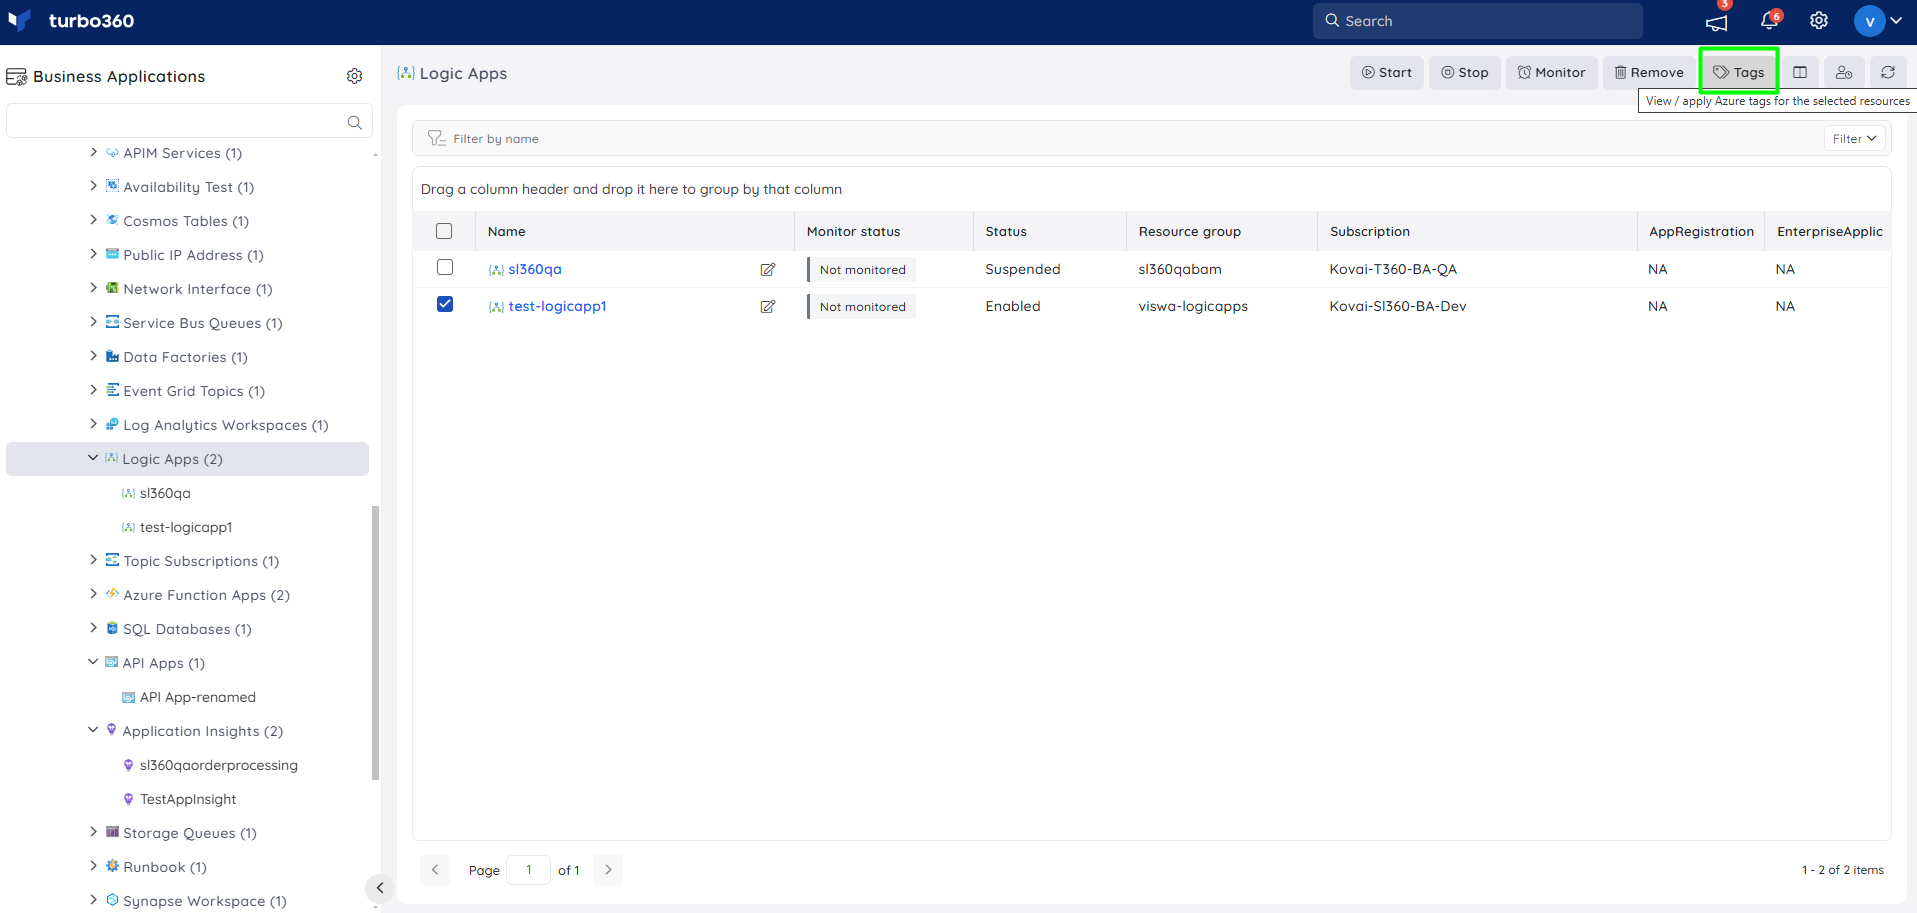
- Provide a tag name and value.
- Click the Add tag button to add more tags.
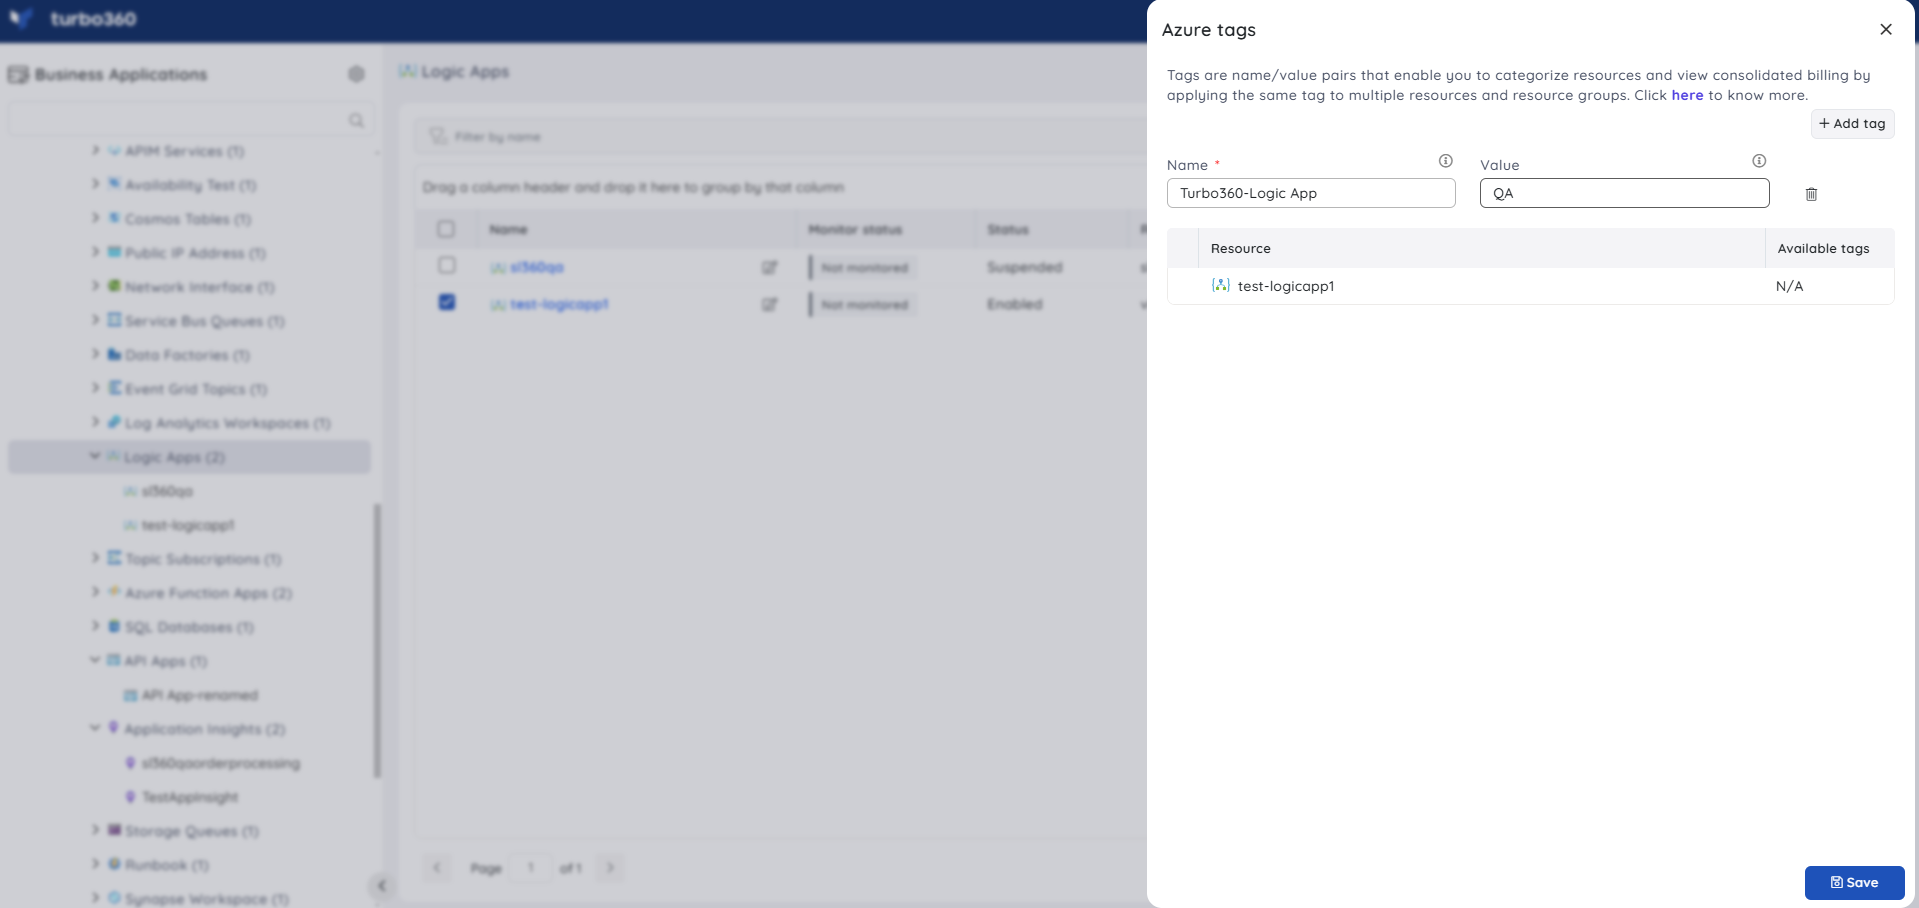
- Click Save to assign the tags to the respective resource.
The assigned tags can be viewed in the Azure tags blade/Tags Column after a manual or an auto-refresh.
- Tag values are case-sensitive.
- Tags can be assigned only to the resources specified in this documentation.

