- 13 Dec 2024
- 3 Minutes to read
- Print
- DarkLight
- PDF
Monitoring profiles
- Updated on 13 Dec 2024
- 3 Minutes to read
- Print
- DarkLight
- PDF
Introduction
Monitoring profiles allow users to configure unique monitoring rules for individual resources/resource types regardless of the rules configuration set for resource types at the Business Application level.
Why do we need a Monitoring profile?
Resources in a Business Application can be monitored by defining monitor rules based on metrics or state. If a large number of resources are added to a Business Application, defining the rules at each resource level is a complex process. A profile can be created in such cases with monitor rules enabled for the required resource types. It can be mapped to the Business Application, which results in monitoring all the resources in one go.
Profile management
Add a profile
- Go to Monitoring Settings-> Monitoring Profiles
- Please enter a unique name to the profile and include a description to distinguish it from multiple profiles
- Select the monitoring metrics for the necessary resource types and configure the threshold values
- Provide any description in the Note field if you wish to attach it along with the rule violation
- Click Save
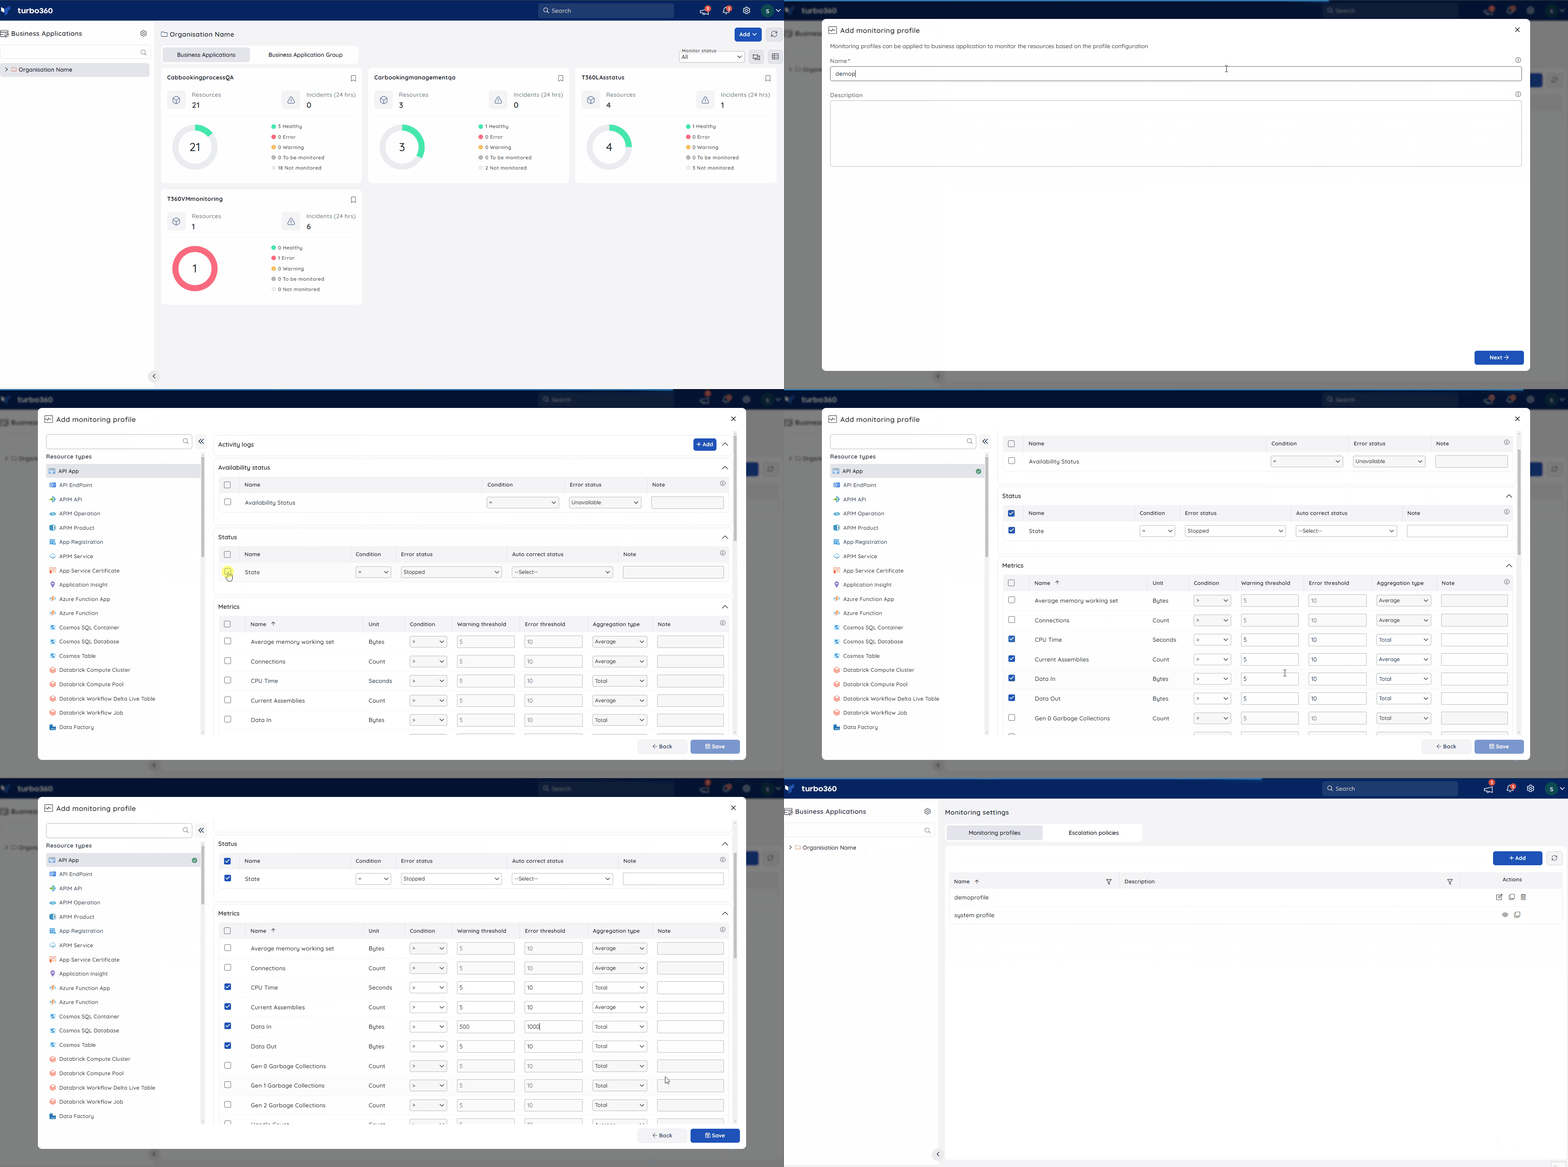
- The rules configuration section displays the list of all supported Azure services for monitoring, including other resource types.
- A tick mark next to the resource type in the Add monitoring profile blade indicates that rules are configured for the respective resource type.
- The Autocorrect Status rule will be available only for compatible resource types.
Update a profile
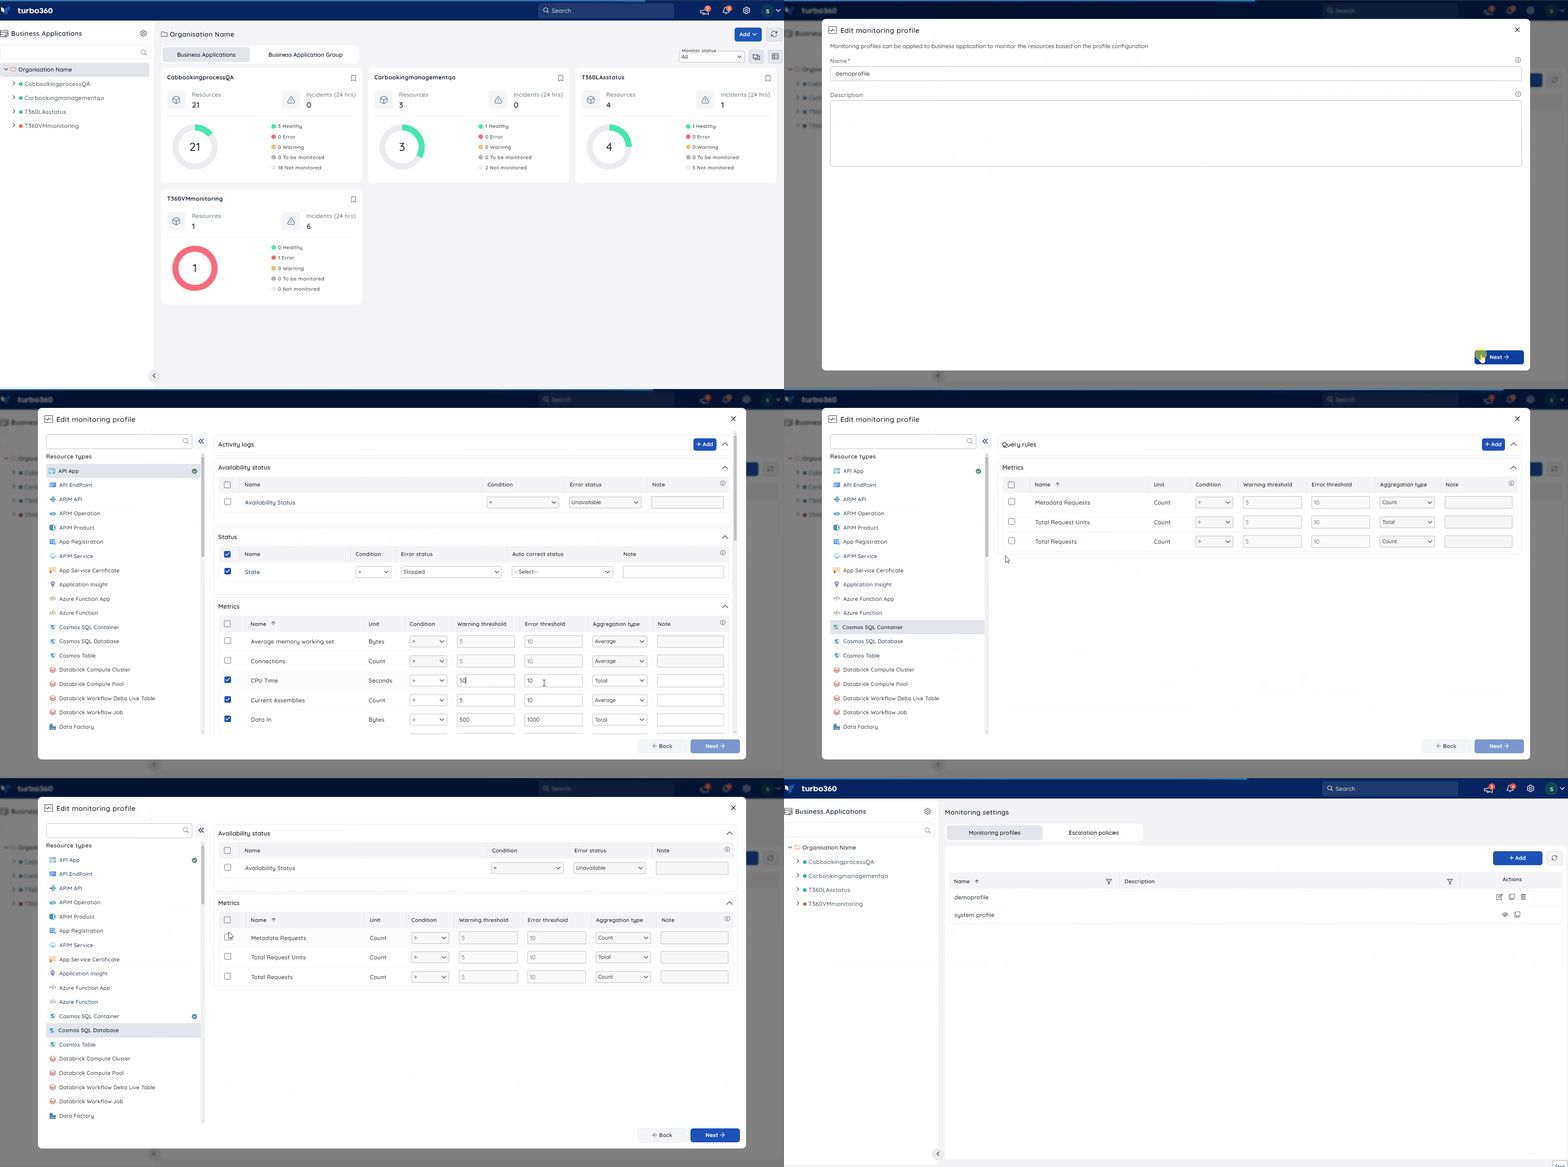
- Go to Monitoring settings -> Monitoring Profiles
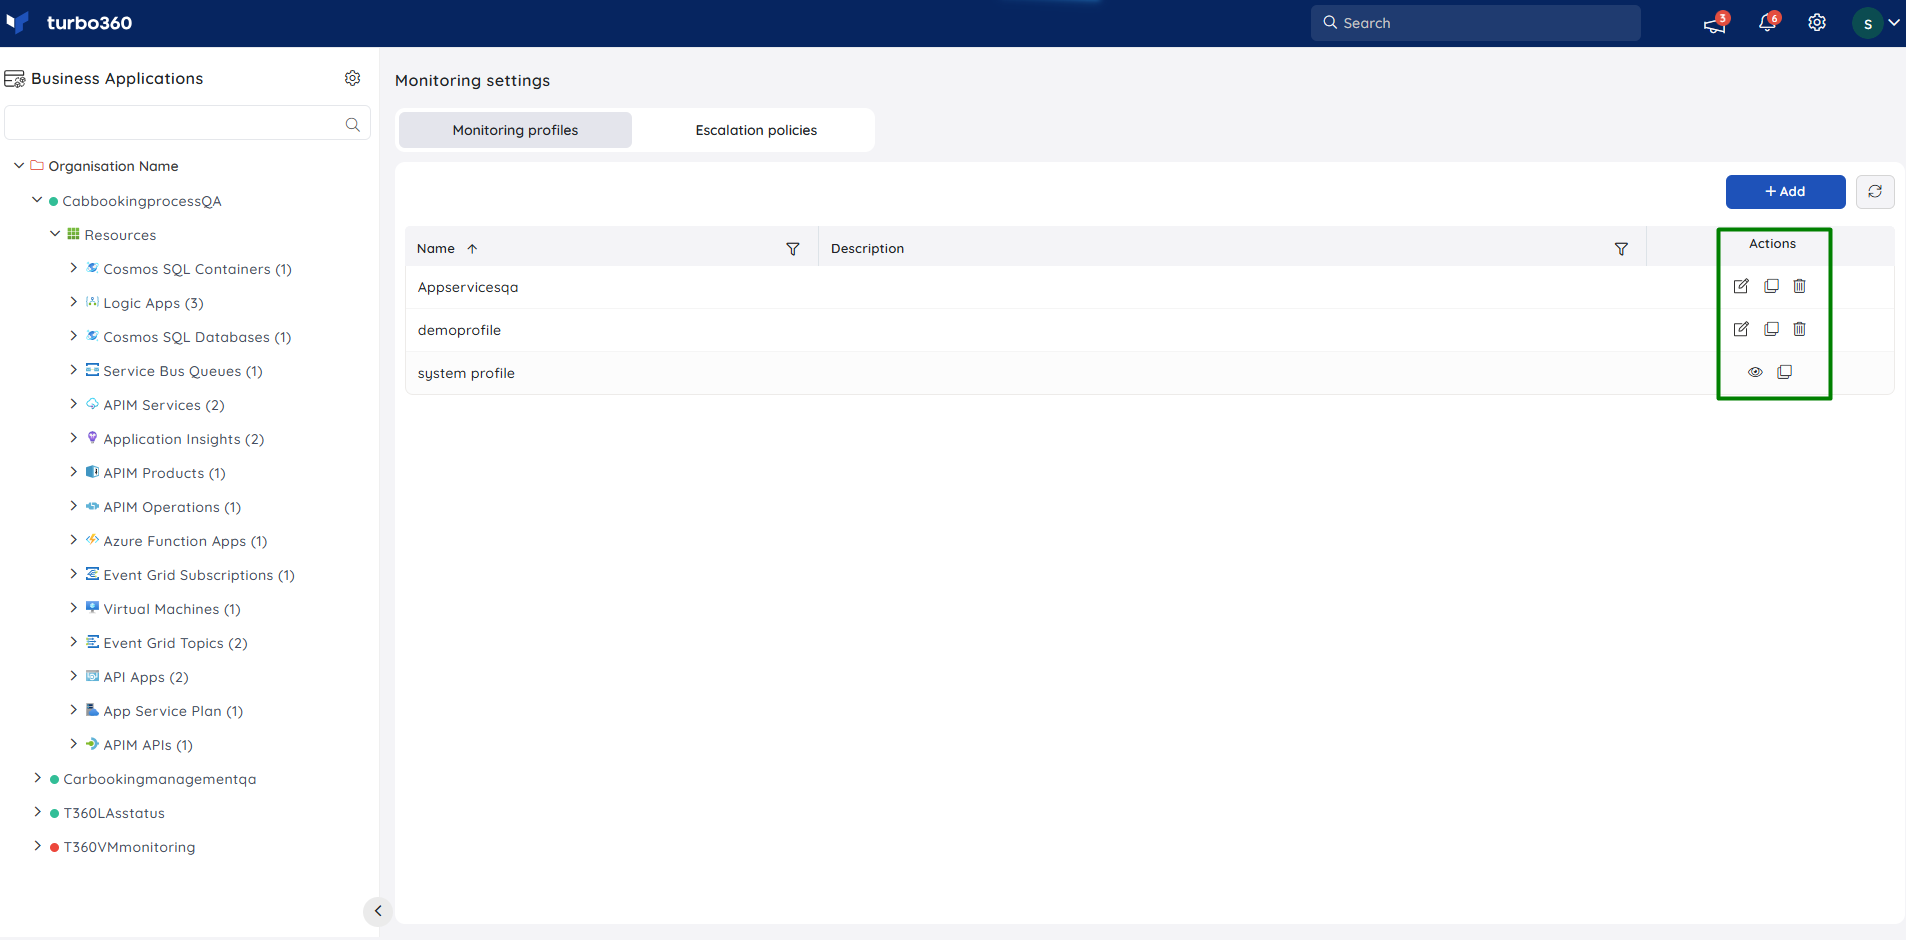
- Click the Edit icon next to any of the desired Monitoring Profile
- The name and description of the profile can be changed in the first page.
- Click Next to proceed
- Update or Add new rules to any resource types and click Next
- This section displays the list of Business Applications to which the profile is mapped. The changes can be made to reflect them by selecting it and clicking Save
Delete a profile
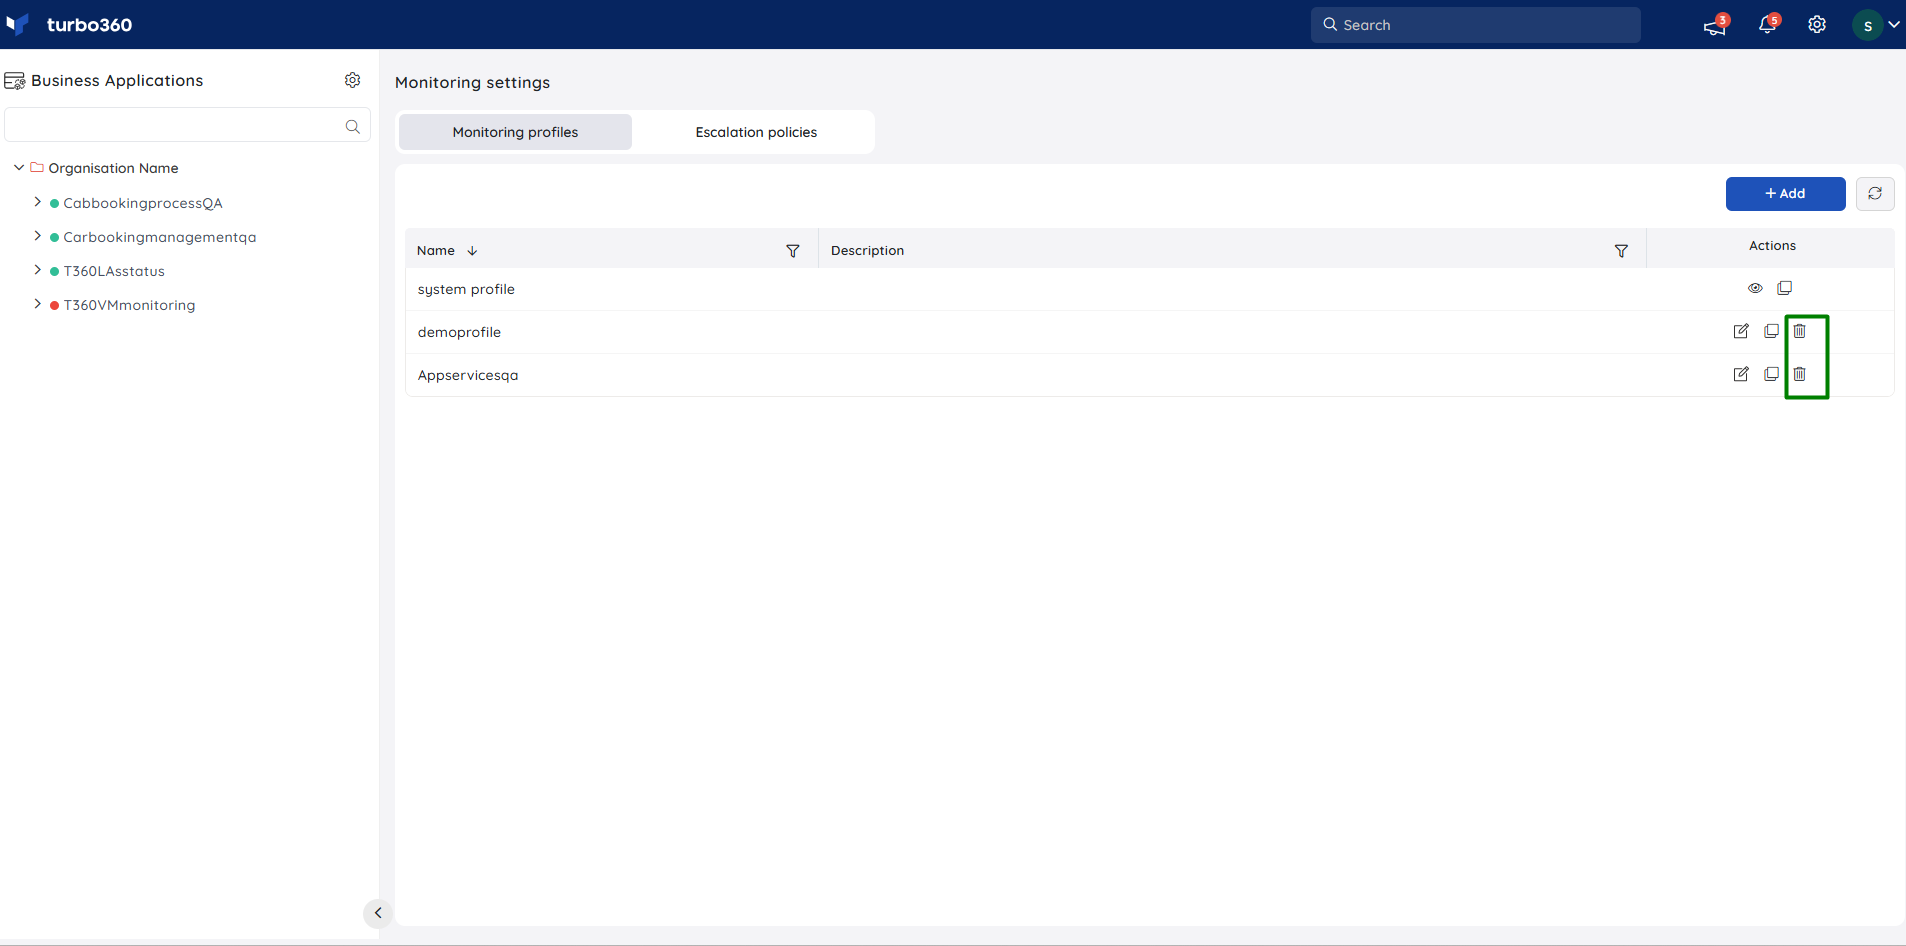
- Go to Monitoring settings -> Monitoring Profiles
- Click the Delete icon next to any of the desired Monitoring Profile
- Press the Delete button in the confirmation box
Profile Cloning
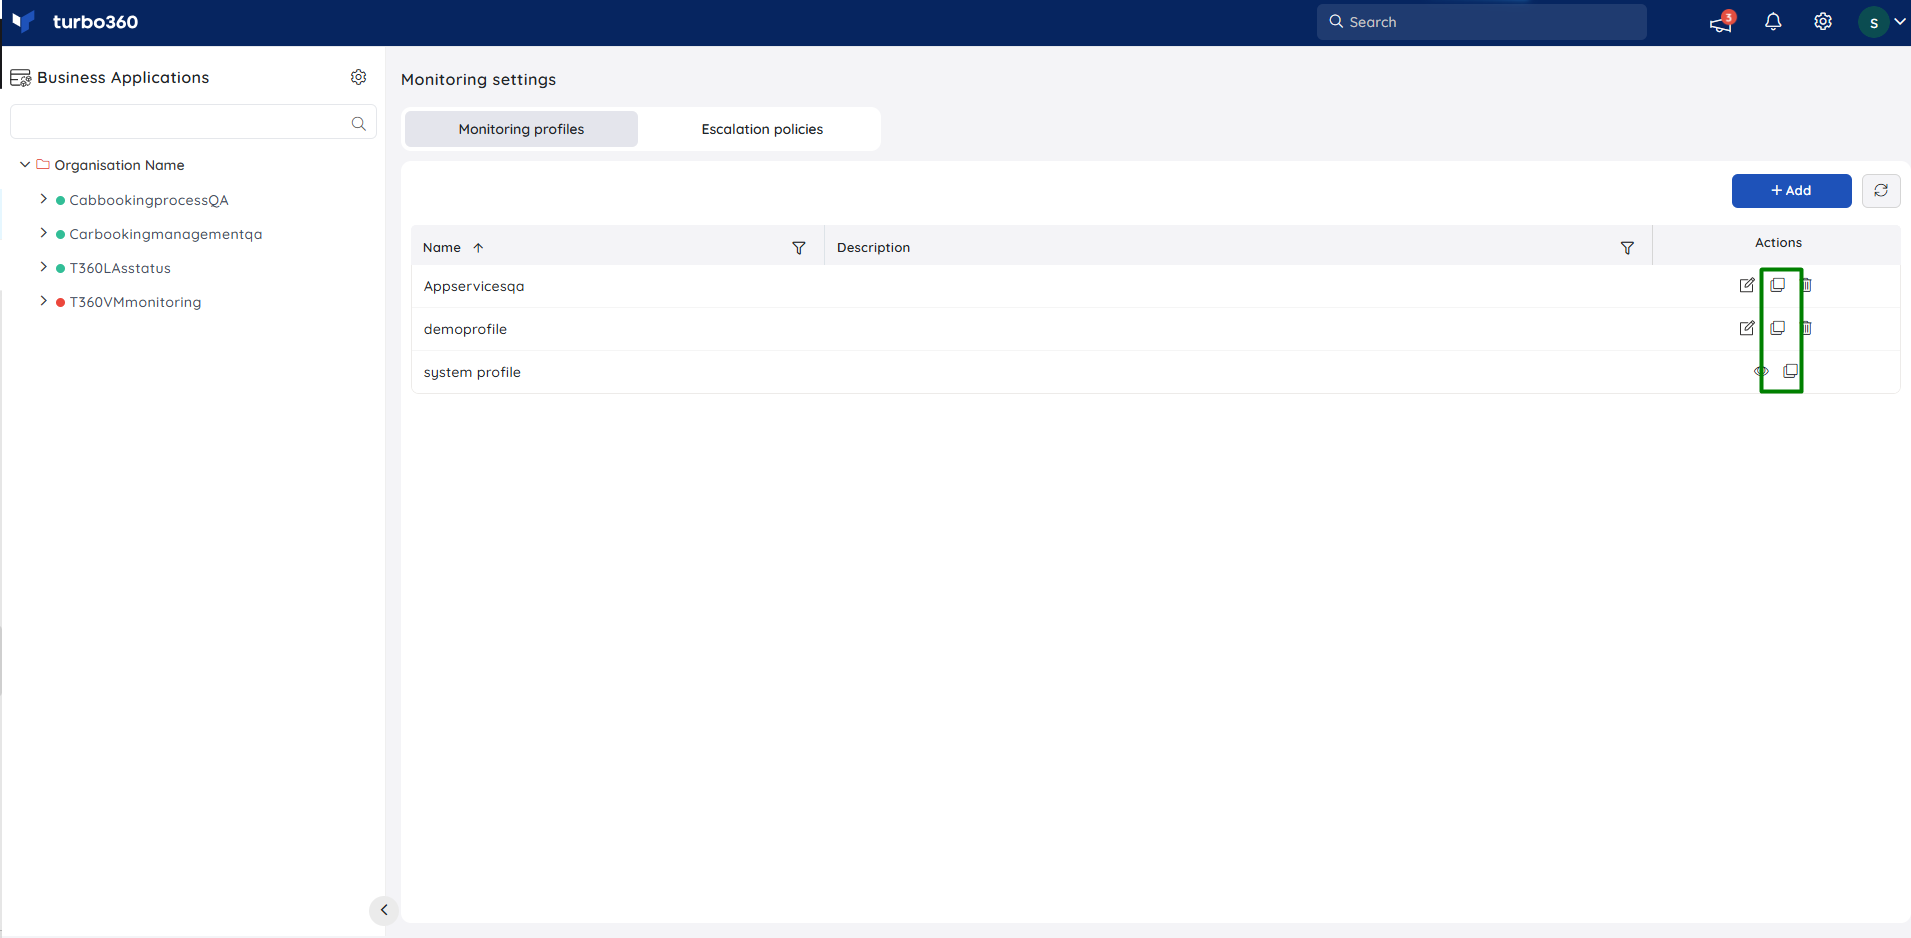
Updating new rules for resources that already have defined rules is made simpler by the availability of cloning existing monitoring profiles. It can be accomplished by using the Clone icon, which is available for all existing monitoring profiles.
Profile Export/Import
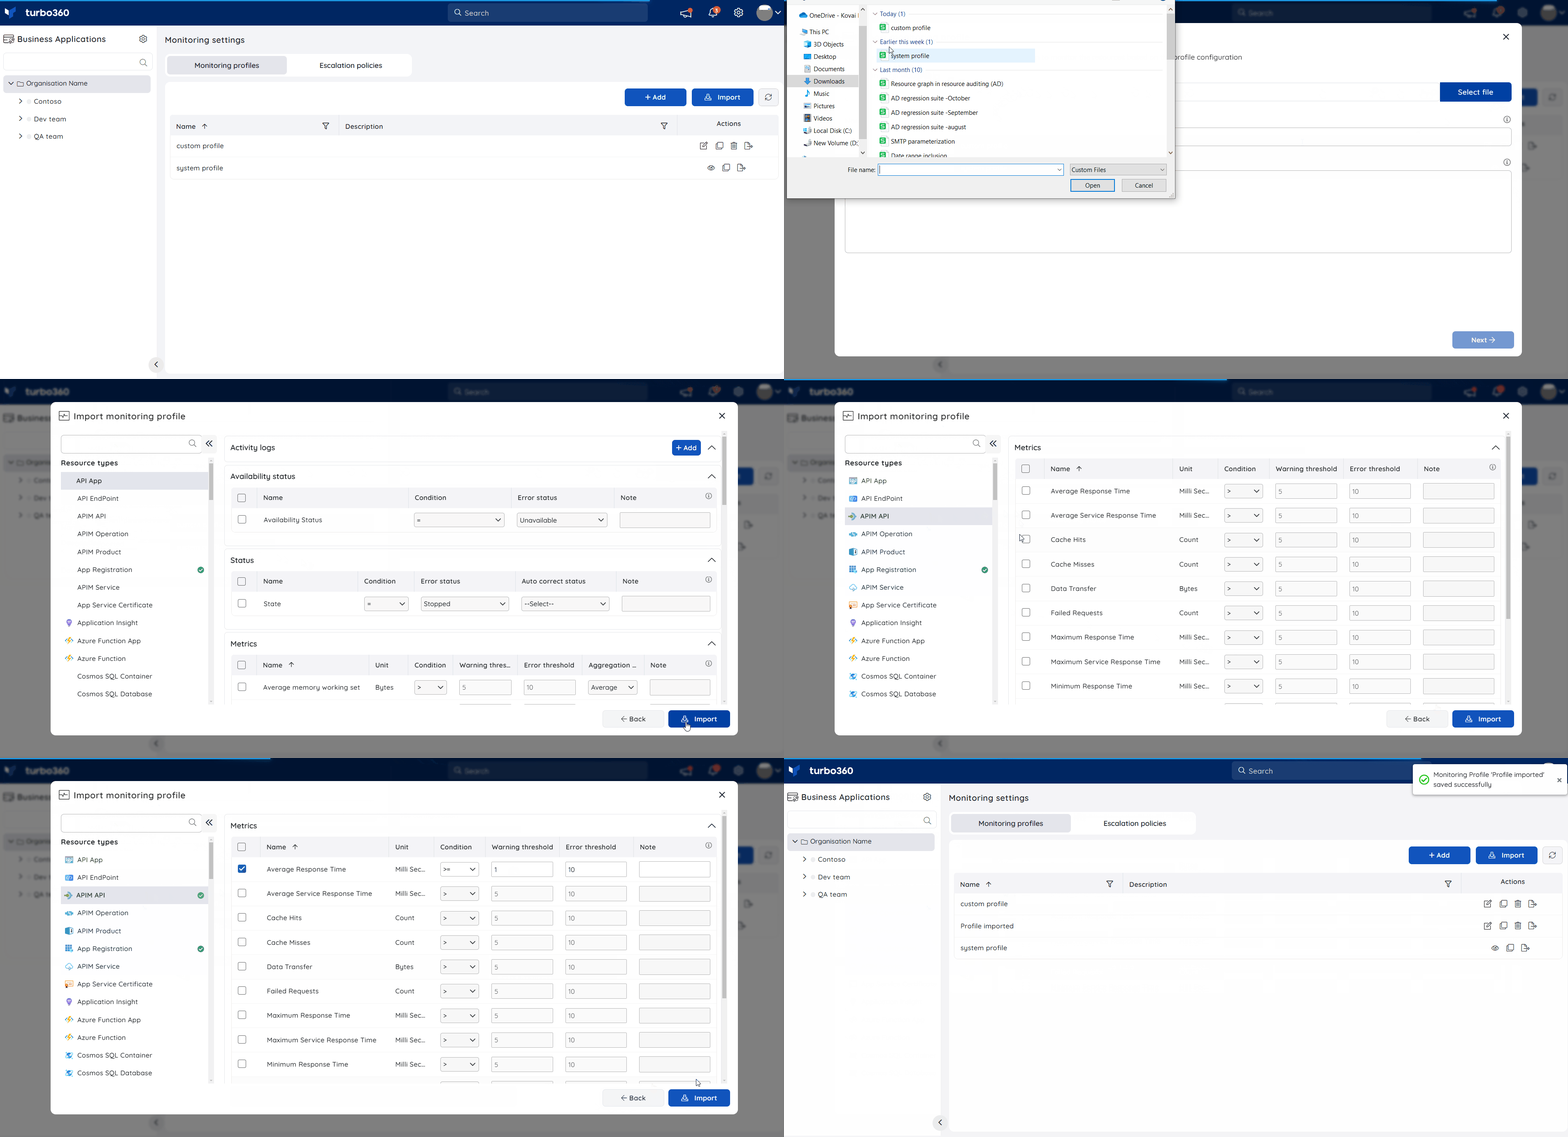
Monitoring profile rules can be exported and imported. Profiles can be exported as Excel files, allowing users to review and make necessary changes. Once updated, the modified file can be imported as a new profile and applied to business applications to monitor resources according to the configured settings.
- Go to Monitoring settings -> Monitoring Profiles.
- Click Import, select the desired excel workbook. Provide valid name and click upon Next.
- Choose the resource types, configure the necessary rules, and click Import to add the profile to the Business Applications.
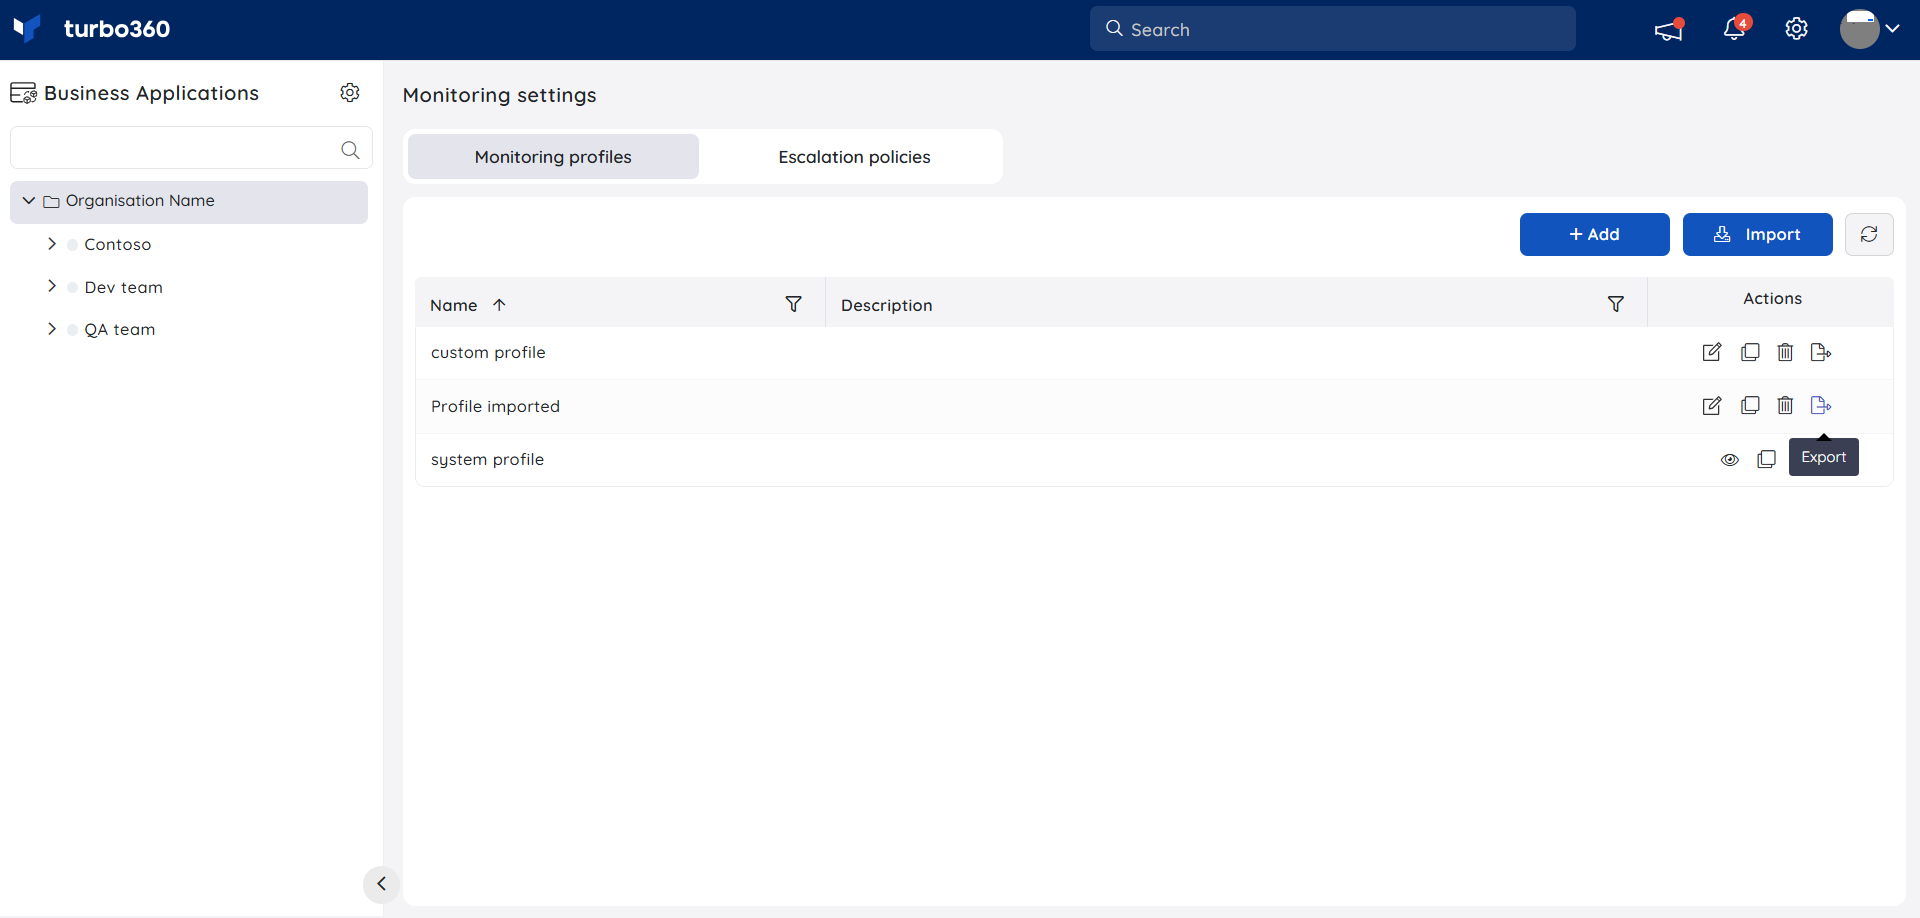
Exporting a profile is even simpler than importing. Just click Export next to Delete under Actions to download the Excel file.
Profile Mapping
- Navigate to Business Application->Monitoring-> Profile settings to begin mapping a monitoring profile to a Business Application
- Click the Apply profile button. The user will be listed with all the user-created profiles and the system profile to map to the respective Business Application
- Select the resources that contains monitoring rules in the profile to be mapped
- Click Next
- Configure the monitoring alert configuration for the profile
- Click Save
The illustration shown below depicts how to map a profile to a Business Application:
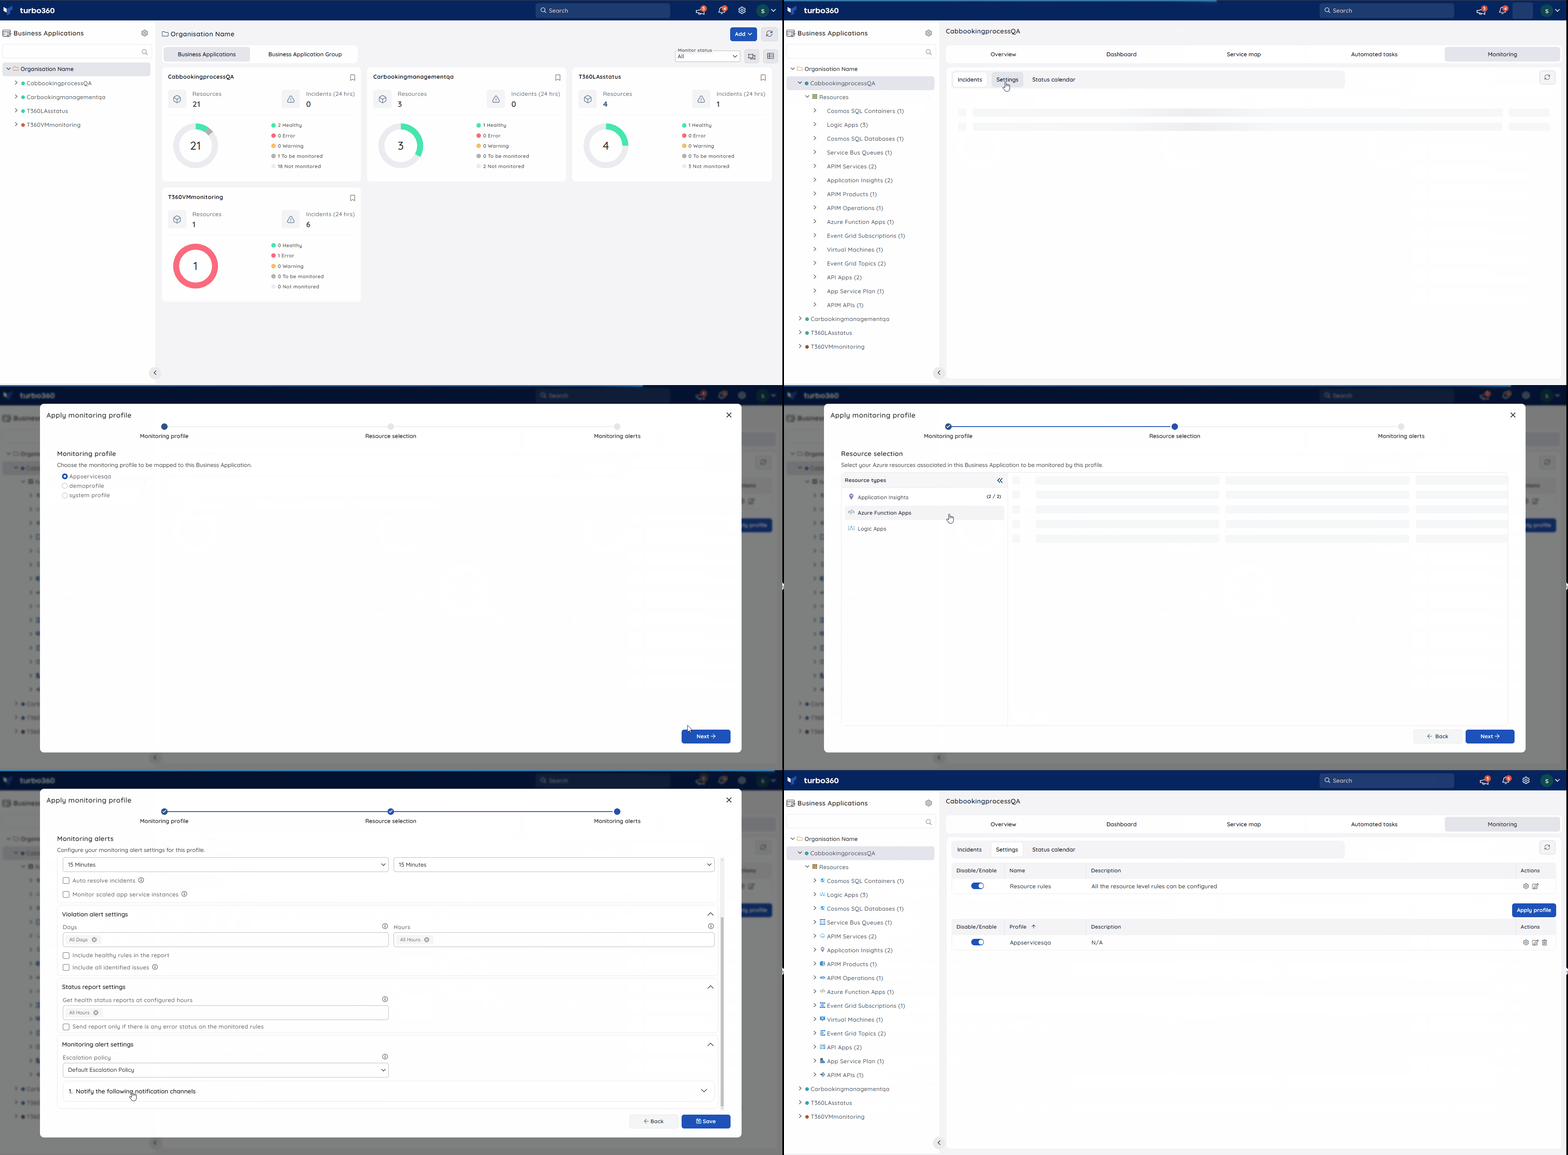
The alert settings and the rules in the mapped profile can be updated with the help of respective options available under the Actions column of the respective profile.
- Only the resource types that contain monitoring rules in the profile to be mapped will be listed when configuring resources during profile mapping.
- Removing a monitoring profile from mapping any Business Application will only remove it from that Business Application.
Rules accessibility
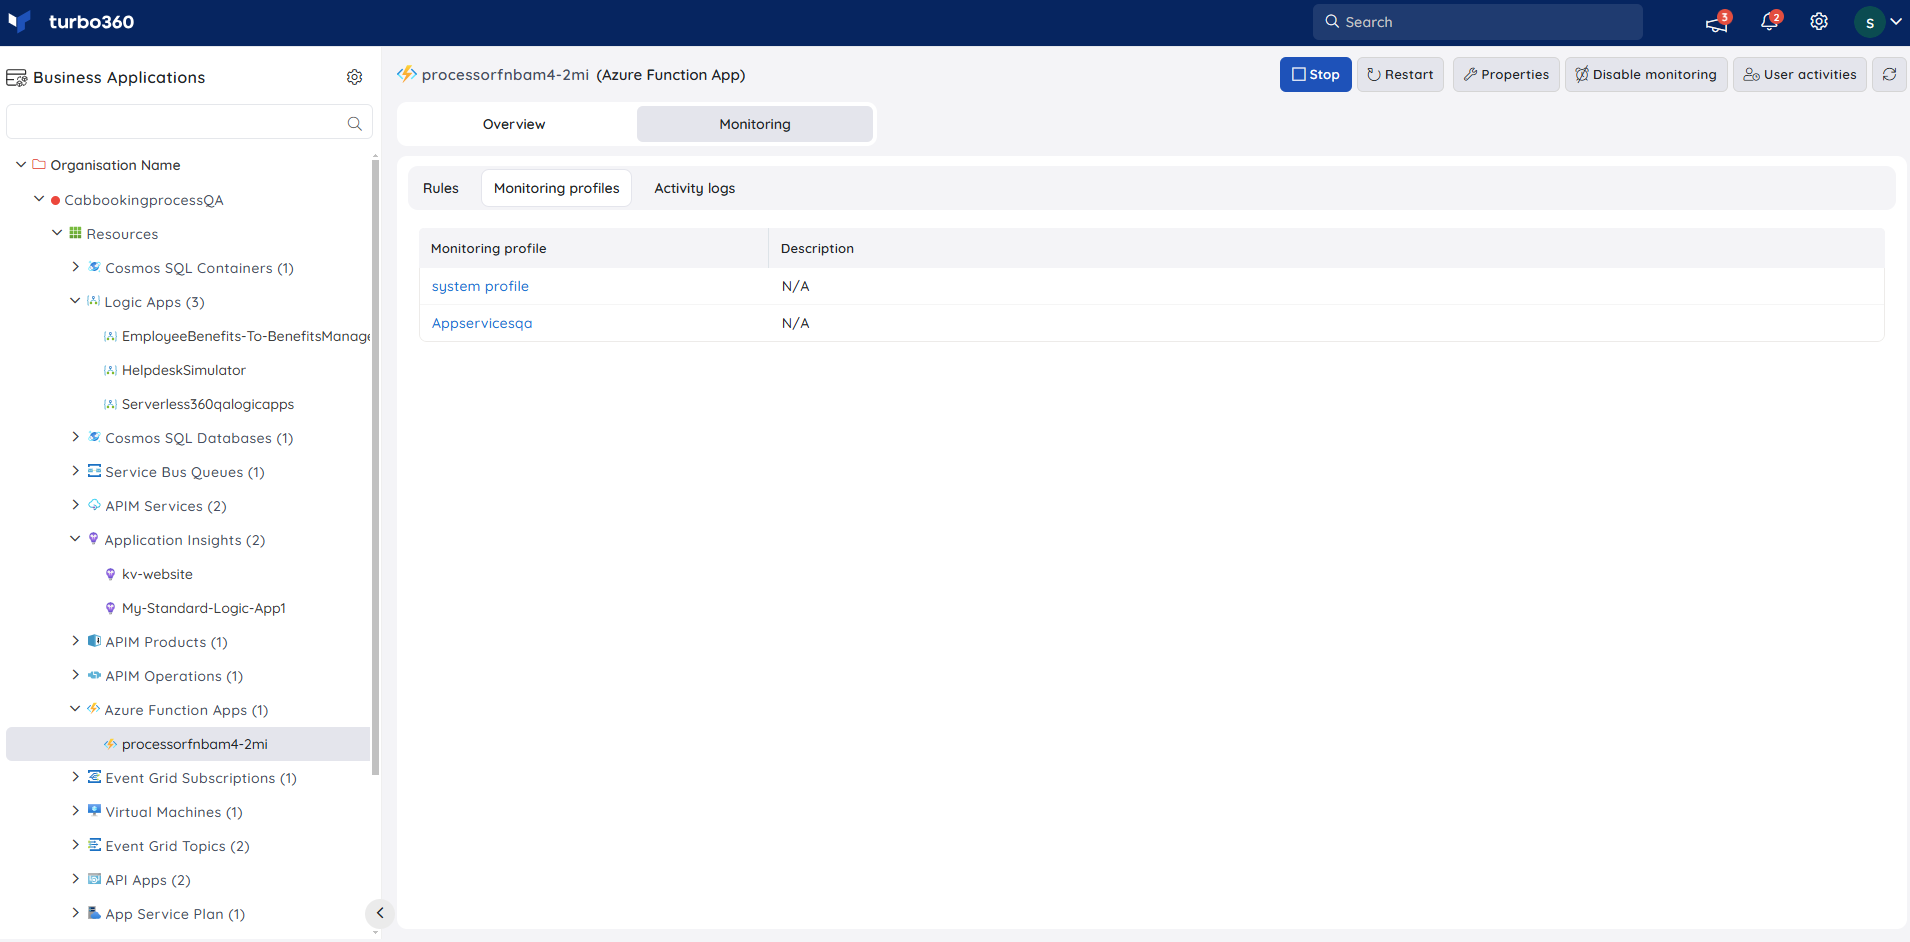
The rules available for any associated resource via applied profiles can be accessed under Monitoring -> Monitoring profiles section.
The image below shows the list of monitoring profiles that has monitoring rules for Azure Function App resource type and the associated Function App resource.
