VNet configuration during Deployment
- 24 Jun 2026
- 3 Minutes to read
- Print
- DarkLight
- Download PDF
VNet configuration during Deployment
- Updated on 24 Jun 2026
- 3 Minutes to read
- Print
- DarkLight
- Download PDF
Article summary
Did you find this summary helpful?
Thank you for your feedback!
Overview
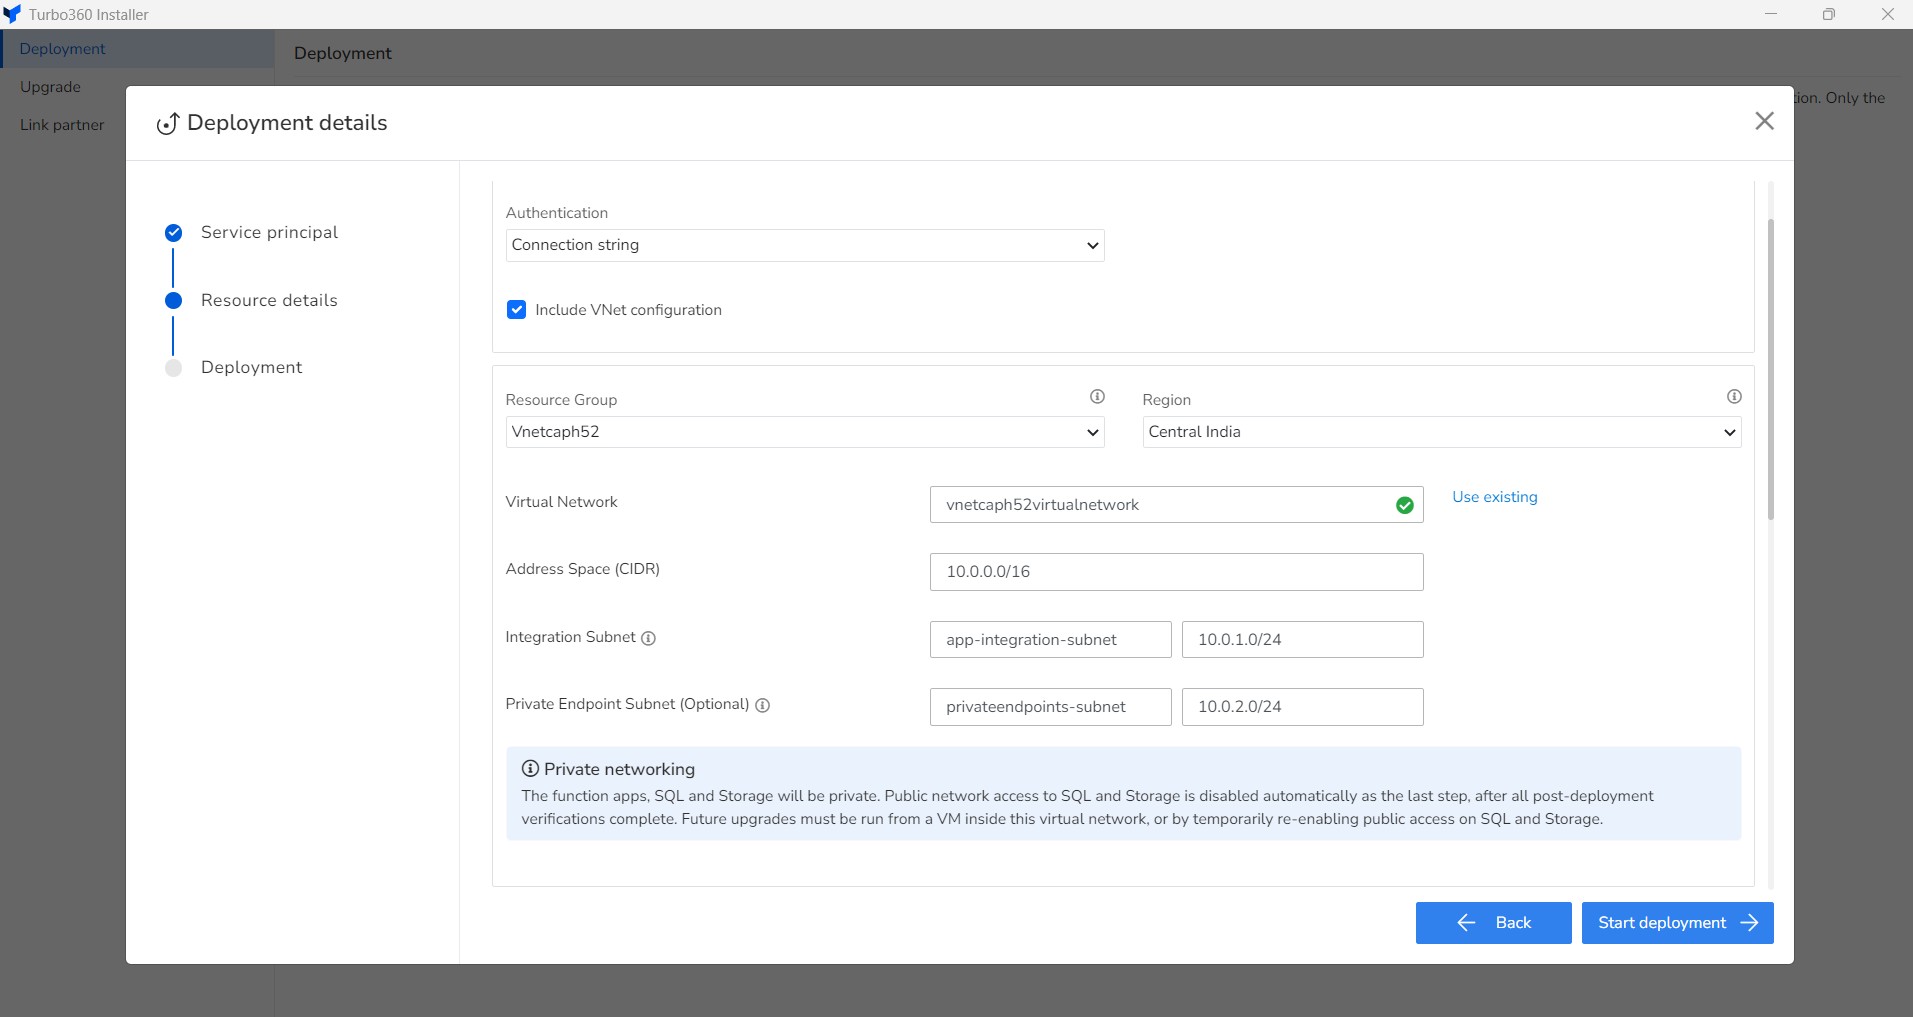
The Turbo360 private instance now supports an optional VNet configuration as part of the deployment process. When enabled, all function apps, SQL, and Storage resources are placed inside a private virtual network. Public network access to SQL and Storage is disabled automatically as the final step, after all post-deployment verifications are complete.
Future upgrades on a VNet-enabled instance must be run from a VM inside the virtual network, or by temporarily re-enabling public access on SQL and Storage.
Enabling VNet configuration
VNet configuration is available on the Resource details step of the deployment wizard. It works with both Connection string and Managed identity authentication modes.
- Open the Turbo360 Installer and proceed to the Resource details step.
- Under Authentication, select Connection string or Managed identity.
- Check the Include VNet configuration checkbox.
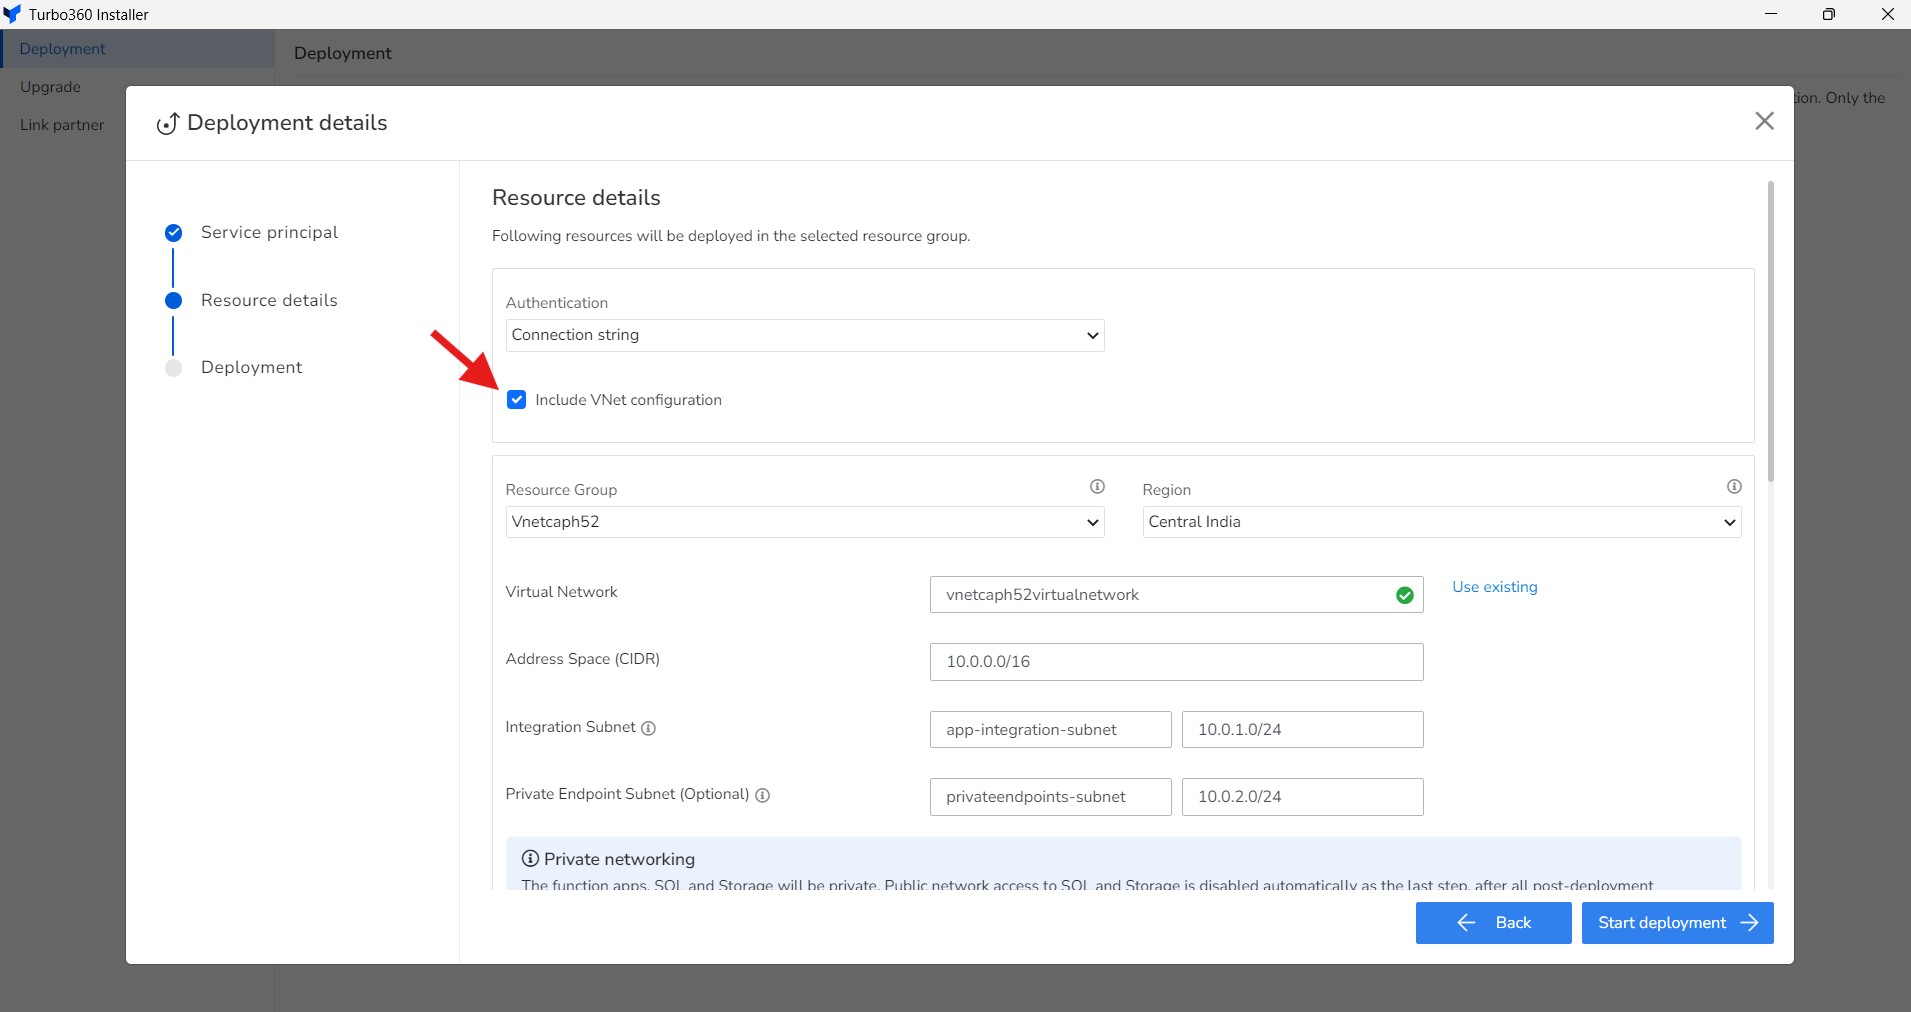
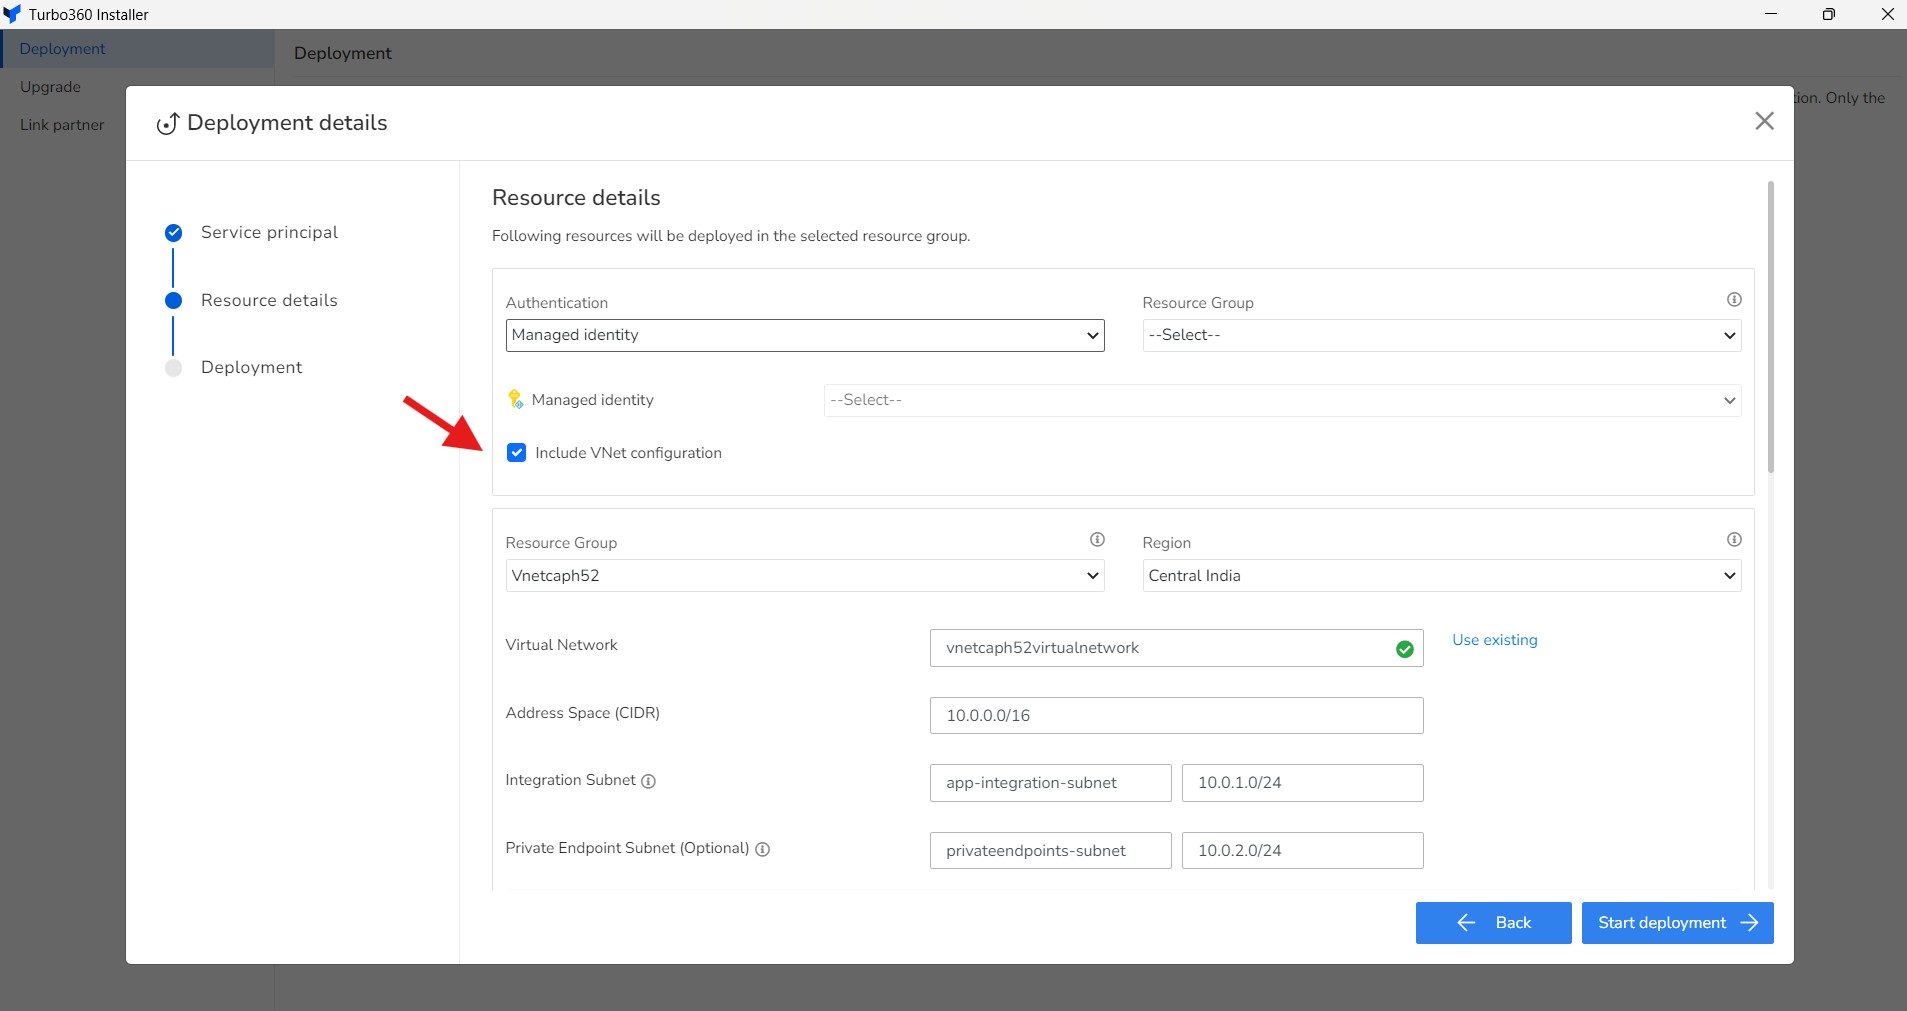
Once the checkbox is selected, the VNet fields are auto-filled with default values. Provide the Resource Group, Region, and Virtual Network name — or click Use existing to select a pre-provisioned VNet. The Address Space (CIDR), Integration Subnet, and Private Endpoint Subnet fields are populated automatically.
Scroll down to provide resource names for each component — Web App, Processor, Document generator, Chart generator, SQL Server, SQL database, and Storage account — across their respective resource groups and regions.
- Click Start deployment.
Troubleshooting Cost Import Issues on VNet-Enabled Instances
On instances deployed with VNet configuration, if the Cost Analyzer module is configured with Azure SQL Database , cost imports for subscriptions may fail with the following error:
SqlException 4861 — Cannot bulk load. The file could not be opened.
Operating system error code 5 (Access is denied).
This occurs because the storage account is now restricted to the VNet, and the SQL Database credentials no longer have access to it via OPENROWSET BULK. The resolution is to switch the SQL server to use its Managed Identity to access the storage account.
Navigate to Cost Analyzer → Cost imports to check the health status of your subscriptions. A Failed status on any subscription confirms the issue.
The storage account's public network access must be set to "Enabled from selected virtual networks and IP addresses" for this fix to work. Setting it to fully Disabled prevents Azure SQL Database from reaching it via Managed Identity.
Resolution
The following steps apply regardless of whether the instance was deployed using Connection string or Managed identity authentication.
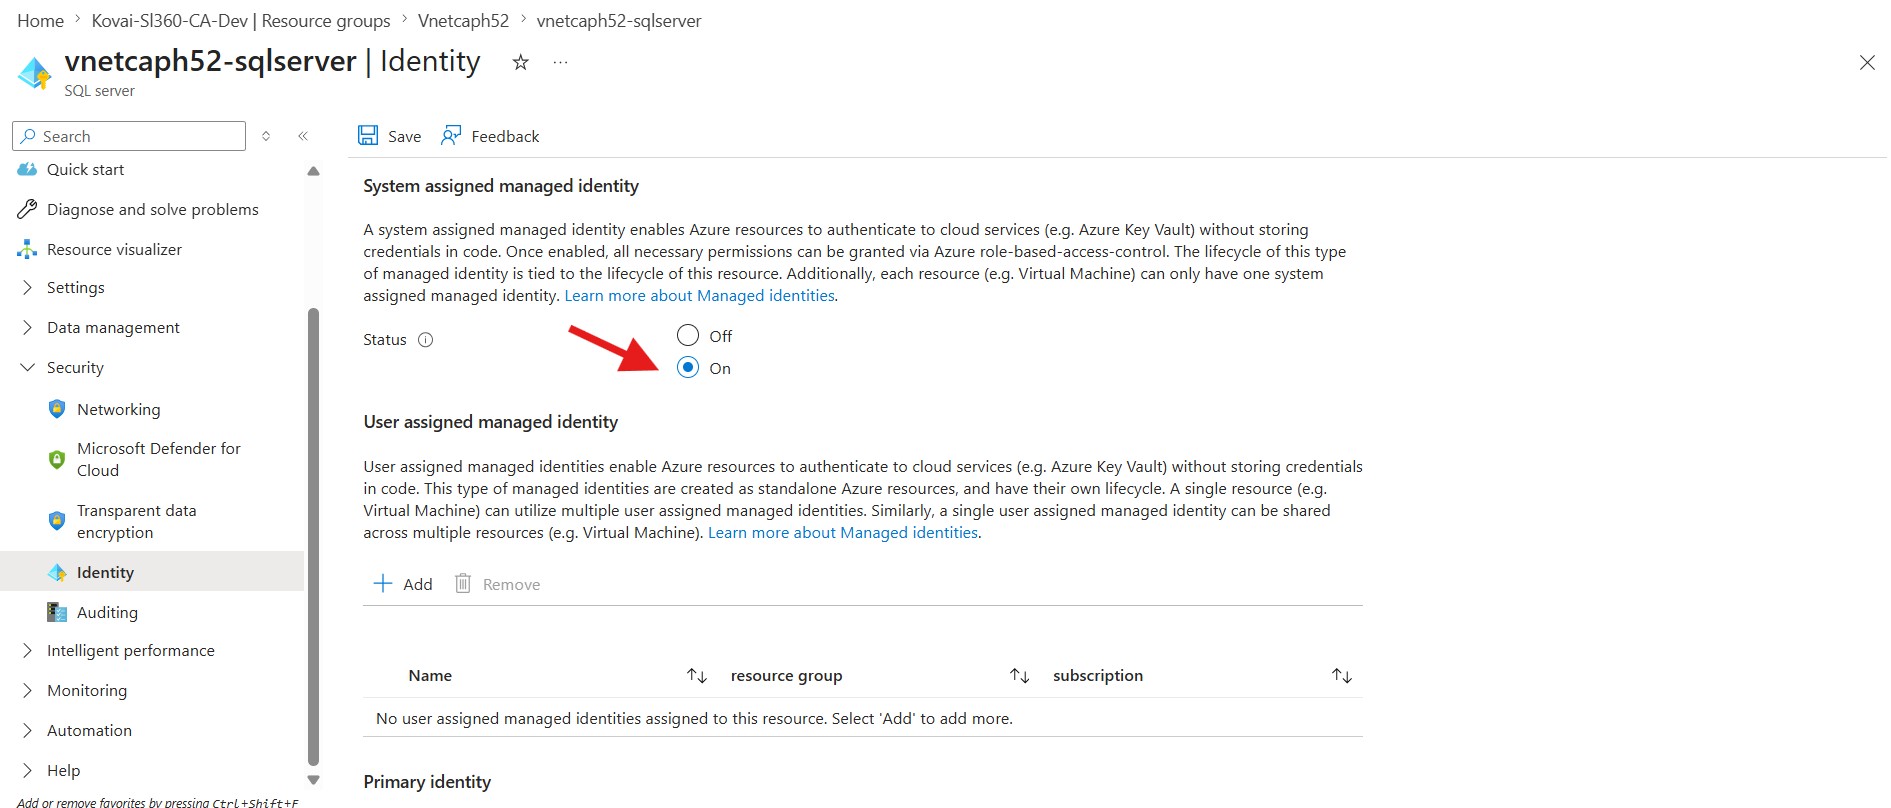
Enable the SQL server's managed identity
- In the Azure Portal, search for and open your SQL server (search "SQL server", not "SQL database").
- Go to Security → Identity.
- Set System assigned → Status to On, then click Save
Allow the SQL server through the storage firewall
- Open the Storage account → Security + networking → Networking.
- On the Public access tab, click Manage next to the public network access status.
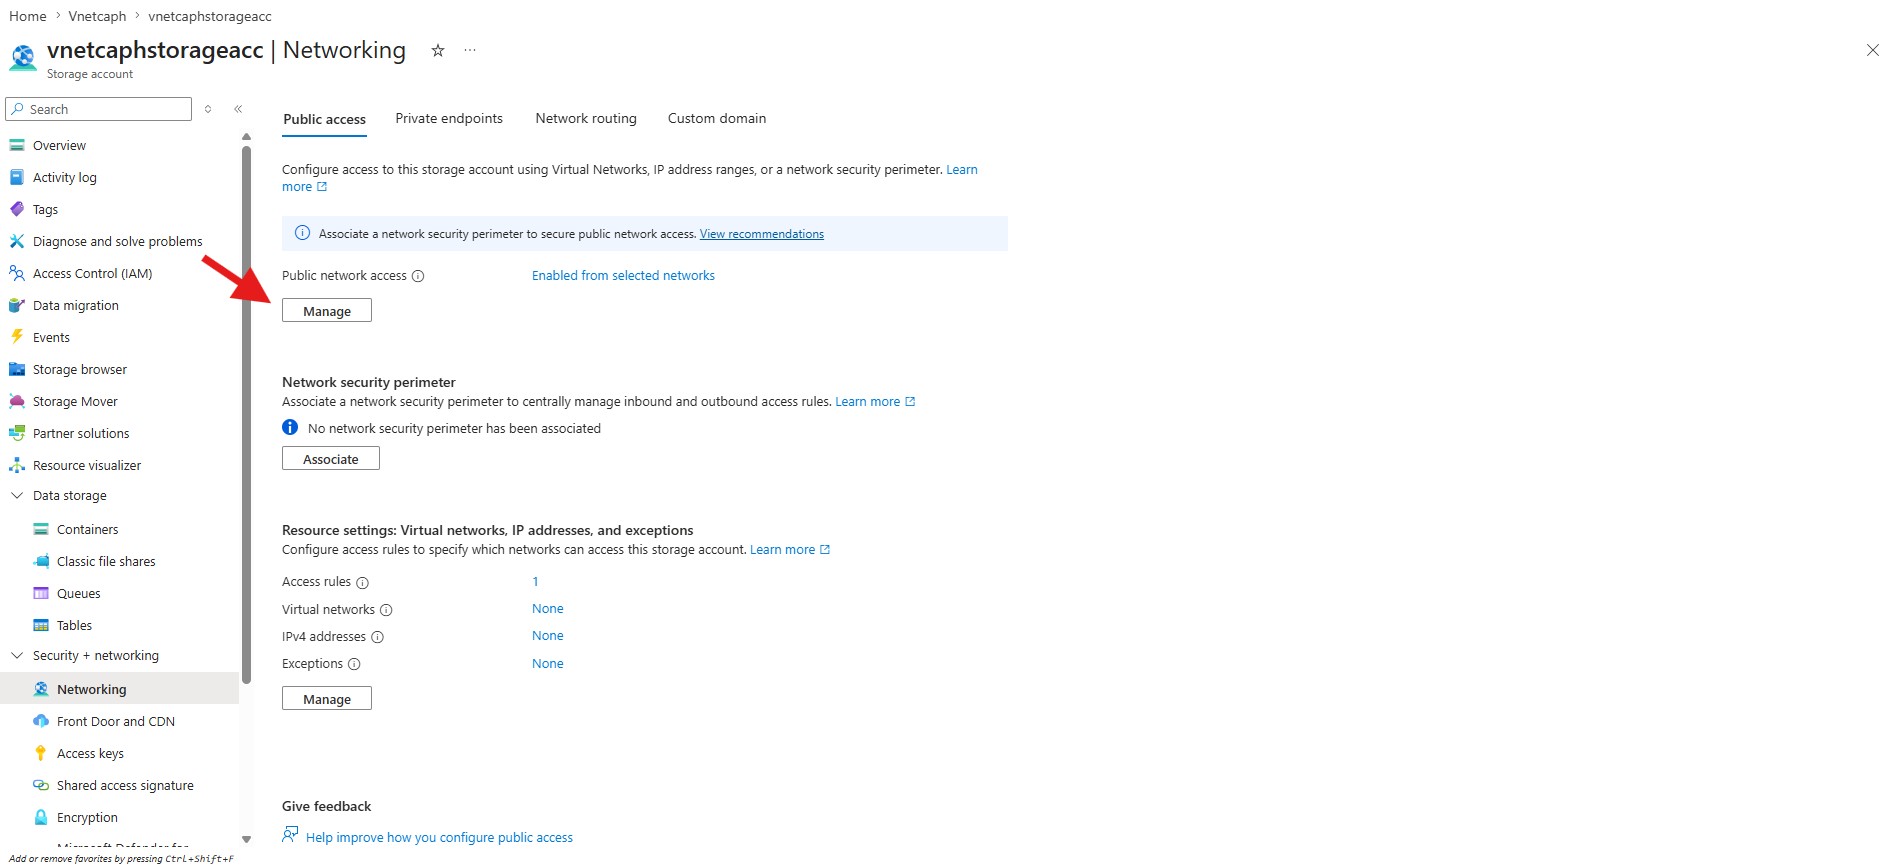
- In the Public network access panel, set Public network access to Enable.
- Under Public network access scope, select Enable from selected networks.

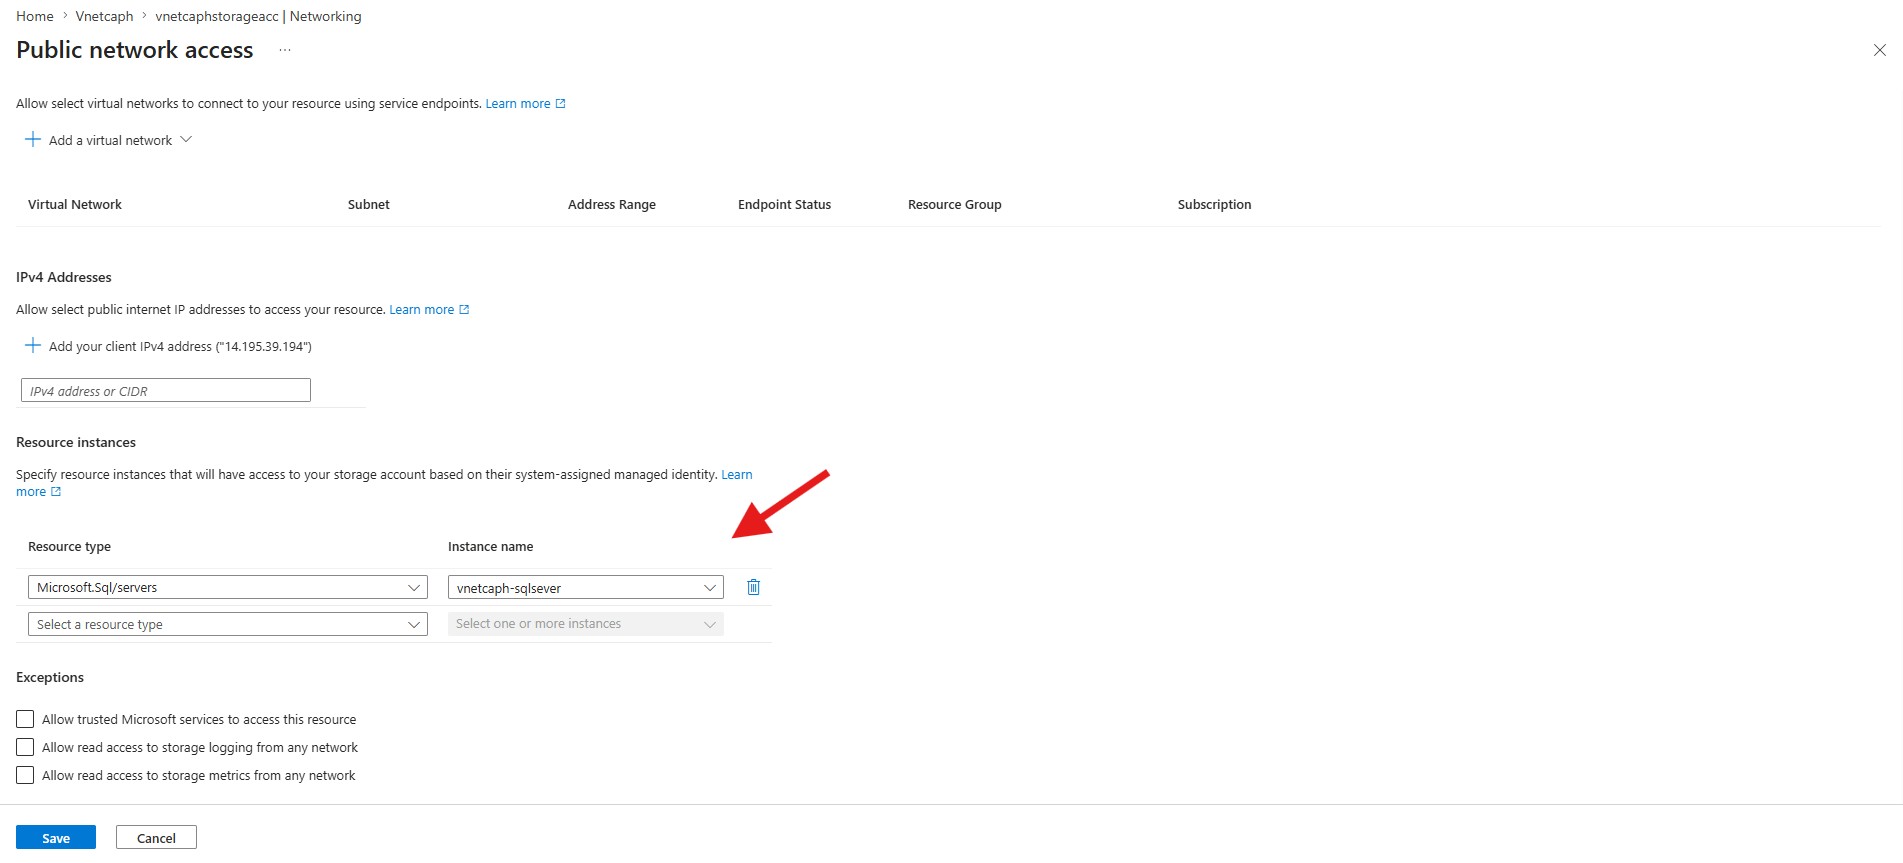
- Scroll down to the Resource instances section, and set:
— Resource type:Microsoft.Sql/servers
— Instance name: your SQL server - Click Save.
Grant the SQL identity read access on storage
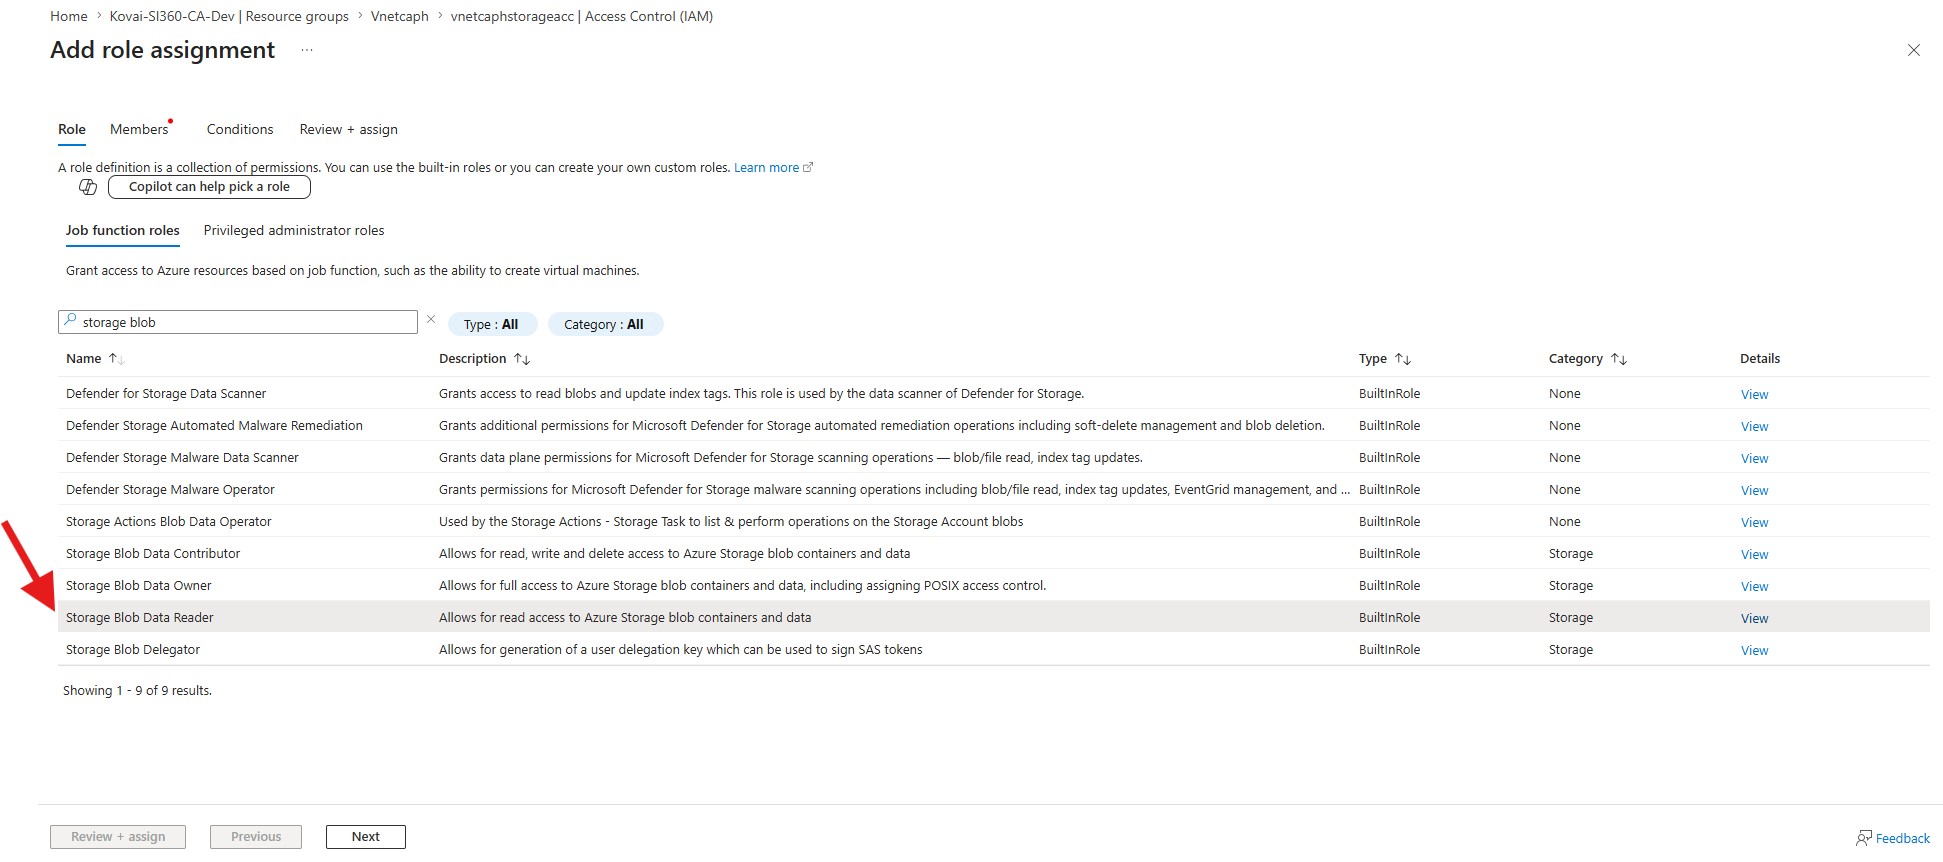
- Go to Storage account → Access Control (IAM).
- Click + Add → Add role assignment.
- Select the role Storage Blob Data Reader, then click Next.
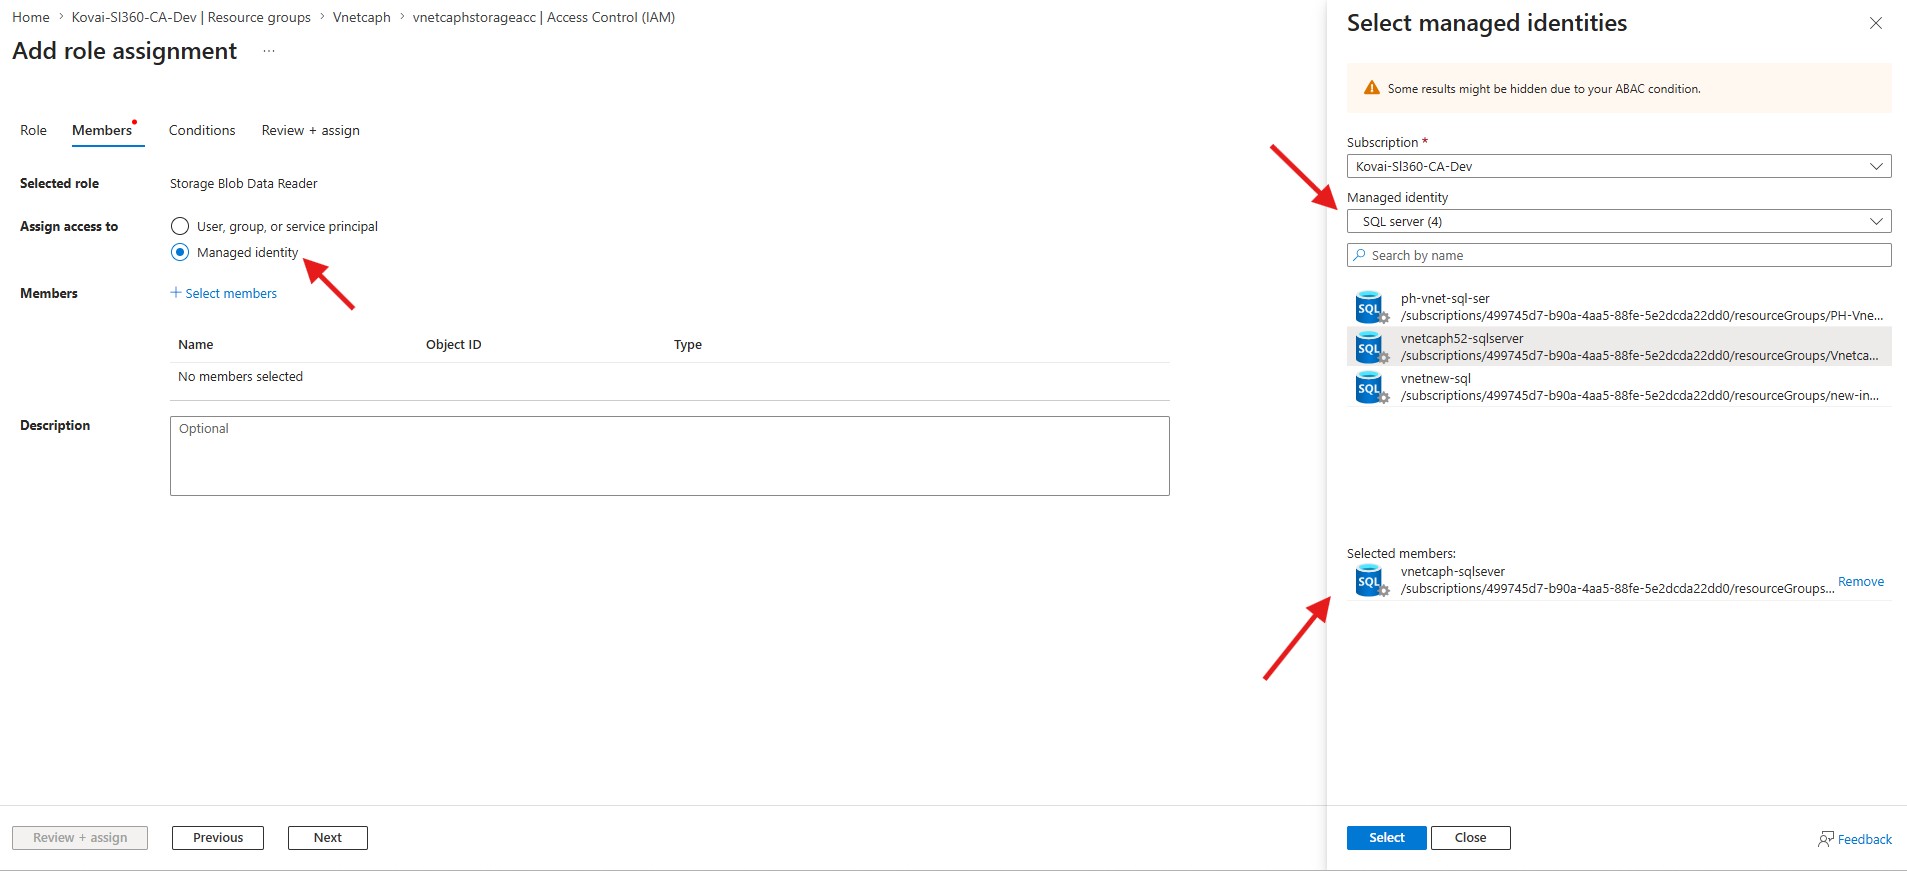
- Under Members, set Assign access to = Managed identity, then click + Select members.
- Choose SQL server as the managed identity type and select your SQL server instance.
- Click Review + assign twice to confirm.
Verify
Once all steps are complete, navigate to Cost Analyzer → Cost imports and manually trigger the import by clicking the run button next to the subscription, or wait for the next orchestrator run. The import should complete successfully.
Was this article helpful?