Managing cost groups
- 24 Jun 2026
- 6 Minutes to read
- Print
- DarkLight
- Download PDF
Managing cost groups
- Updated on 24 Jun 2026
- 6 Minutes to read
- Print
- DarkLight
- Download PDF
Article summary
Did you find this summary helpful?
Thank you for your feedback!
Introduction
Cost management group is a logical container that brings together multiple Azure subscriptions to reflect an organization’s structure. It enables centralized visibility into cost usage and spending patterns across teams, departments, or business units, supporting consistent cost tracking and governance.
A single group can contain multiple child groups.
Group overview
The Cost group overview presents two dedicated sections, with one section aggregating cost data such as previous month usage and potential savings, and the other offering a dashboard to analyze spending patterns grouped by resource type, location, and additional dimensions.
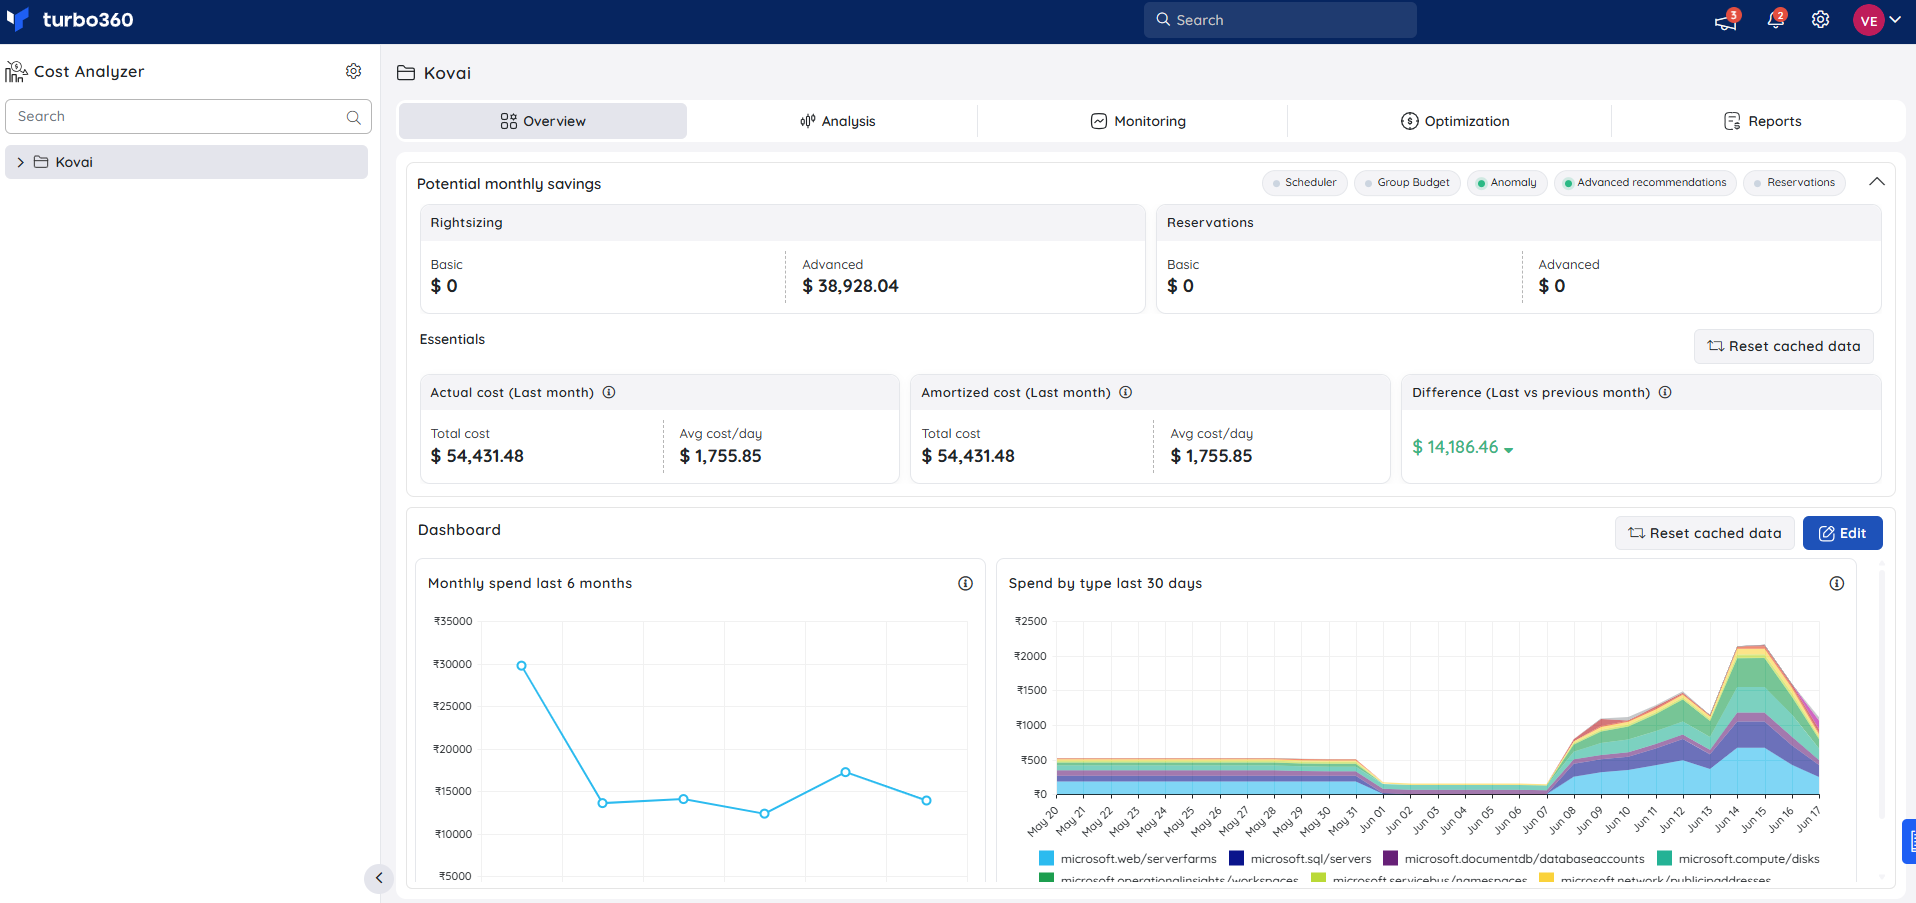
Dashboard management
The data points of the cost charts can be right-clicked to expand the cost based on different categories.
.png)
Adding a widget
In addition to the existing widgets, new ones can be added to the dashboard. The Add widget panel offers two tabs depending on the type of widget to be created.
- In the overview dashboard, click Edit, then select Add widget.
- Select the widget type using the tabs at the top of the panel:
Default
Use this tab to create a standard cost widget scoped to specific subscriptions.
- Enter a unique Name for the widget
- Select the desired Subscriptions
- Choose a Group by dimension
- Specify Granularity
- Select a Chart type
- Choose the Metric — Actual cost or Amortized cost
- Define the Time range
- (Optional) Apply Filters
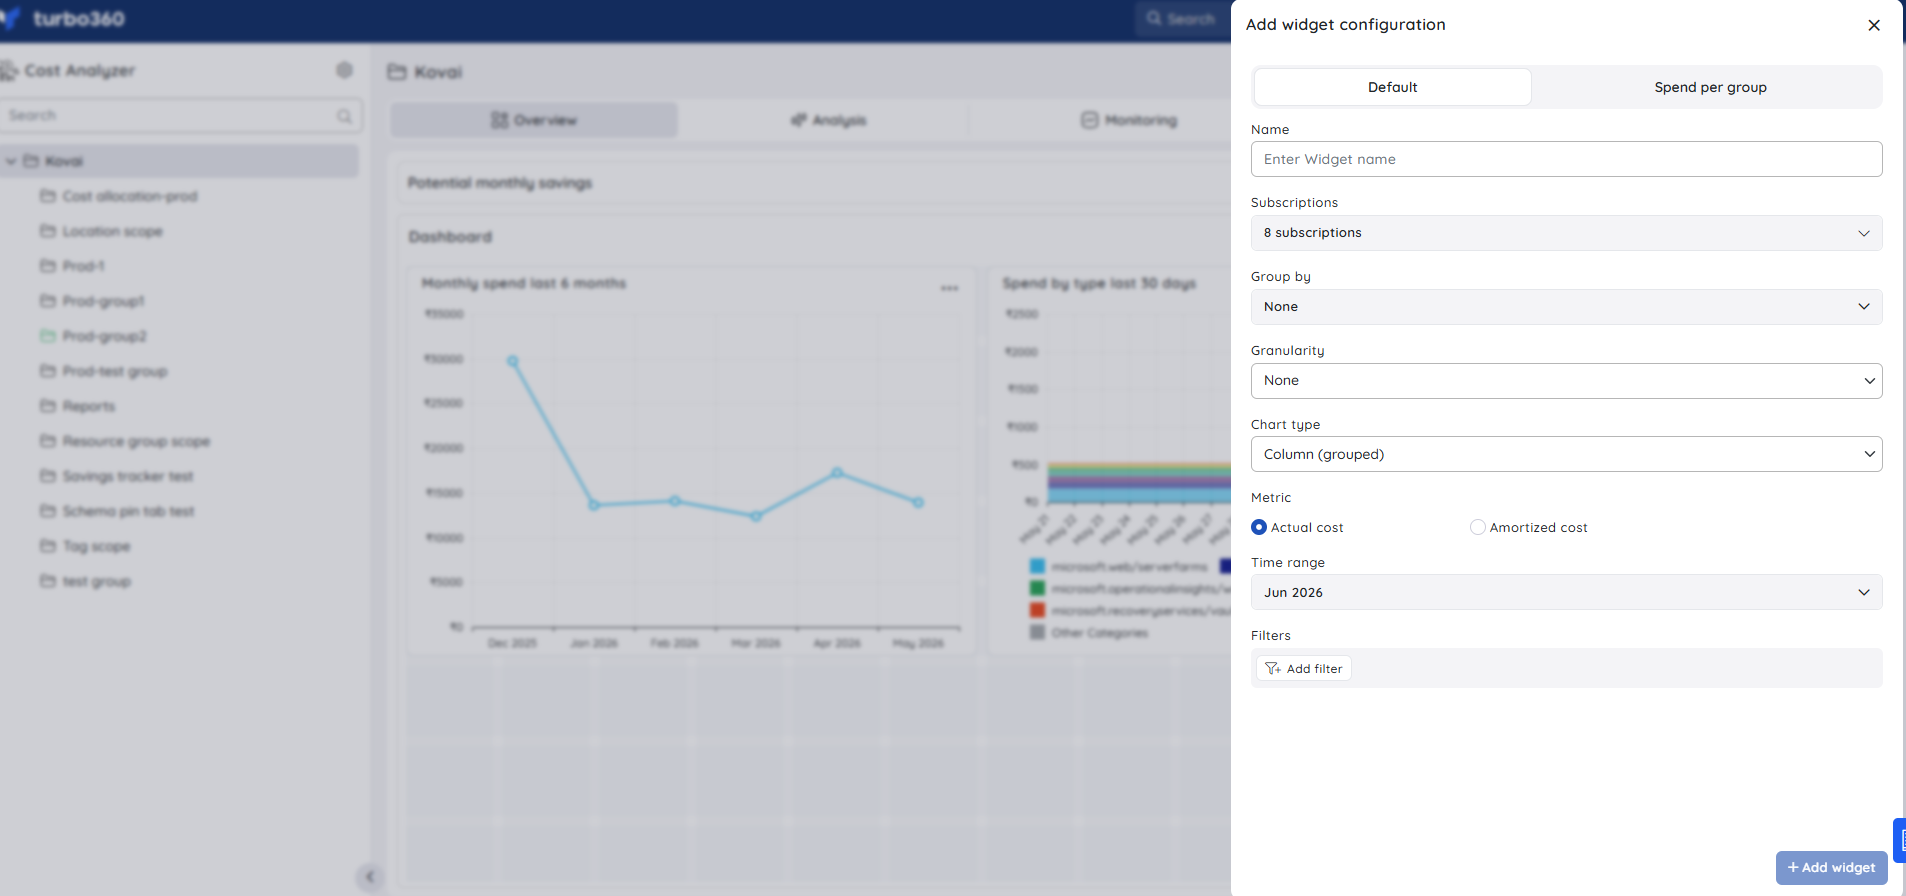
Spend per group
Use this tab to create a widget that visualizes cost data across child groups of the current cost group.
- Enter a unique Name for the widget
- Specify Granularity
- Select a Chart type
- Choose the Metric — Actual cost or Amortized cost
- Define the Time range
- Configure the Group filter — by default set to All groups, which includes the current group and all its descendants
- Click + Add widget to create the widget, then click Update to save the dashboard changes.
Dashboard does not support Area chart when the Granularity is set to None.
Editing a widget
- Navigate to the overview dashboard and click Edit to enable dashboard editing.
- On the required widget, open the context menu and select Edit.
- Modify the necessary configuration settings in the edit pane, then click Update to apply the changes to the widget.
- Click Update on the dashboard to save all changes.
Deleting a widget
- In the overview dashboard, click Edit to enable dashboard editing.
- Open the widget’s context menu and select Delete.
- Click Update on the dashboard to save the changes.
Resetting cached data
Why reset cache?
In Cost Analyzer, cached data is utilized to enhance performance and reduce load times. However, this stored data may not always reflect the most recent updates to cost information.
To ensure that the cost data in the Essentials section and the saved widgets in the Dashboard display the latest and most accurate data, users may need to reset the cache periodically. Resetting the cache forces the system to refresh its data, ensuring alignment with the most current cost records.
Cost Analyzer executes a daily cache reset when the date rolls over.
Resetting cached data
- Click on the Reset cached data option available within the Essentials or the dashboard to update the cost data.

When to reset cache?
It is advisory to reset the cache under the following conditions:
- When the displayed cost data appears outdated or inconsistent with recent updates.
- After major modifications to the underlying cost group, such as updated scope.
- When encountering performance issues, delays, or data errors that may be related to cached content.
Create a child group
- In the tree view, click the three-dot menu next to the parent group under which the child group needs to be created.
- Select Create child group.
- Enter a name for the new group and click Next.
- Select the required subscriptions whose cost data will be managed within the group.
- Click Save to complete the creation of the child group.
A default analysis view that offers information on the monthly cost of the chosen subscriptions based on a predetermined set of filters will be included when the cost group is created.

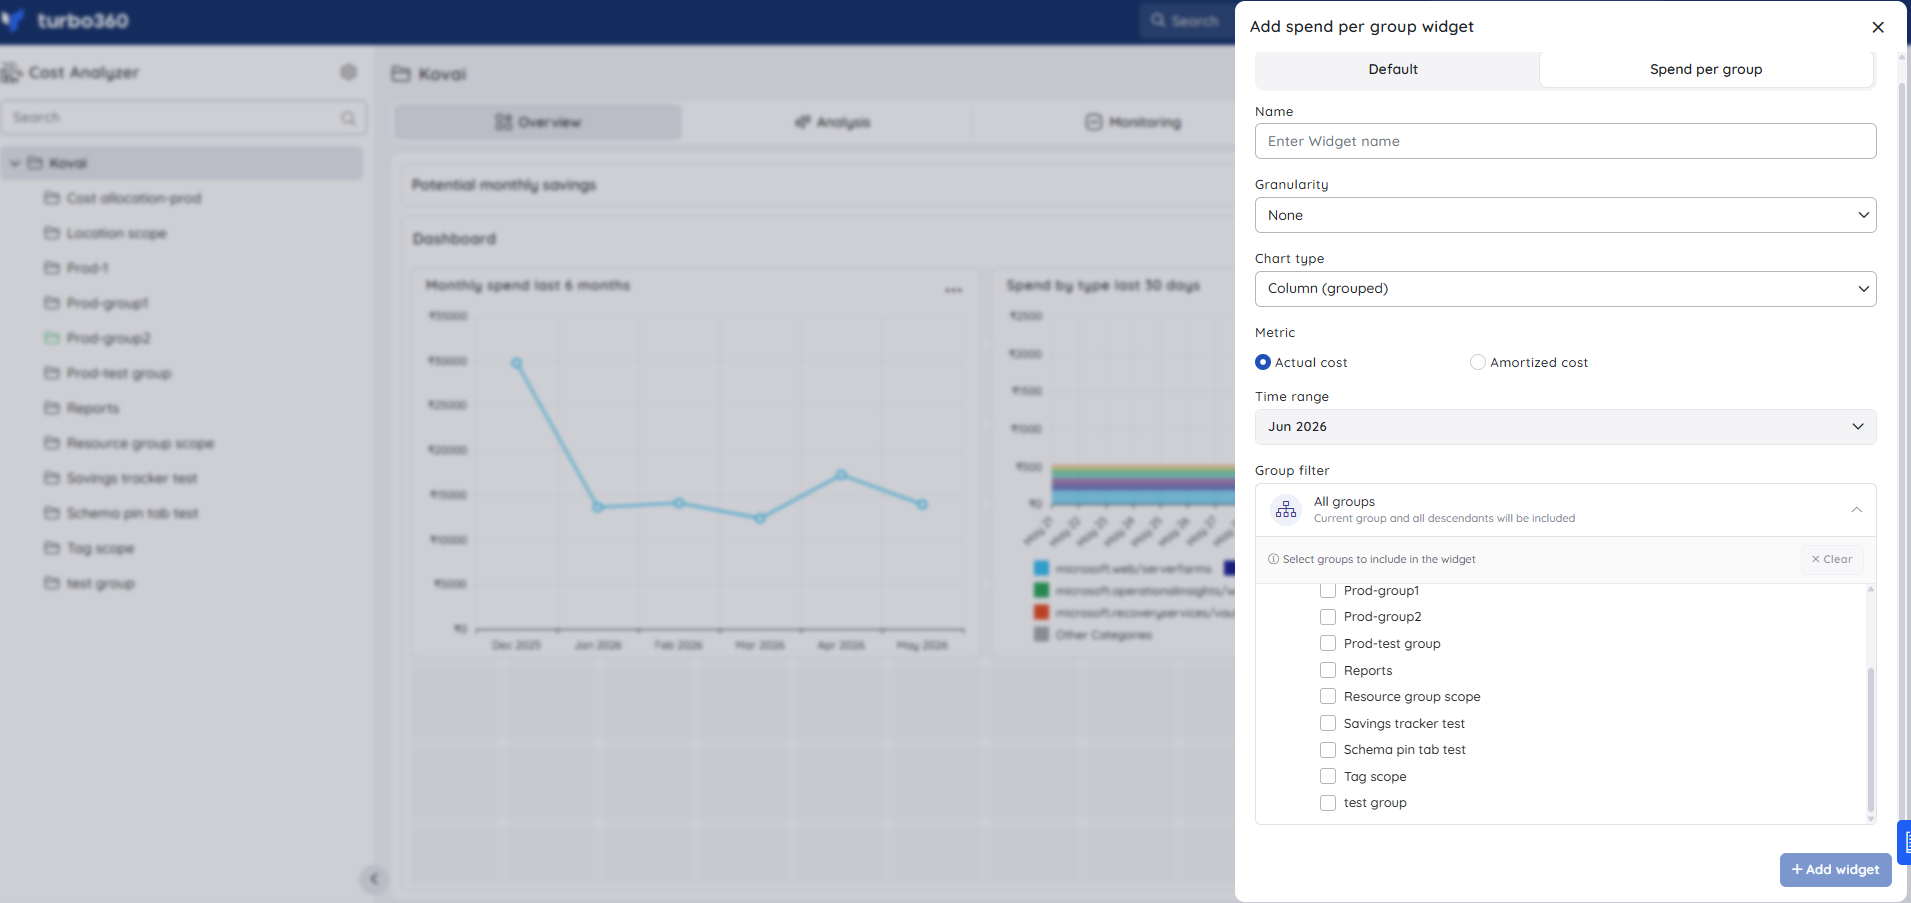
Scope selection
Scope selection enables users to analyze Azure costs from a specified location and refine the view to particular targets such as resource groups or subscriptions for precise cost and resource control.
Click the three-dot icon next to the desired group in the tree view.
Select Edit Scope.
.png)
Choose the target subscriptions whose cost data should be visible to the corresponding cost management group.
Apply the desired scope to each selected subscription.
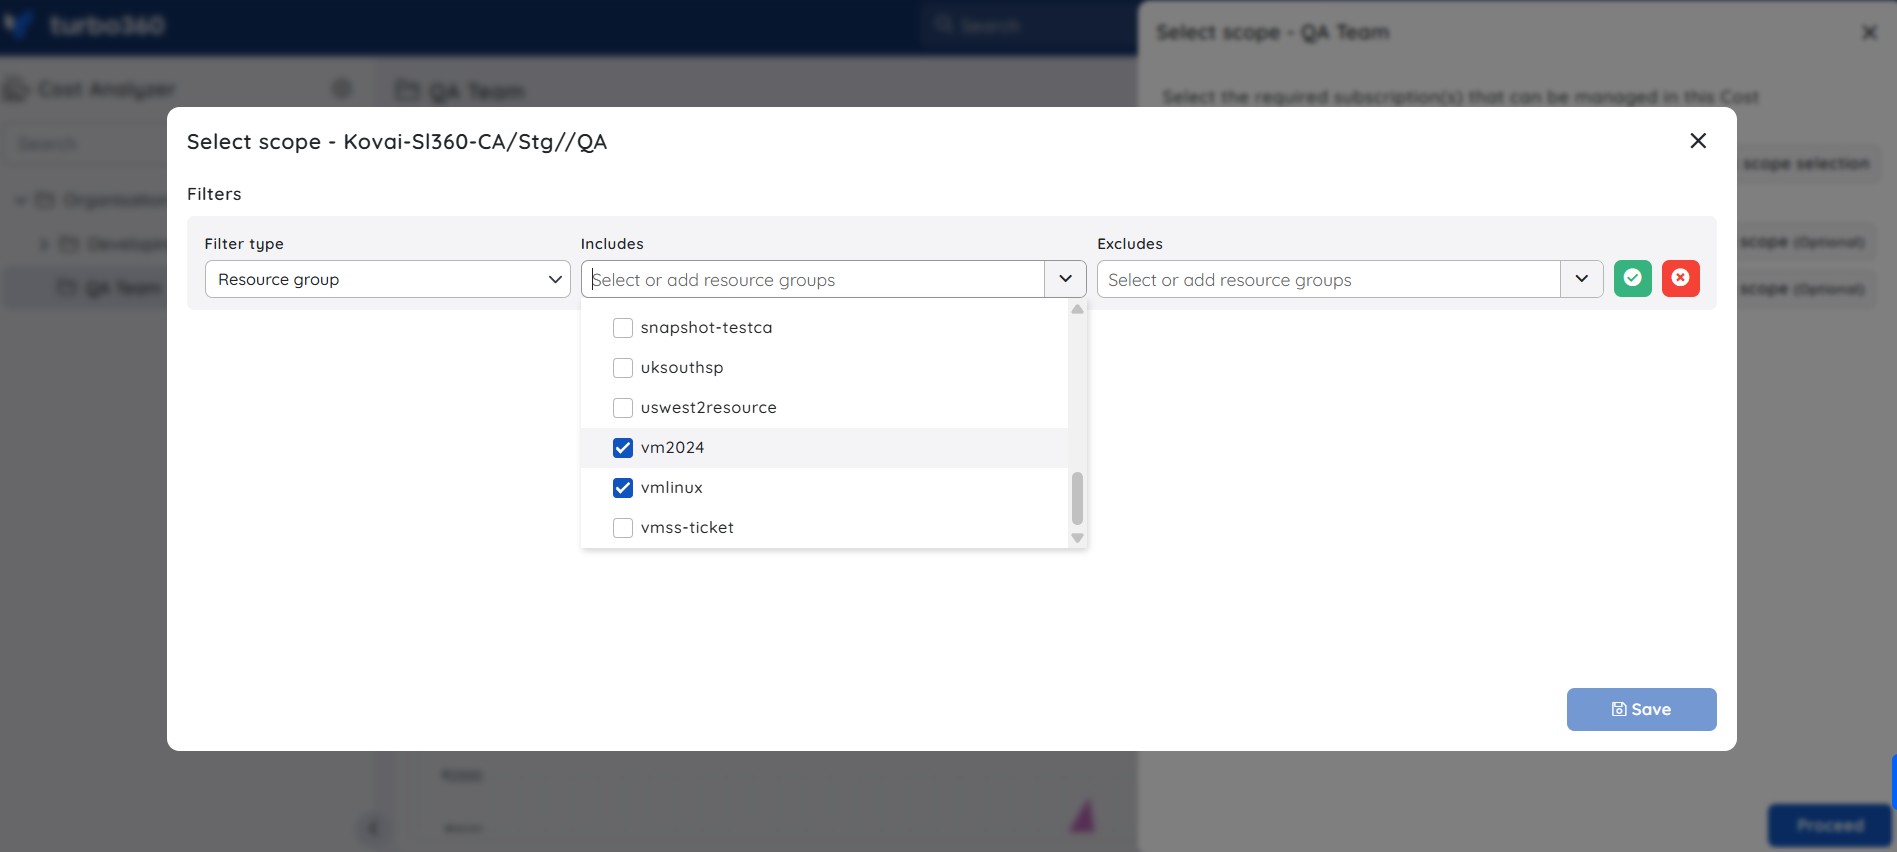
Users can also add custom filter items (e.g., a new Resource Group) directly within the filter type. Once the same resource group is created in Azure, the associated cost will be reflected. This capability is available across all filter types except the Resource filter type.
In the confirmation window, click Proceed -> Continue to apply the changes.
Updating the scope selection will only reflect the Unscheduled resources data by the following day at 12 AM UTC.
Bulk scope selection
The Bulk scope selection functionality enables users to perform scope updates across multiple subscriptions concurrently.
- In the Scope selection blade, select Bulk scope selection.

Choose the target subscriptions to which the scope should be applied.
Specify a common scope that matches the selected subscriptions.
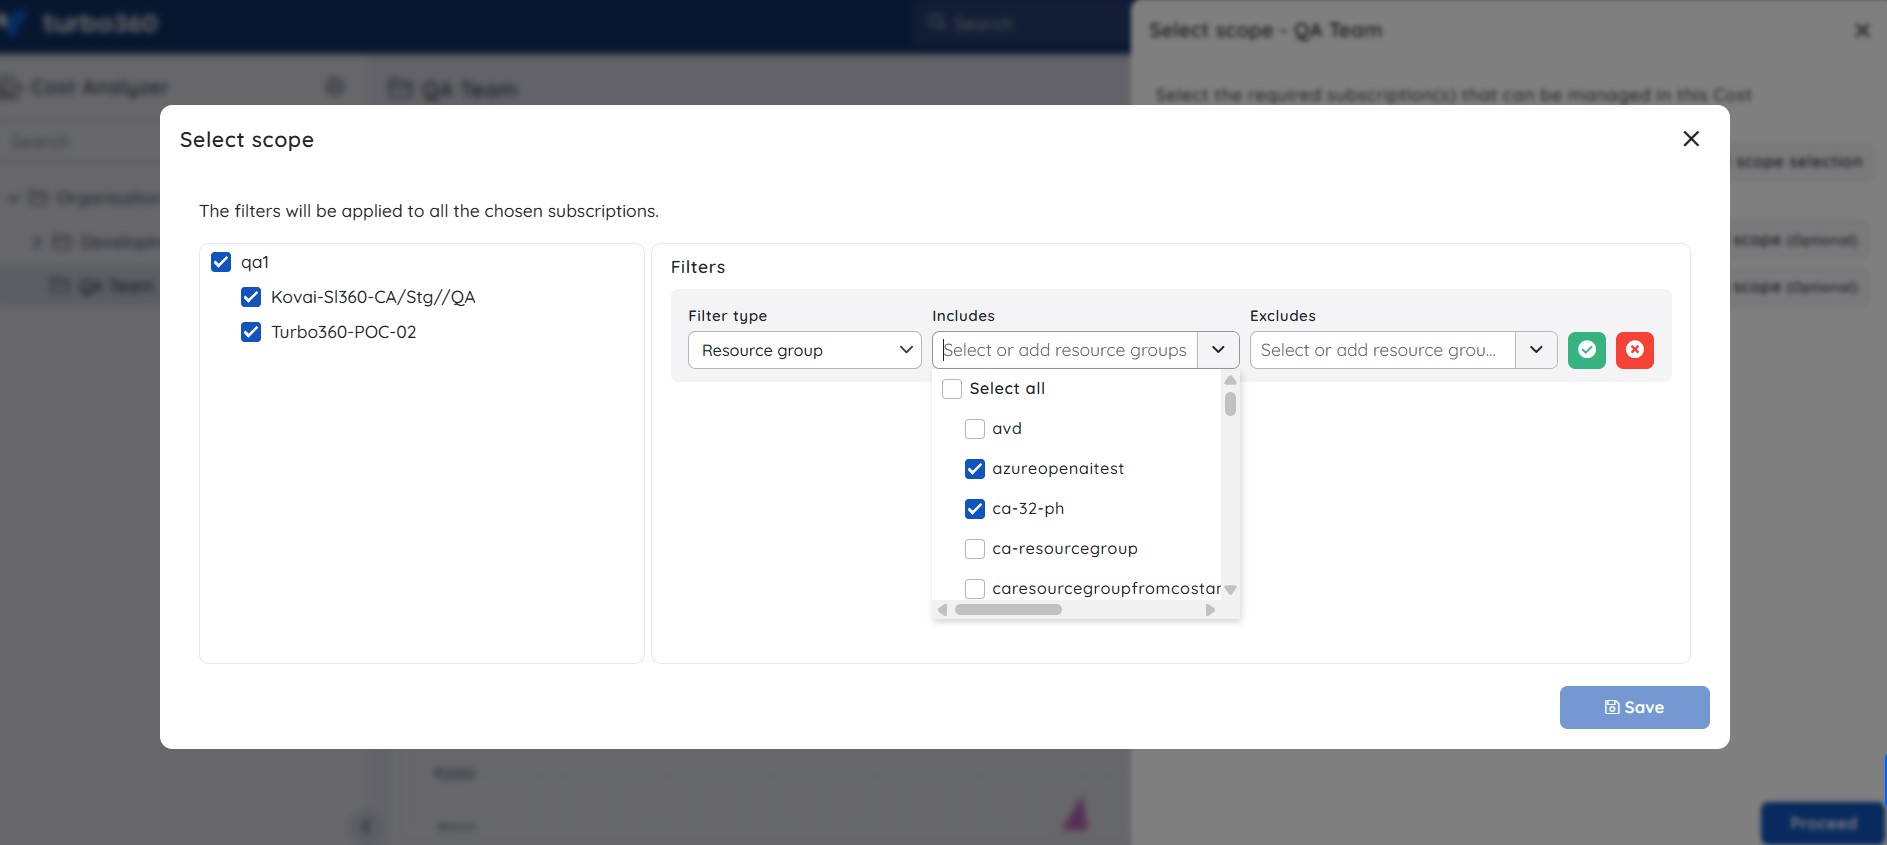
Click Save.
To finalize the update, click Proceed → Continue.
Cost adjustment
Cost adjustment refers to an increase applied to the original spend of a Cost management group. This feature enables the application of custom billing rates, additional charges, and other client-specific billing adjustments, particularly for Managed Service Providers (MSPs).
Only the Account Owner can access this option from the Cost group context menu.
- Click the three-dotted icon next to the required cost group in the tree view.
- Select Cost adjustment from the menu.
.png)
- Enable the toggle and specify the cost adjustment percentage.
- Click Save to confirm the changes.
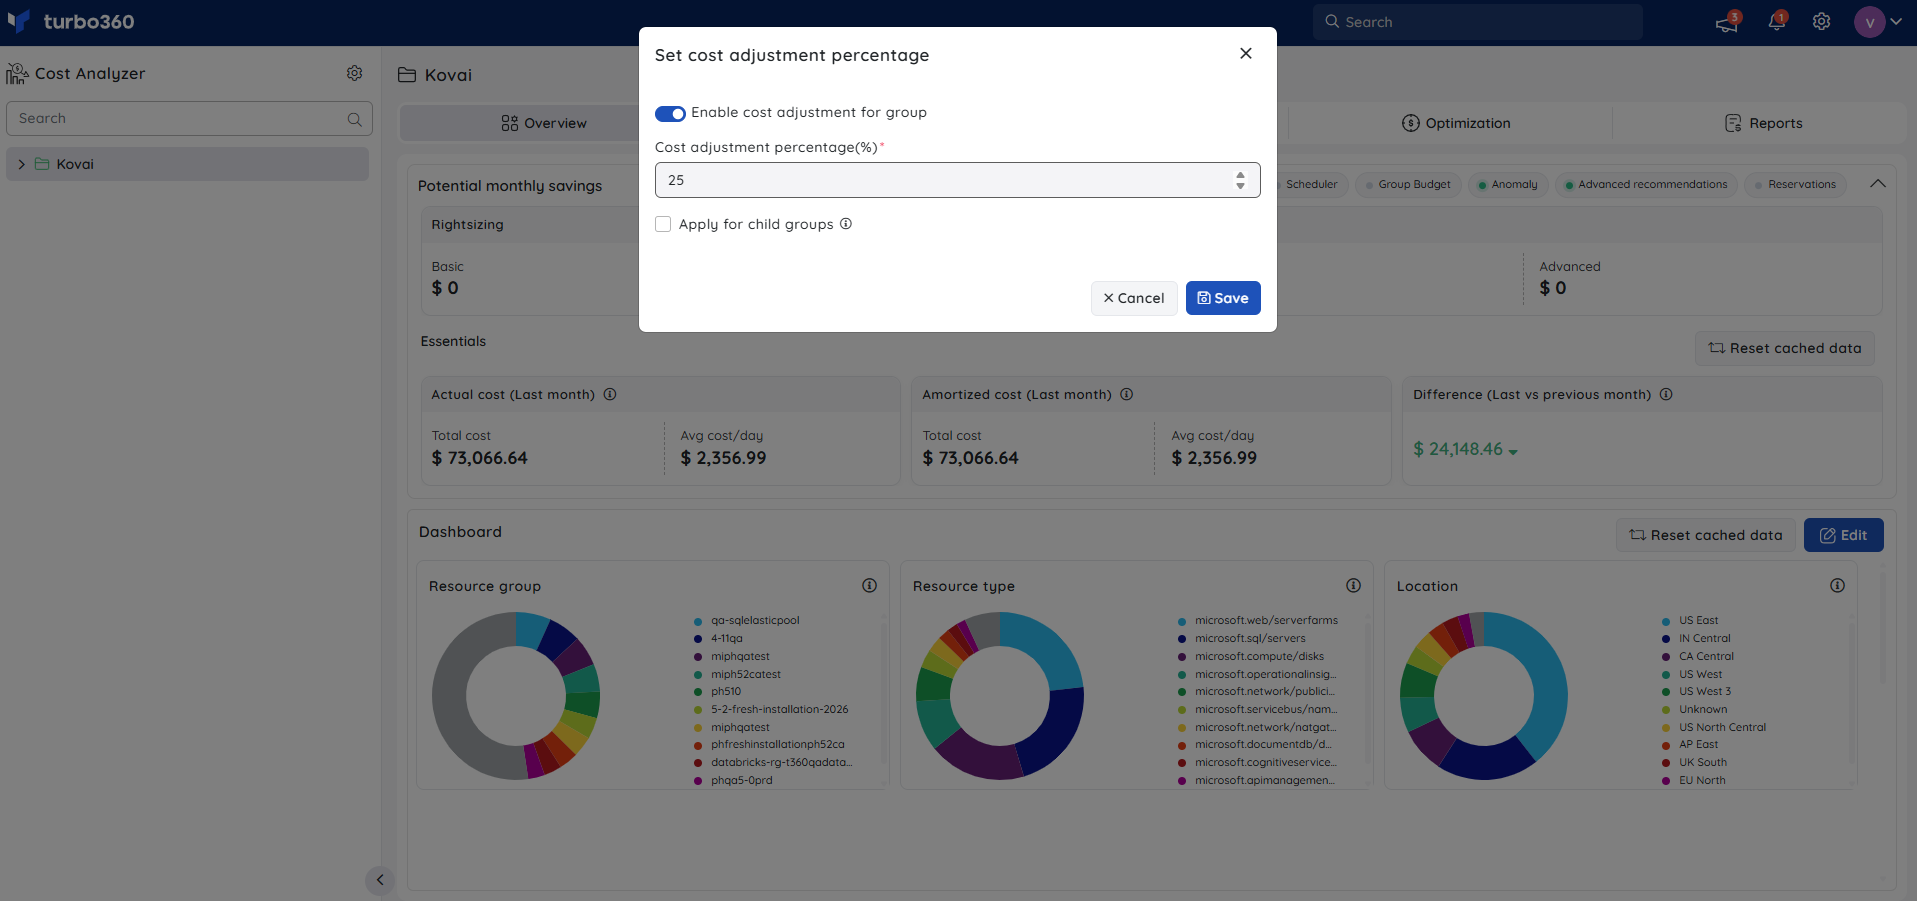
Apply for child groups - Enabling this option will override the cost adjustment settings for the child groups.
All cost data within a cost management group will be adjusted according to the configured adjustment percentage.
Health indicator
The health status of a cost group in the tree view is based on the Group budget monitoring alert incidents for the current date.
Closing all open incidents from the present date will update the cost group status to healthy.
Below is an illustration showing the health status of a cost group changing to healthy after manually closing all active Group budget incidents from the present date:

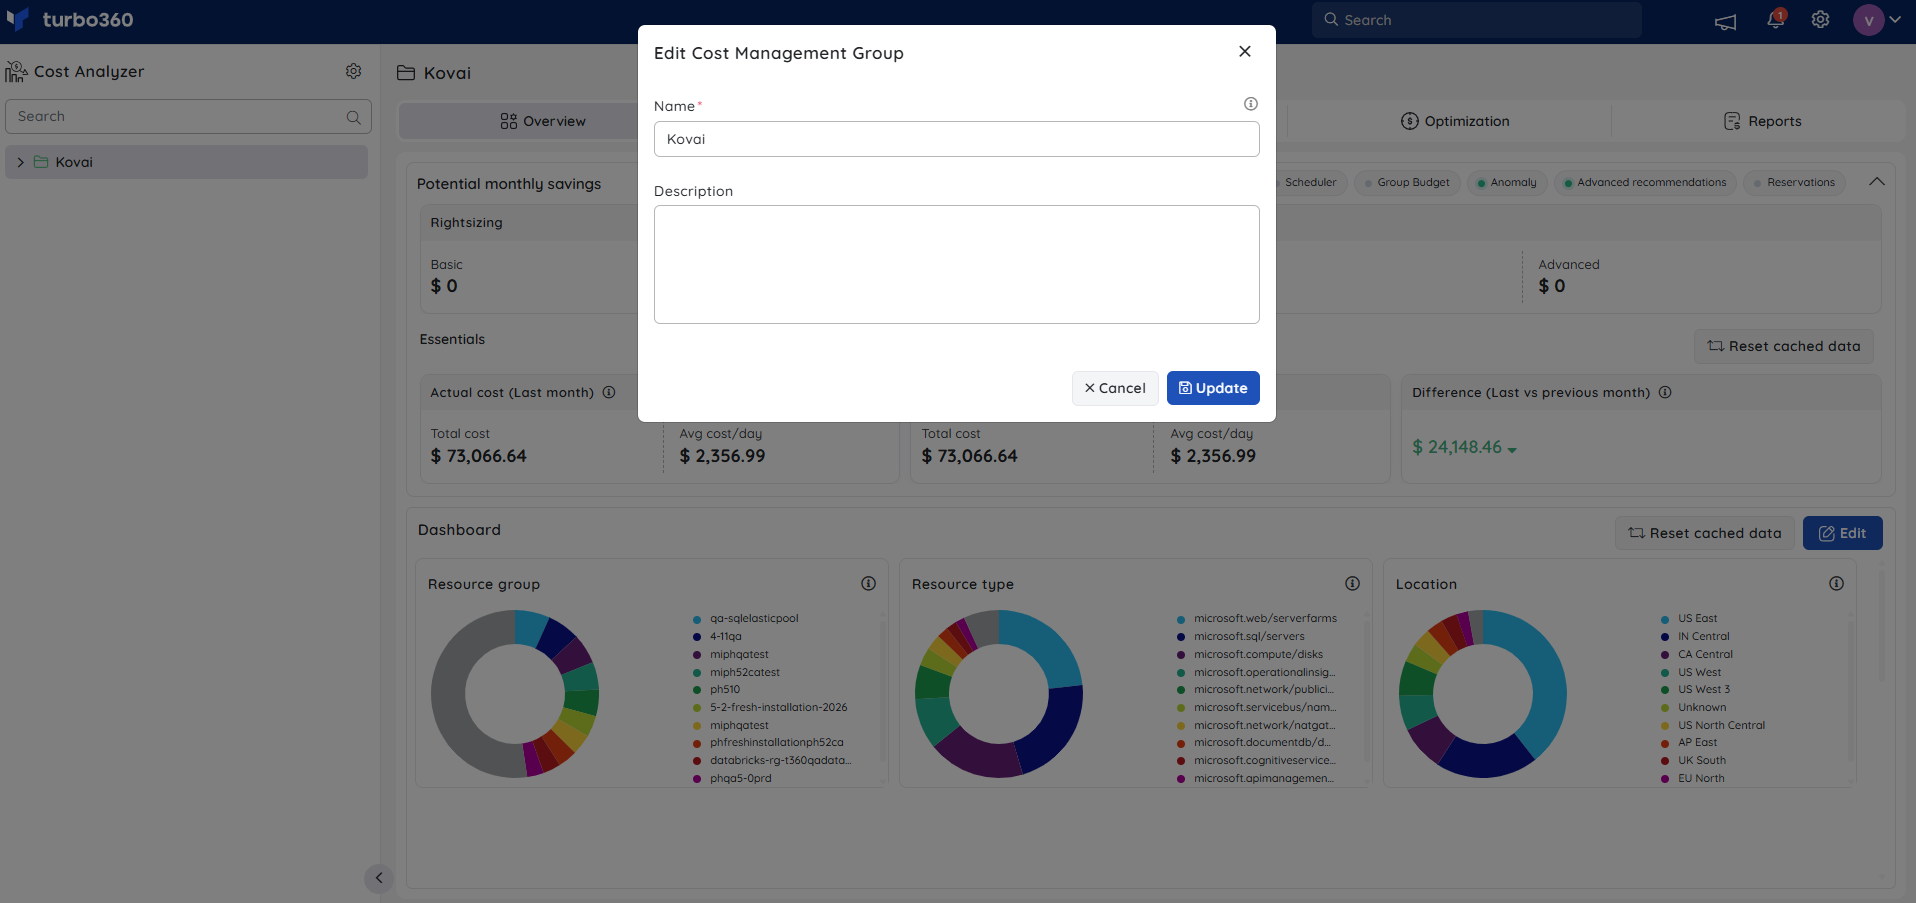
Edit an existing cost group
- Click the three-dotted icon next to the desired group in the tree view
- Select the Edit option in the group context menu
- The name and description of the cost group can be modified
- Click Update
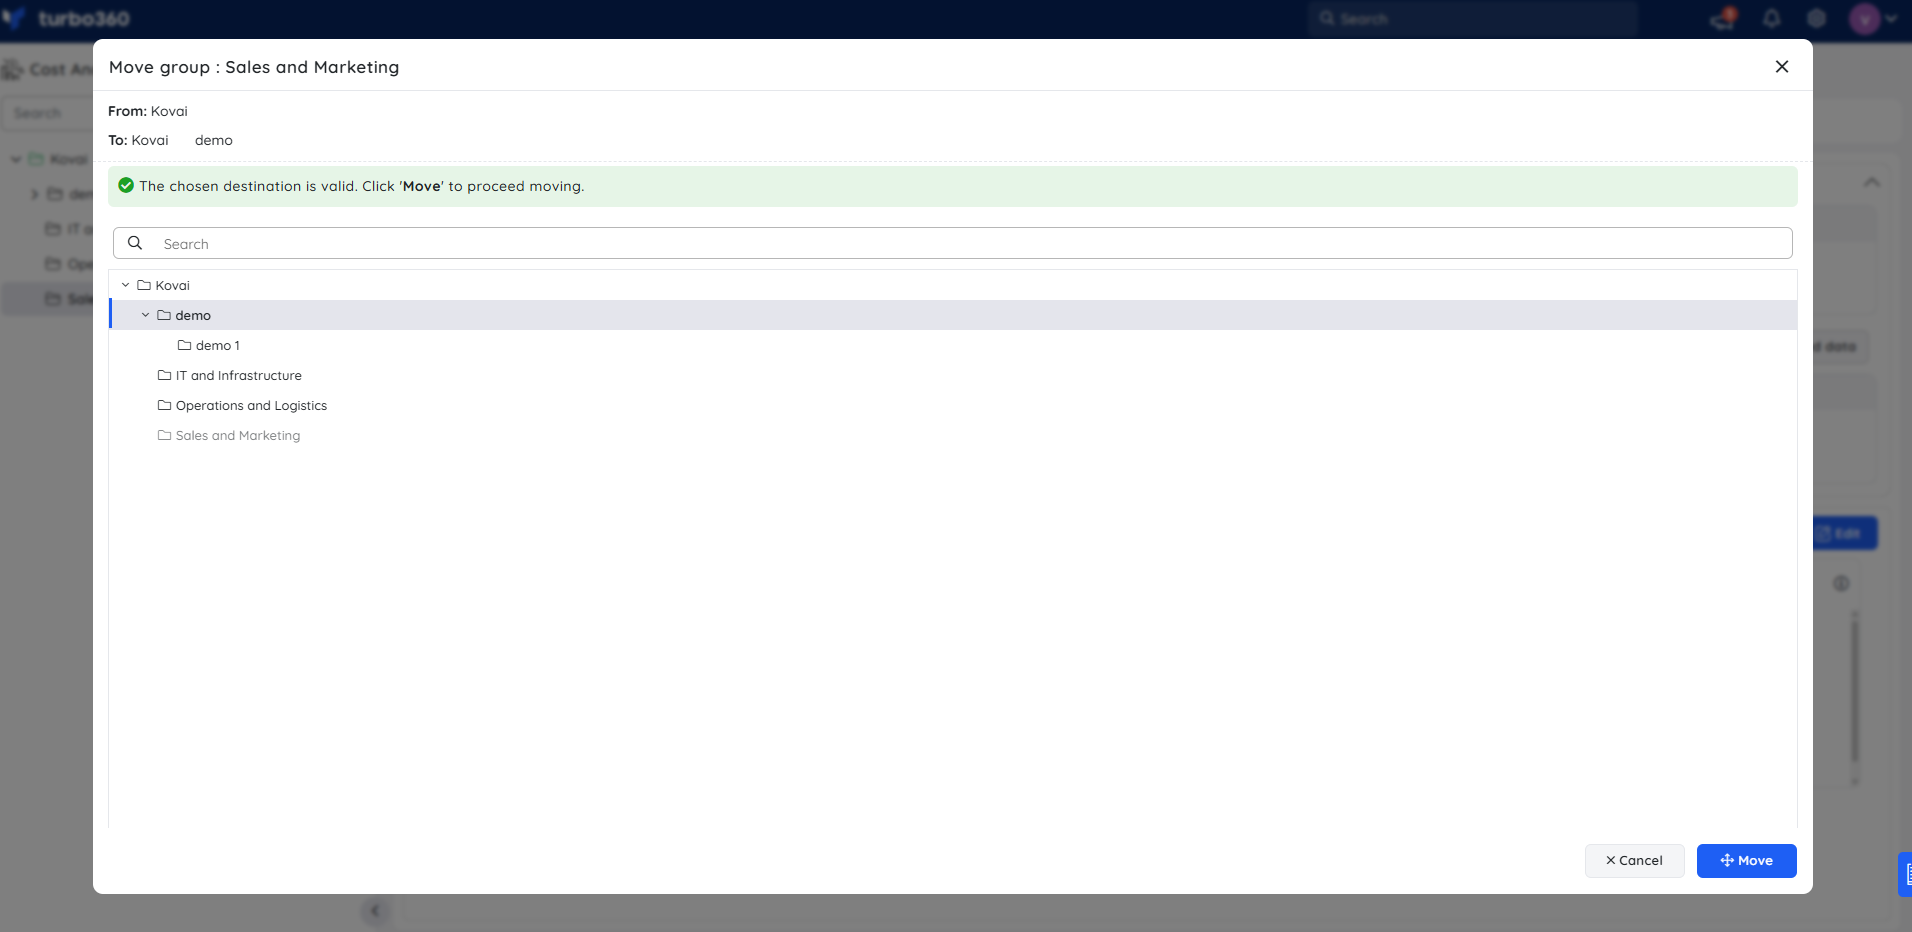
Move a cost group
When a cost management group is moved from a source group to a destination group, it is restructured under a new hierarchy. While the associated cost data and resource links remain intact, the group's access permissions are replaced by those defined in the destination group.
To move a cost management group from a source group to a destination group, follow these steps:
In the tree view, click the three-dot icon next to the group node to be moved.
Select Move from the menu.
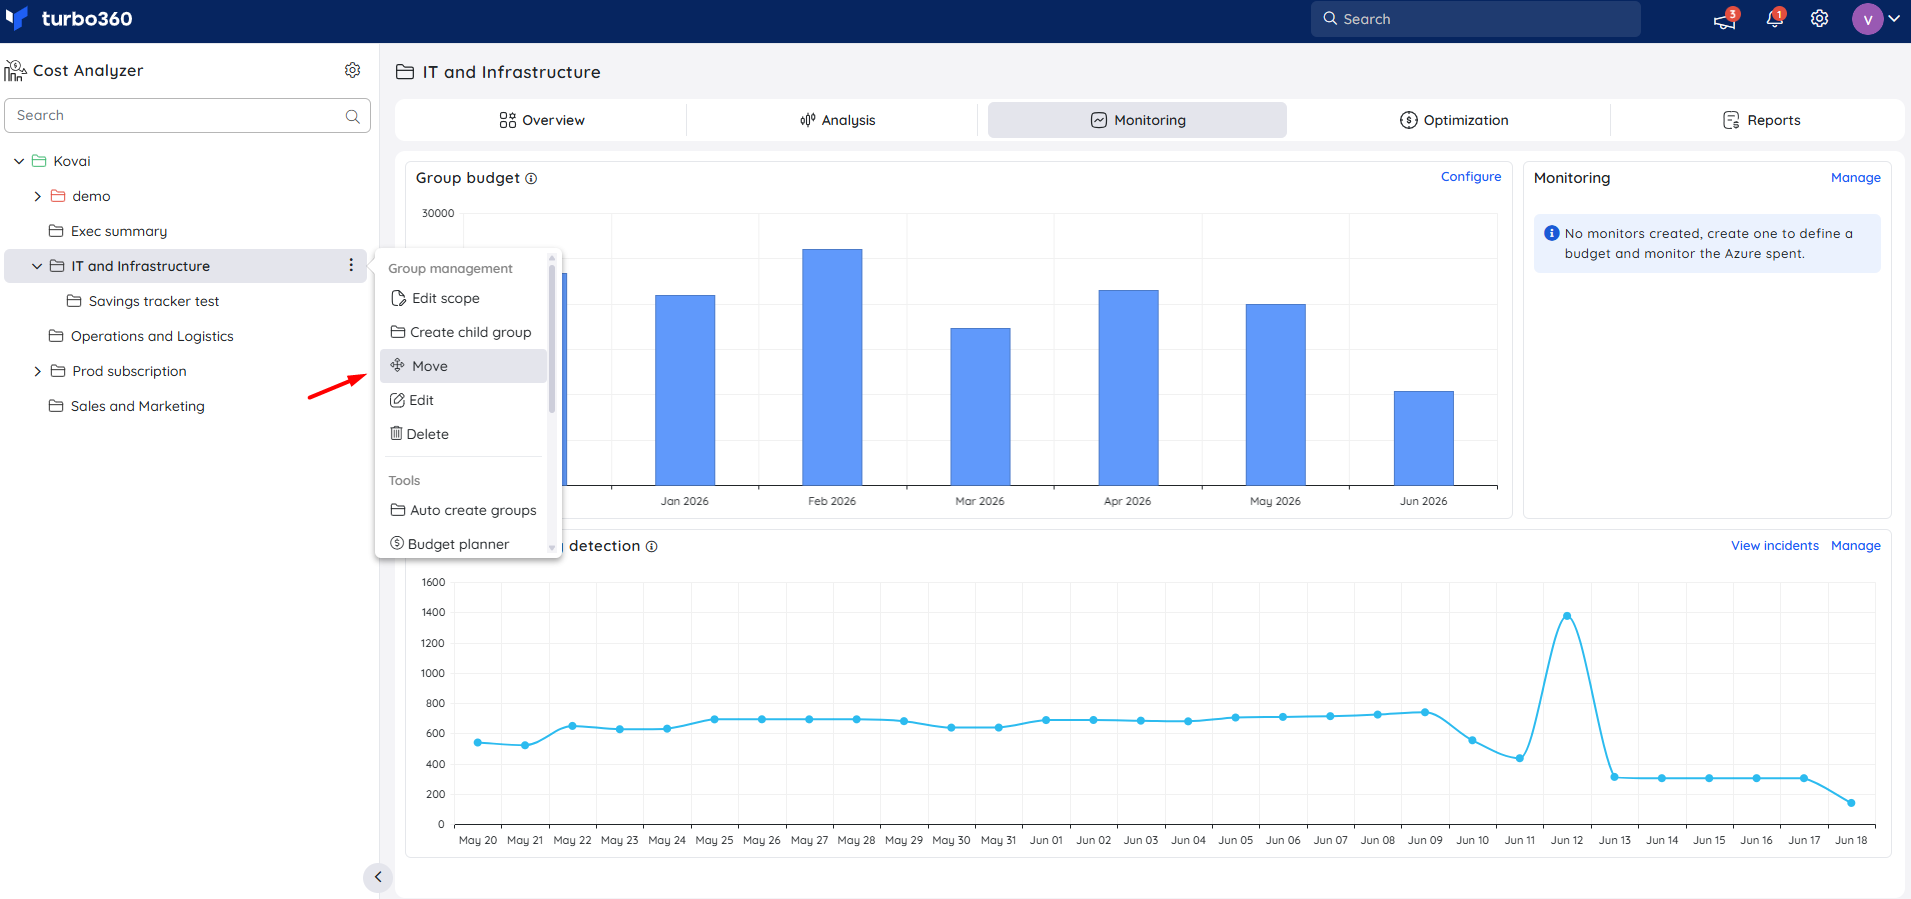
Choose the destination group where the selected cost management group should be moved.
Click the Move button to confirm the action.
Access policy impact
During the move:
The user and service principal access policies defined in the source group are overridden by those configured in the destination group.
Any custom role assignments, inherited permissions, or explicit access controls associated with the source group will no longer apply.
This change is immediate and cannot be reversed. Ensure that all necessary users and service principals have appropriate access in the destination group before proceeding with the move.
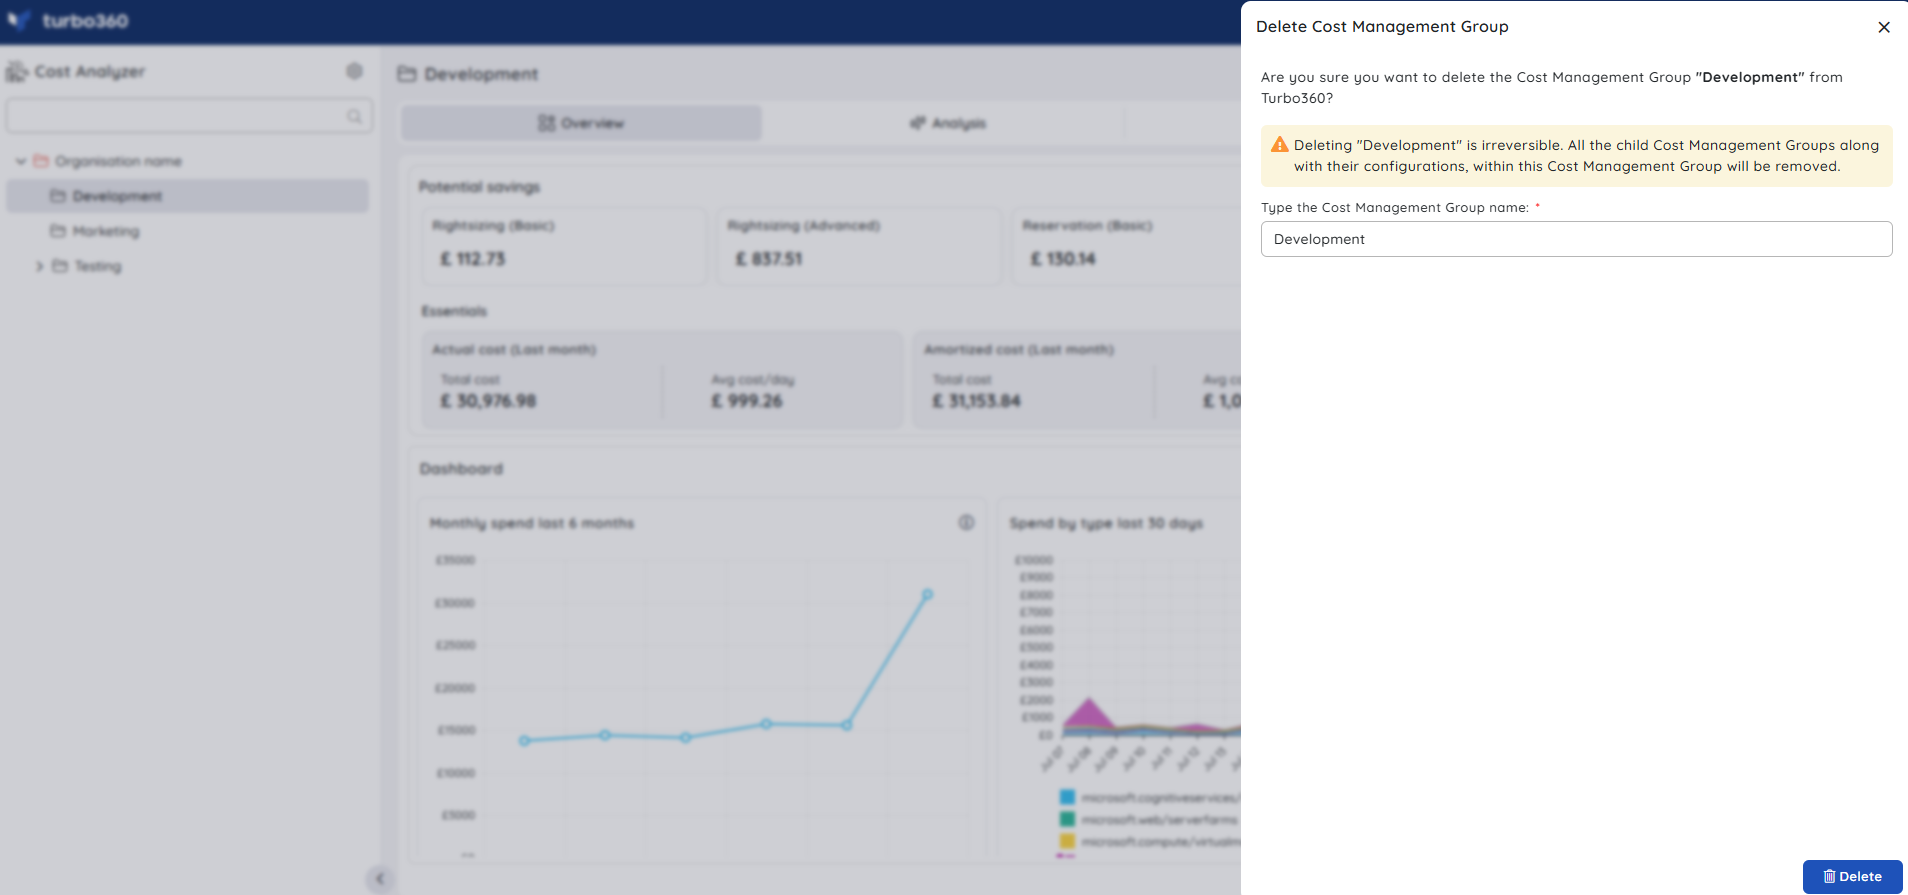
Delete a cost group
- Click the three-dotted icon next to the desired group in the tree view
- Select the Delete option in the group context menu
- Type the group name for confirmation
- Click Delete
Was this article helpful?