Stage Configuration
- 24 Jun 2026
- 5 Minutes to read
- Print
- DarkLight
- Download PDF
Stage Configuration
- Updated on 24 Jun 2026
- 5 Minutes to read
- Print
- DarkLight
- Download PDF
Article summary
Did you find this summary helpful?
Thank you for your feedback!
Introduction
Users must specify the milestones that occur in a specific transaction during business process configuration. These milestones are defined as Stages.
Users may add one or more stages to each of the selected transactions.
Create a Stage
Custom Logging type
- Go to Transactions section in a Business Process
- Click Edit transaction flow in any of the available transactions
- Click Add Stage
- Provide a Tracking name and a Friendly name to the transaction stage
- Users can also make use of the Optional settings if necessary
- Choose any of the available options from the Executed at dropdown to specify the resource in which the stage is to be performed.
- Users can add Stage property as well as Global property by selecting the relevant option from the Add Property button
- Click the Add button to complete creating a stage
Once the stage is added, users can configure properties for the added stage by using Configure properties (Custom Properties that need to be tracked) available in the context menu of the stage. The transaction stage can be connected in the transaction flow as per the users' needs.
Optional settings
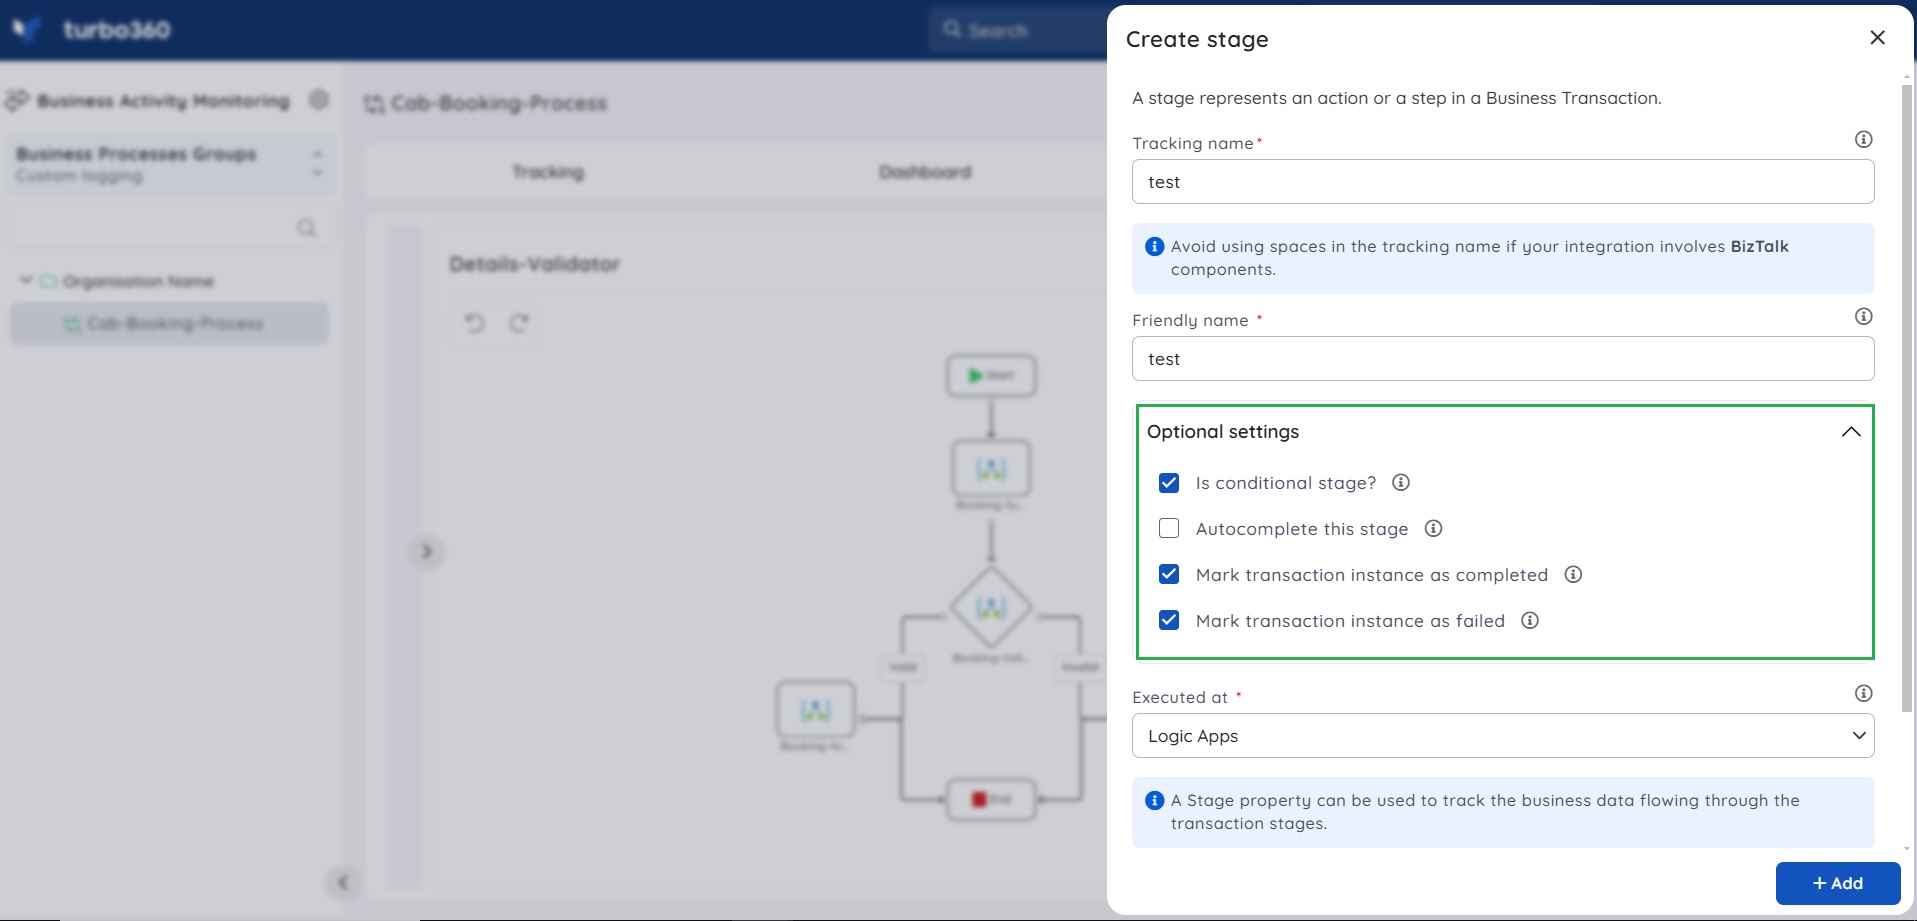
1. Is Conditional Stage - Enabling this feature will make the stage look like a decision-making box in the transaction diagram.
2. Mark transaction instance as completed - Enabling this option in a stage will make the transaction completed whenever that stage gets executed, irrespective of the IsTransactionComplete parameter passed to the stage. This setting will be applied only when the IsTransactionComplete parameter is not enabled in the checkpoint connector.
3. Mark transaction instance as failed - Enabling this option in a stage will make the transaction fail whenever that stage gets executed. This setting will be applied only when the StageStatus parameter is not enabled in the checkpoint connector.
Data Queries type
The stage configuration for a Data Queries type Business Transaction depends on the Designer Mode selected during transaction creation.
Auto-Generate
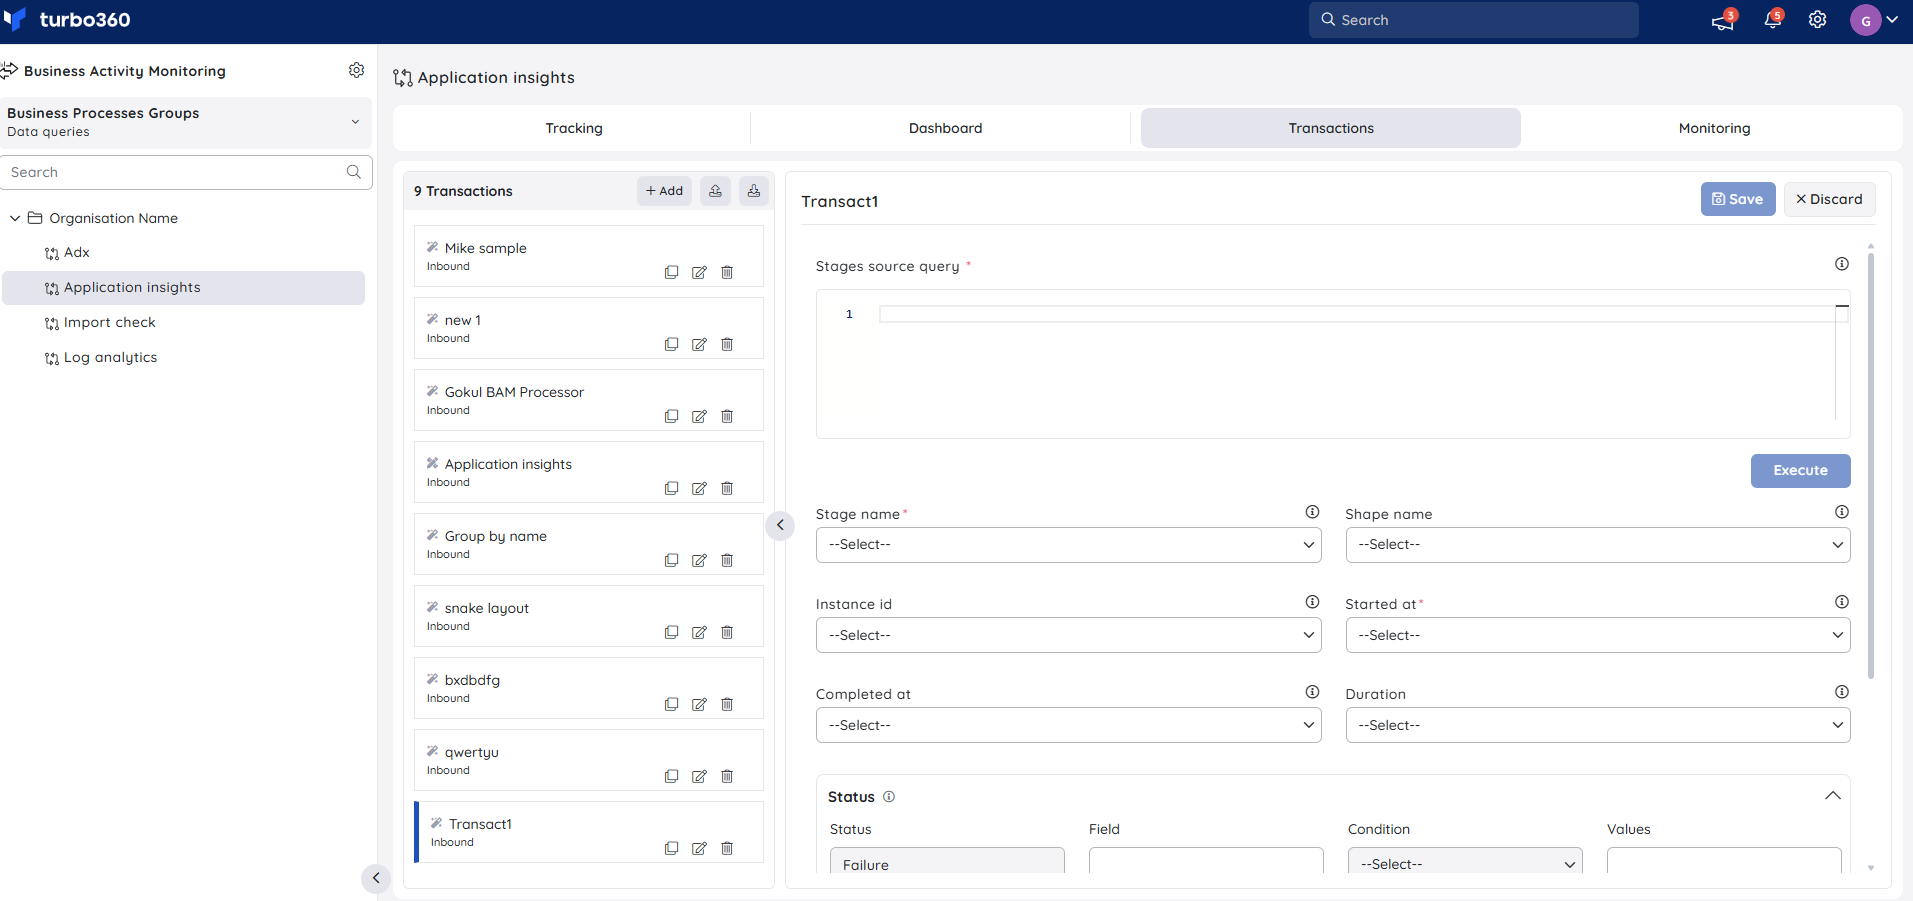
When a transaction is created with the Auto-Generate designer mode, stages are derived automatically at runtime from a source query. After the transaction is created, users configure the stage mappings in the transaction detail panel:
- Create a new Business Transaction with Auto-Generate designer mode
- Click Configure Now to configure the Stages source query.
- Enter the Stages source query and click Execute to fetch available fields from the data source
- Map the query result columns to the following fields:
- Stage name — identifies each stage
- Shape name — optional, used for visual representation in the diagram
- Instance id — identifies each transaction instance
- Started at — when the stage started
- Completed at — when the stage completed
- Duration — how long the stage took
- Under Status, configure the Field, Condition, and Value for each status (Failure, Cancelled, In progress, Success)
- Optionally configure Is batched transaction or Is debatched transaction if applicable
- Click Save
Manual
When a transaction is created with the Manual designer mode, stages are added and configured individually. Follow the steps below to create a stage:
- Go to Transactions section in a Business Process
- Click Edit transaction flow on the transaction
- Click Add Stage
- Provide a Tracking name and a Friendly name to the transaction stage
- Optionally, enable Is conditional stage? to make the stage appear as a decision-making box in the transaction diagram
- Choose between Application Insight, Log Analytics, or Azure Data Explorer in the Type dropdown
- Select the resource from the Executed at dropdown where the stage is to be performed
- Click + Add
The existing optional settings (correlation properties, stage status threshold) apply as before.
.jpg)
Configure properties
This functionality is available only in the Custom Logging type of BAM.
- Go to Transactions section in a Business Process
- Click Edit transaction flow in any of the available transactions
- Right-click the desired stage and select Configure properties
- In order to create a Stage / Global property, press the Add Property button and choose either Stage property or Global property option from the dropdown to proceed further
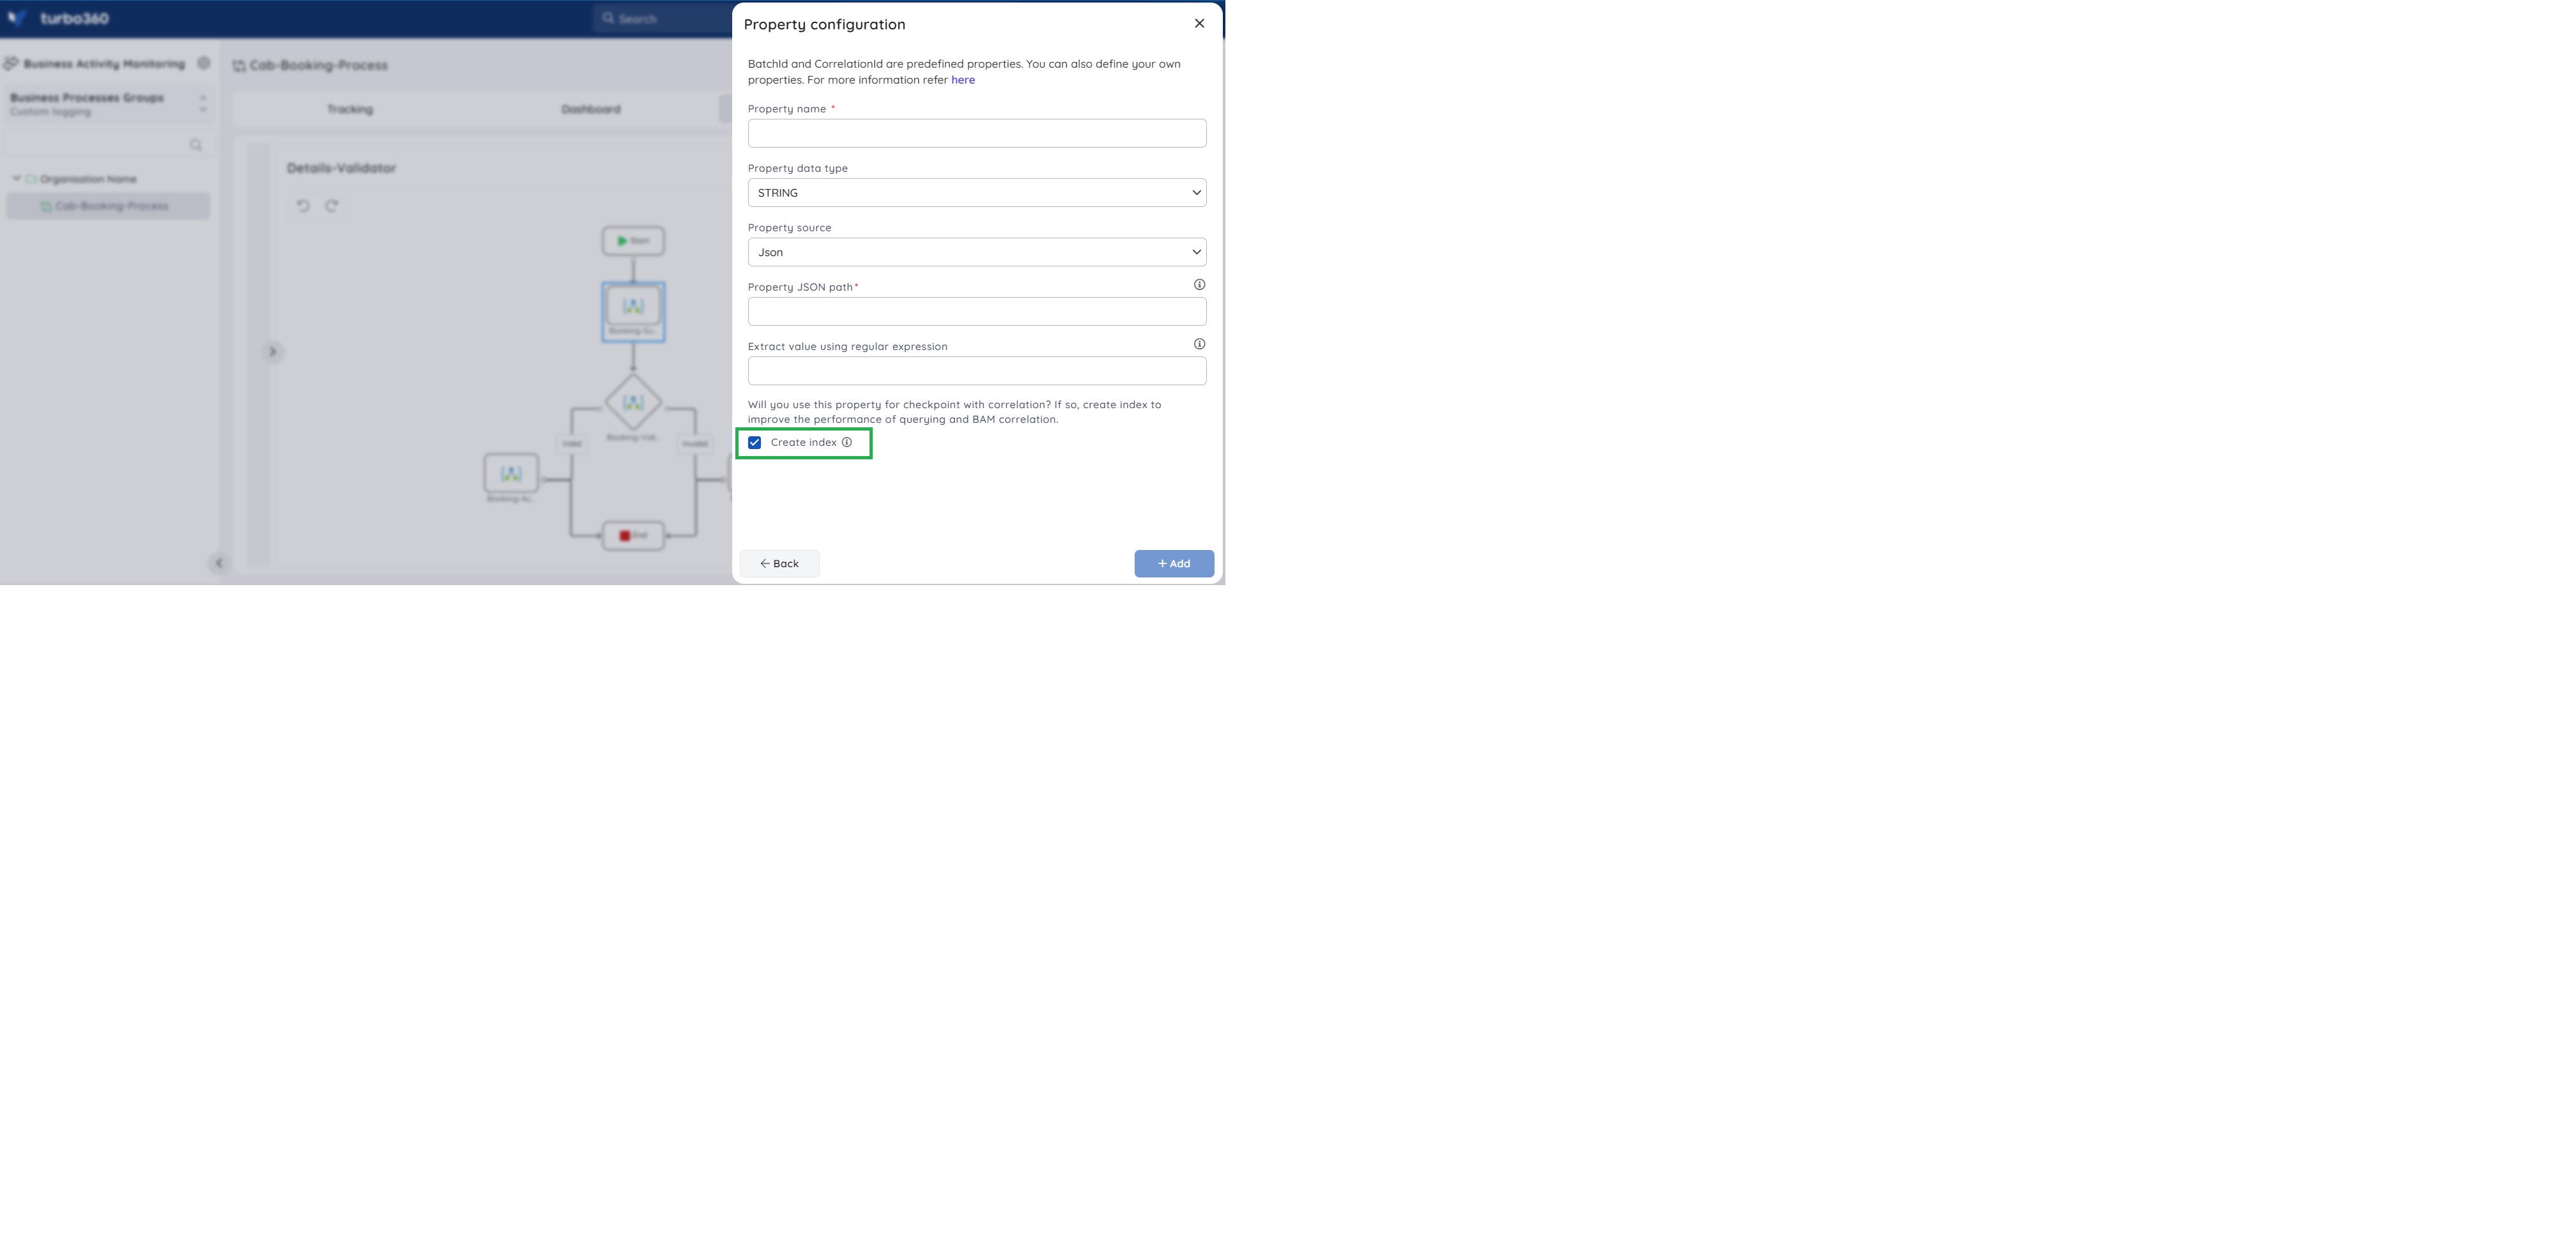
- Provide the property with a Property Name, Property DataType, Property Source which can be Xpath, JSON, constant or an HTTP Header, Property Path of the property that needs to be tracked, and Extract value using regular expression data to extract values from the configured property that matches the given regular expression which is optional
- Press the Add button to complete adding a new property to the respective stage.

Index Creation
Index creation in Property configuration helps in improving the performance of querying and BAM correlation if the property is used in "CorrelationCheckpoint" action during instrumentation. This can be achieved by enabling the Create index option while configuring the properties.
Property source
There are four types of property sources for Stage property:
- XPath
- JSON
- Constant
- HttpHeader
- BizTalk Context
XPath
Users must provide a valid XPath in order to track the XPath property.
Example:
- //Landmark
The provided XPath is used to select all Landmark elements.
- PickUpLocation/Landmark
The given XPath picks all Landmark elements that are present under the parent element, PickUpLocation.
JSON
Users must provide a valid JSON path in order to track the JSON property.
Example:
- $['PickUpLocation']
PickUpLocation is the root element that is selected by using this JSON path.
- $['Ratio2.1']
Ratio2.1 is the root element that is selected by using this JSON path.
- $['PickUpLocation'] ['Landmark']
The provided path selects the child element Landmark from the parent element PickUpLocation.
(or)
- Dot notation can be used
.PickupLocation.Landmark
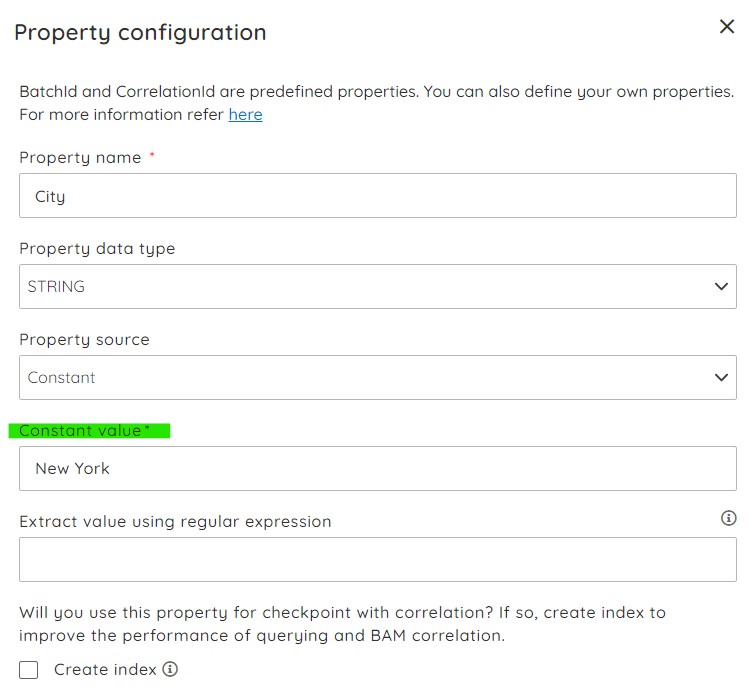
Constant
Users can enter a constant value that will be displayed in addition to the other property sources while it is being tracked.
The constant value does not have to match any data in order to be triggered.
Example:
- New York
The specified property name will appear alongside the provided constant value.
HttpHeader
Users must specify a header name that matches the value next to messageHeader when triggering the data in order to display its data while tracking the relevant Stage.
Example:
- BookingStatus
The provided header will be used to extract the data available within it.
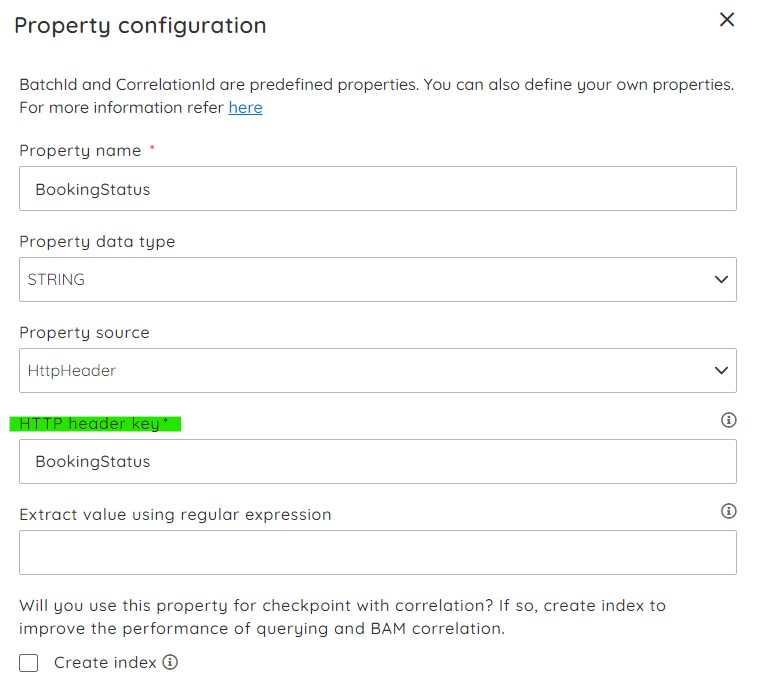
If HTTP header key contains special characters e.g. 'dot' it should have the syntax format as such ['ratio2.1'].
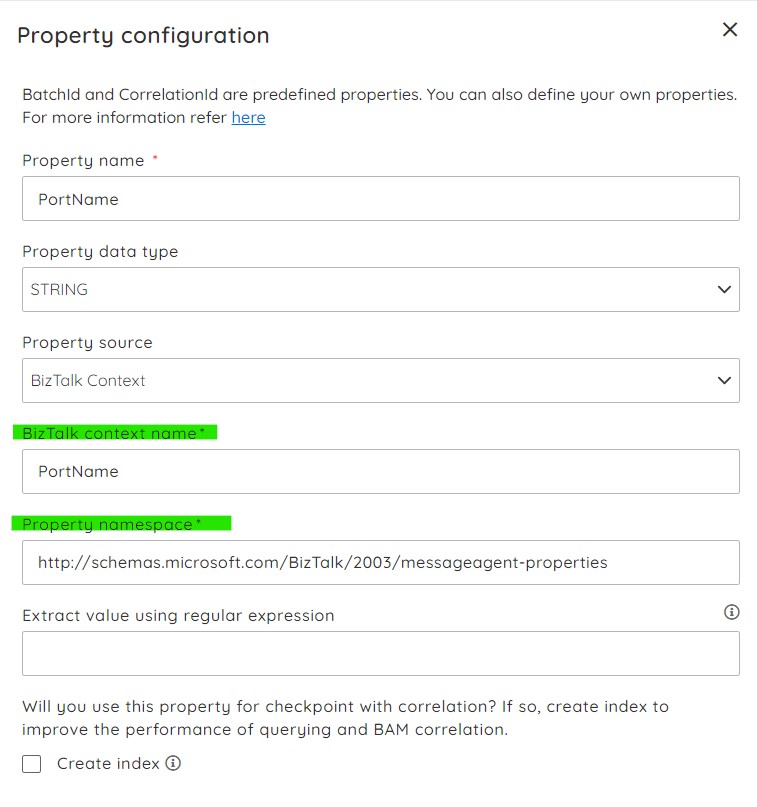
BizTalk Context
Users must specify BizTalk context property name and namespace in order to track the BizTalk context property.
Example:
Extract value using regular expression
Users must provide a valid regular expression in order to extract values from the configured property.
Example:
- [^\/:*?"<>|\r\n]+$
The provided expression extracts the file name.
- ^[a-zA-Z]+$
The provided expression accepts only letters.
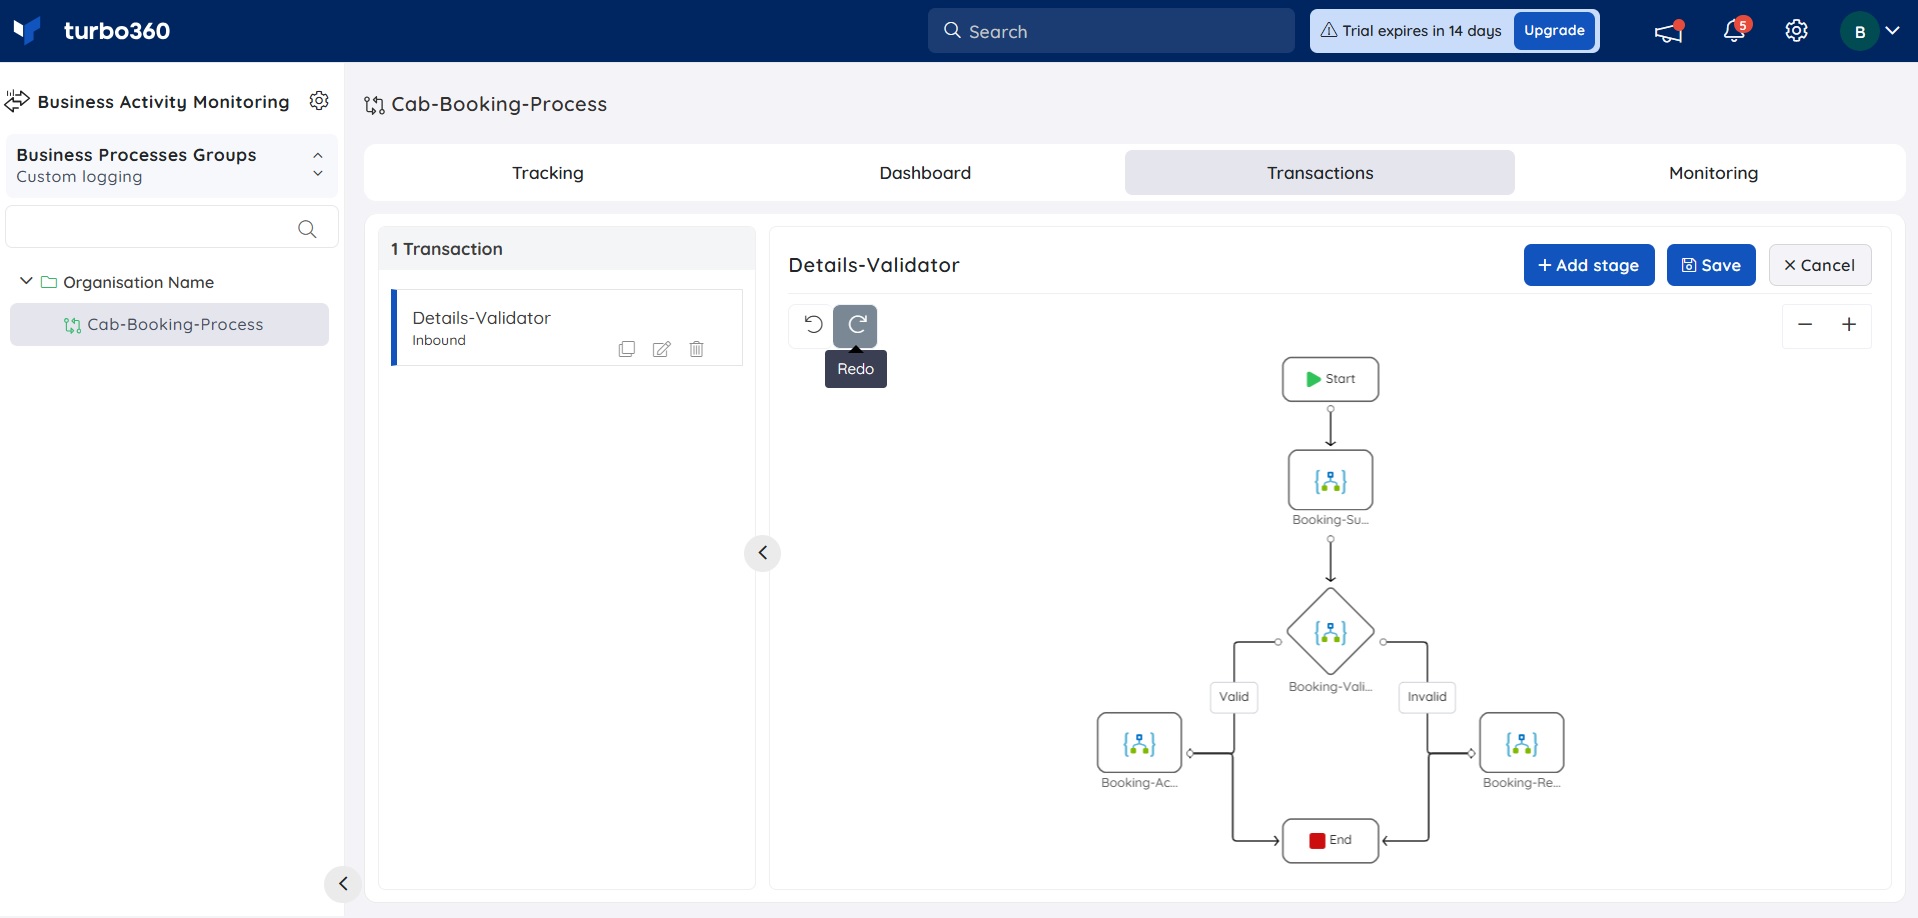
Other capabilities
Zoom in/Zoom out option is available in the Transaction Diagram section in order to perform zooming operation in the transaction flow.
Undo/Redo actions can be performed while editing the transaction flow.
Was this article helpful?