

Common first actions
- 05 Aug 2026
- 5 Minutes to read
- Print
- DarkLight
- Download PDF
Common first actions
- Updated on 05 Aug 2026
- 5 Minutes to read
- Print
- DarkLight
- Download PDF
Article summary
Did you find this summary helpful?
Thank you for your feedback!
Overview
After signing in to Turbo360 for the first time, a small set of foundational actions helps you move from initial setup to productive use. This article covers the most common tasks new users complete in their first session — connecting an Azure subscription, exploring a module, setting a budget, and configuring notifications.
Business value
Completing these first actions establishes the data connections and alert channels Turbo360 depends on to deliver cost visibility, monitoring, and operational insights. Skipping them leaves modules without data and notifications unrouted, reducing the immediate value of the platform.
Prerequisites
- A Turbo360 account that has been activated
- An Azure subscription you have permission to connect
- At least Contributor-level access to the Azure subscription for service principal setup
Required permissions
- Turbo360: Account owner or a role with subscription management permissions for connecting Azure
- Azure: Contributor or Owner role on the subscription being connected
Dependencies
- Azure subscription active and accessible
- Service principal created in your Microsoft Entra ID (required for subscription connection)
How it works
Turbo360 pulls cost, resource, and monitoring data from Azure after you connect a subscription using a service principal. Once a subscription is connected, modules such as Cost Analyzer and Business Applications begin importing data. You then configure which alerts and notifications you want to receive, and optionally invite team members.
Most first actions follow a linear path: Connect > Explore > Configure > Invite.
Steps
Step 1: Connect your Azure subscription
- Sign in to the Turbo360 portal.
- Go to Settings > Service principals from the Settings gear icon available at the top bar
- Select Add.
- Enter your Microsoft Entra ID and the service principal credentials (Application ID, Client Secret).
- Select Validate to verify the connection.
- Once validated, select Save.
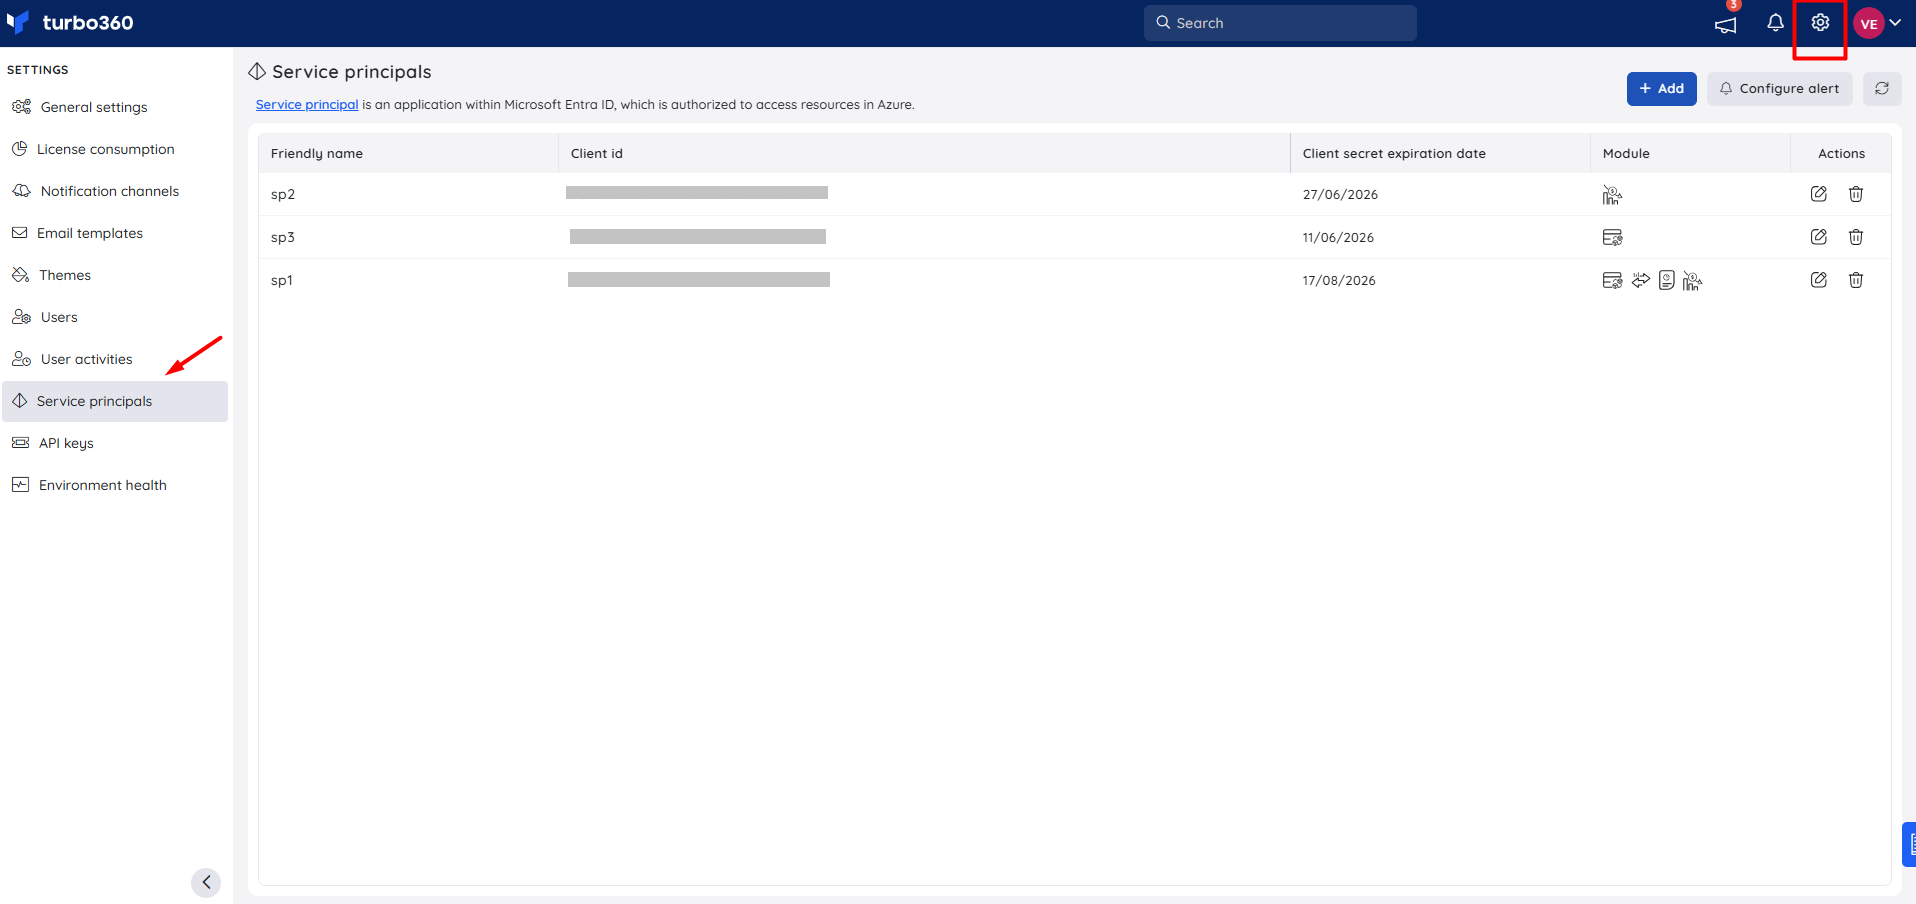
Service principals configured at the account level can be reused across all modules.
Step 2: Explore Cost Analyzer
- In the left navigation panel, select Cost Analyzer.
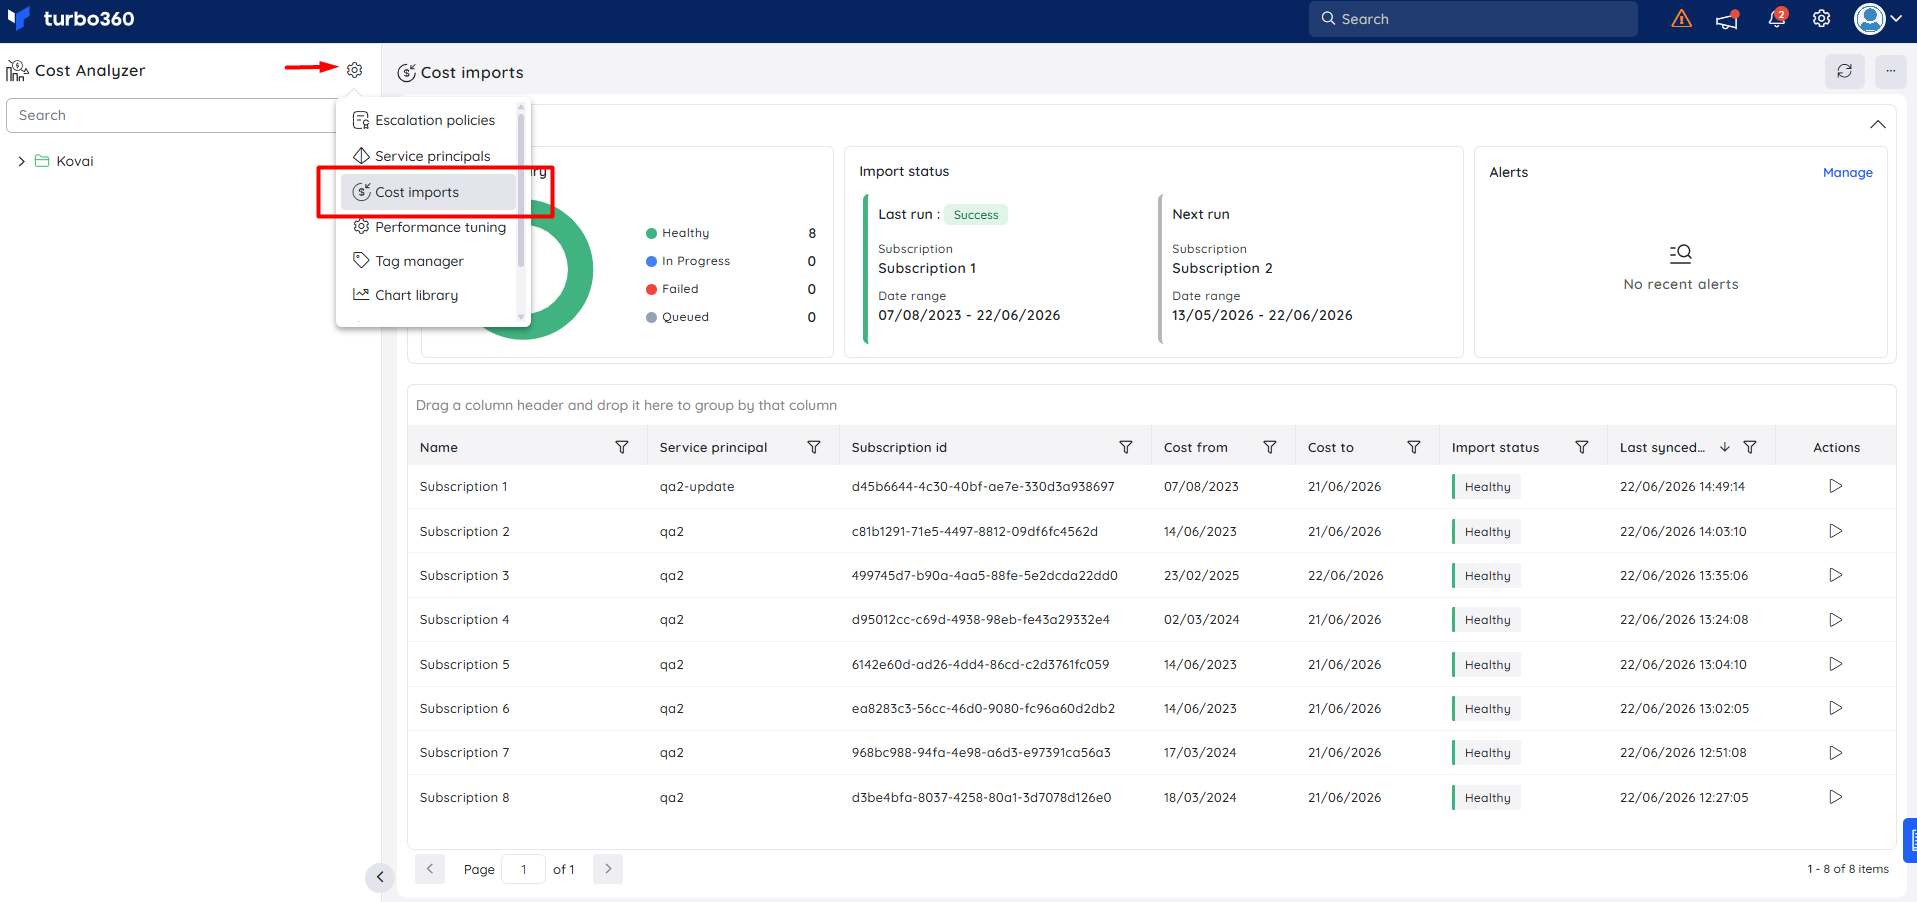
- Add the existing service principal to Cost analyzer and choose the desired Azure subscriptions from Settings > Service principals page.
.png)
- Go to Settings > Cost imports and review the import status to confirm data is importing from your connected subscriptions.
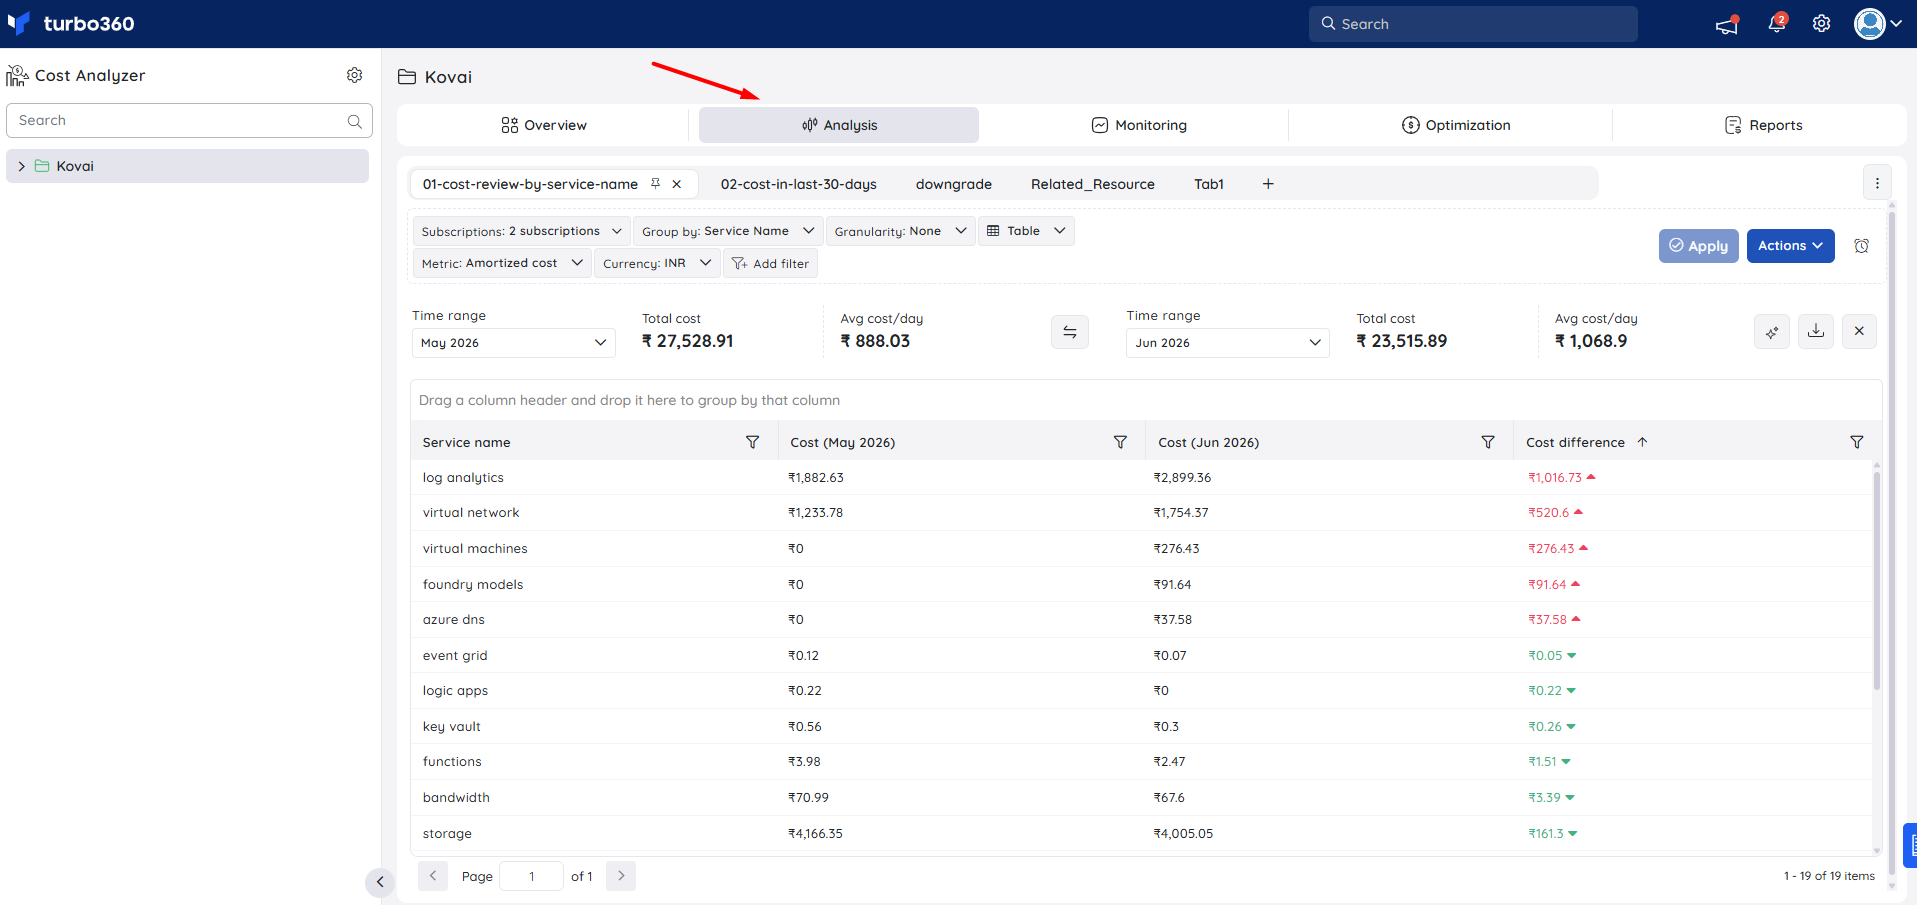
- Open Analysis to view a breakdown of current Azure spend.
- If data has not yet appeared, wait until the cost import status for the subscription turns Healthy.
Step 3: Create your first budget
- In Cost Analyzer, navigate to Cost management group > Monitoring > Group budget.
- Select Configure/Manage.
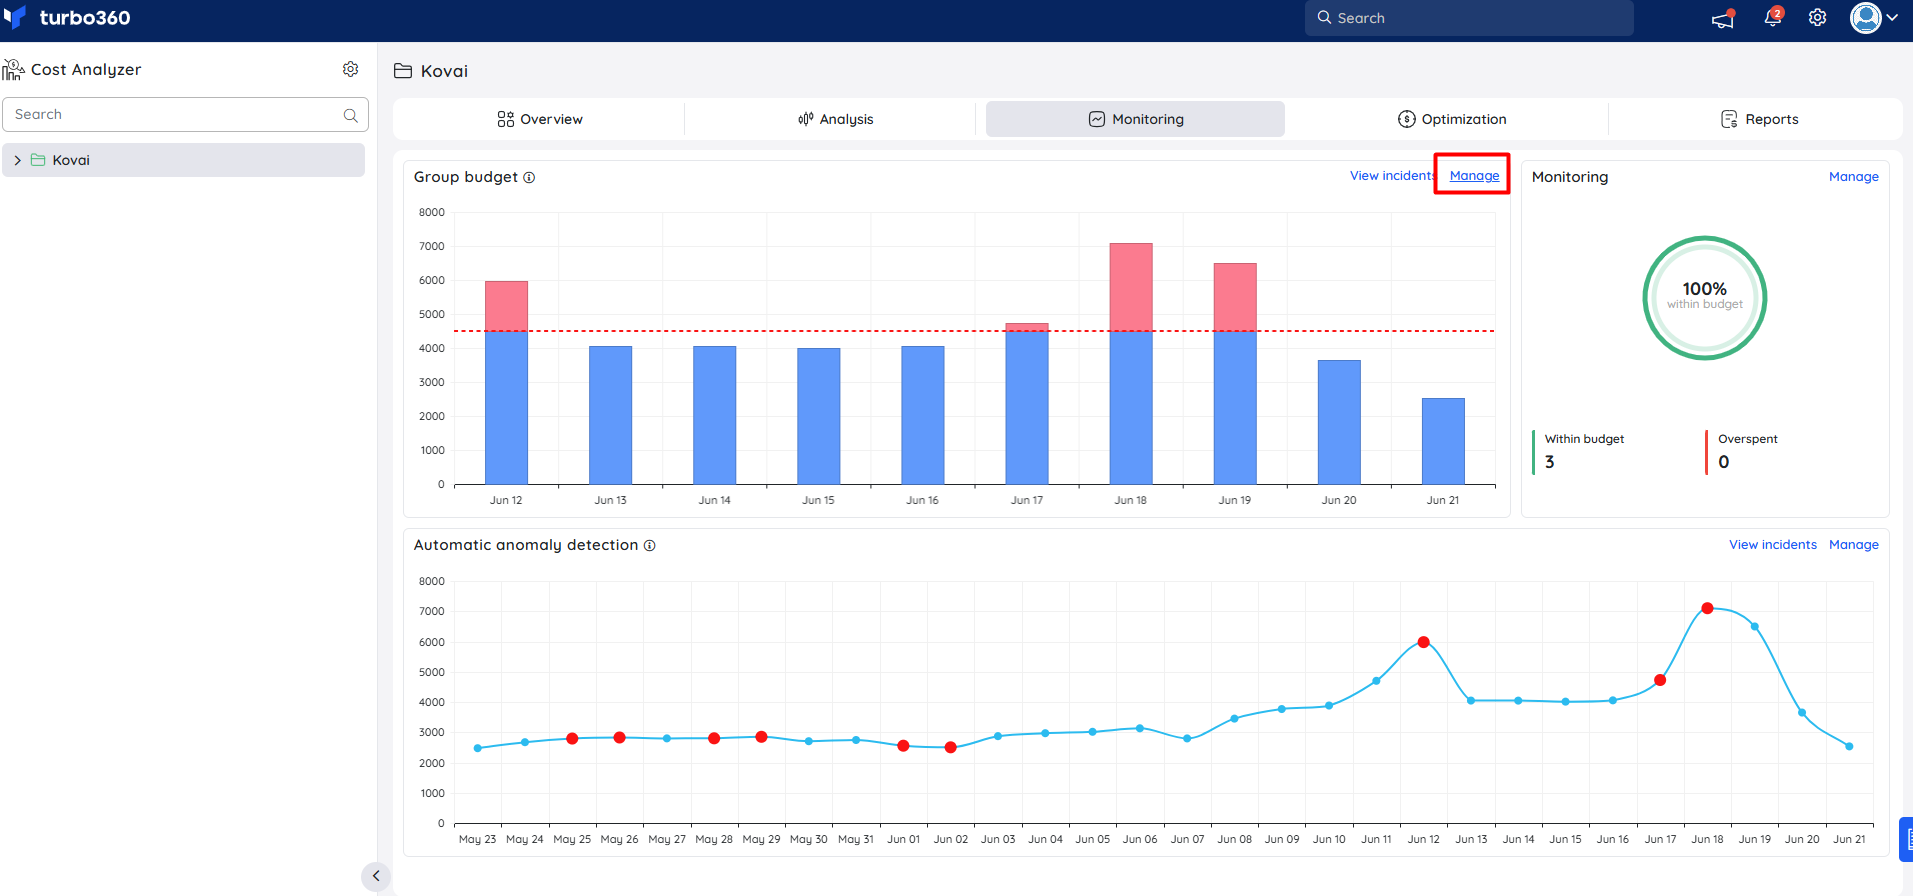
- Turn on the Group budget monitoring toggle, then set the time interval, cost metric, and budget value.
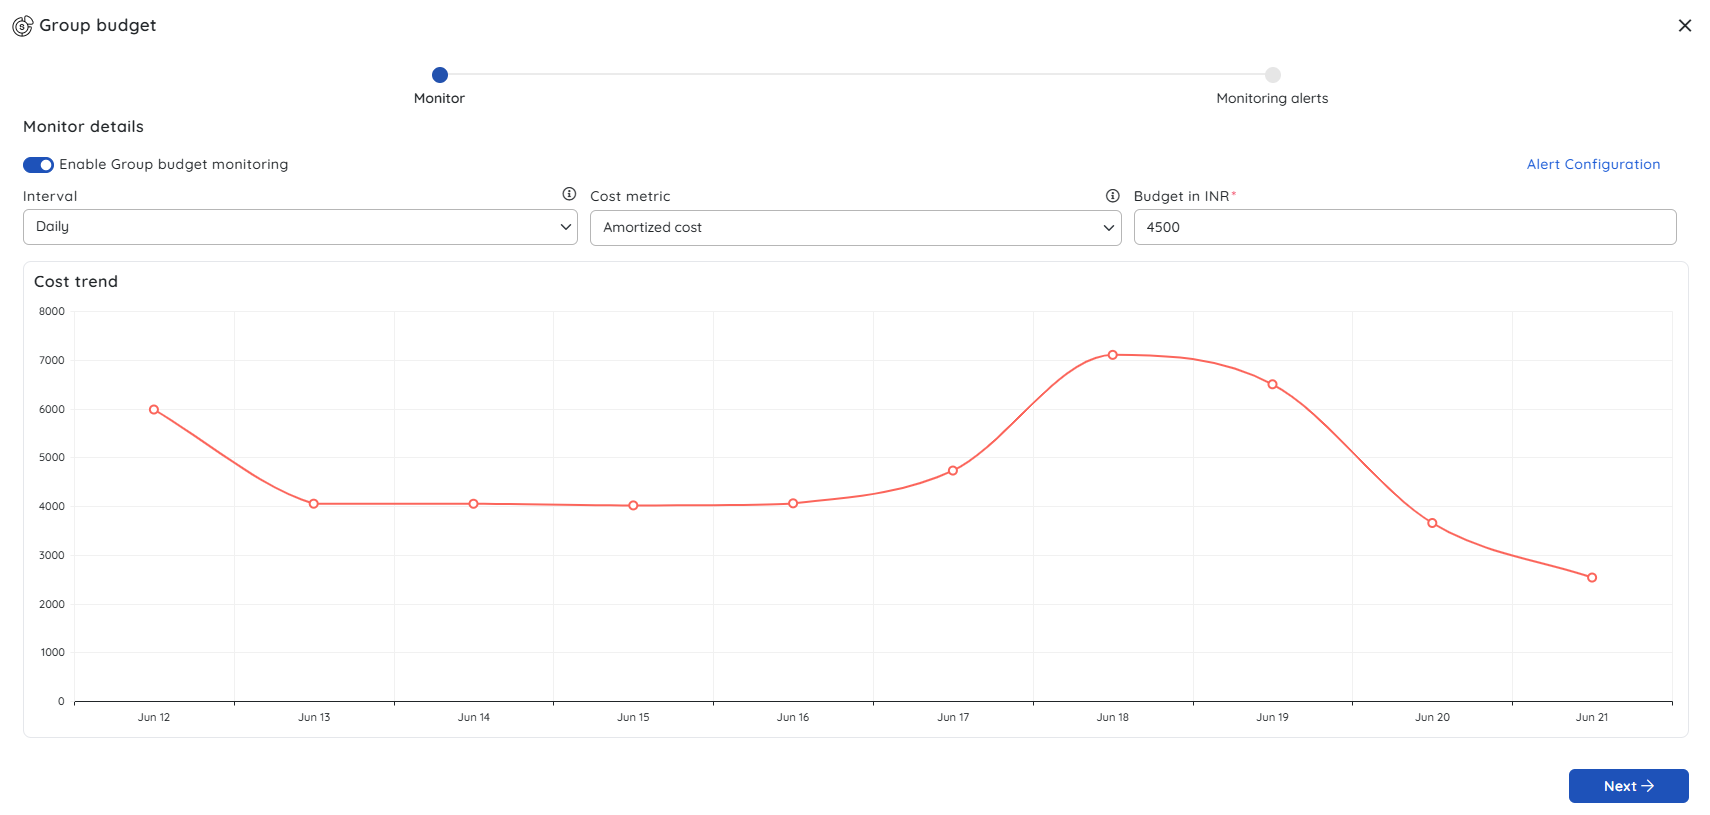
- Under Alert Configuration, set percentage thresholds and enable budget risk prediction as needed.
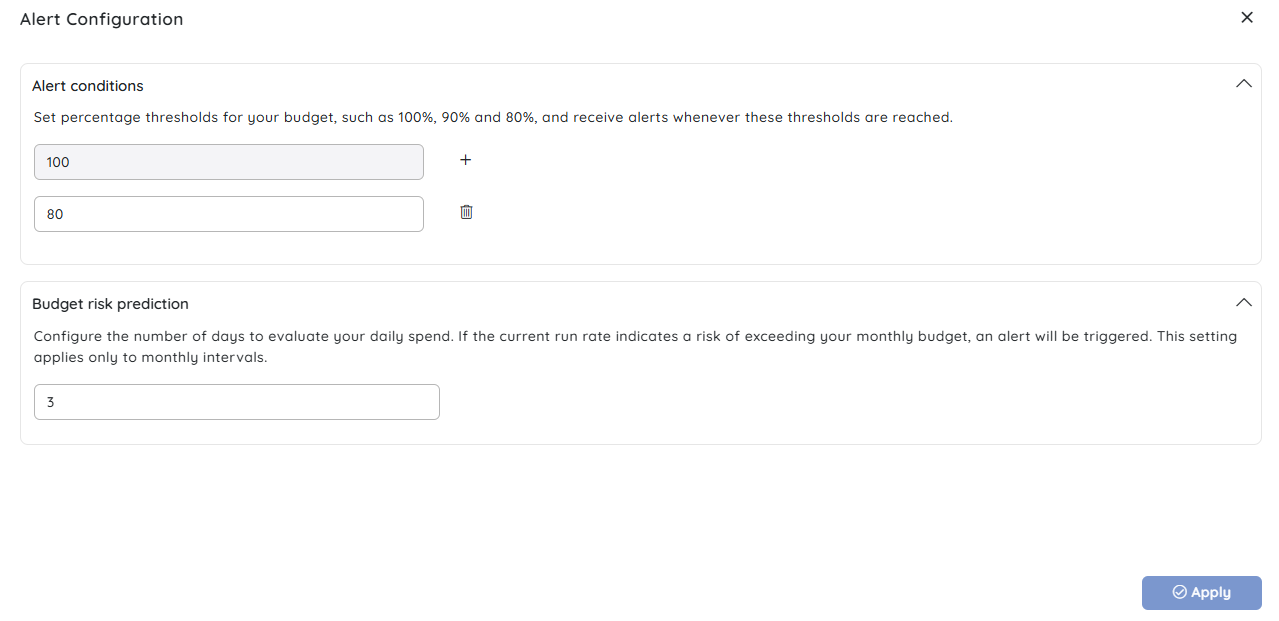
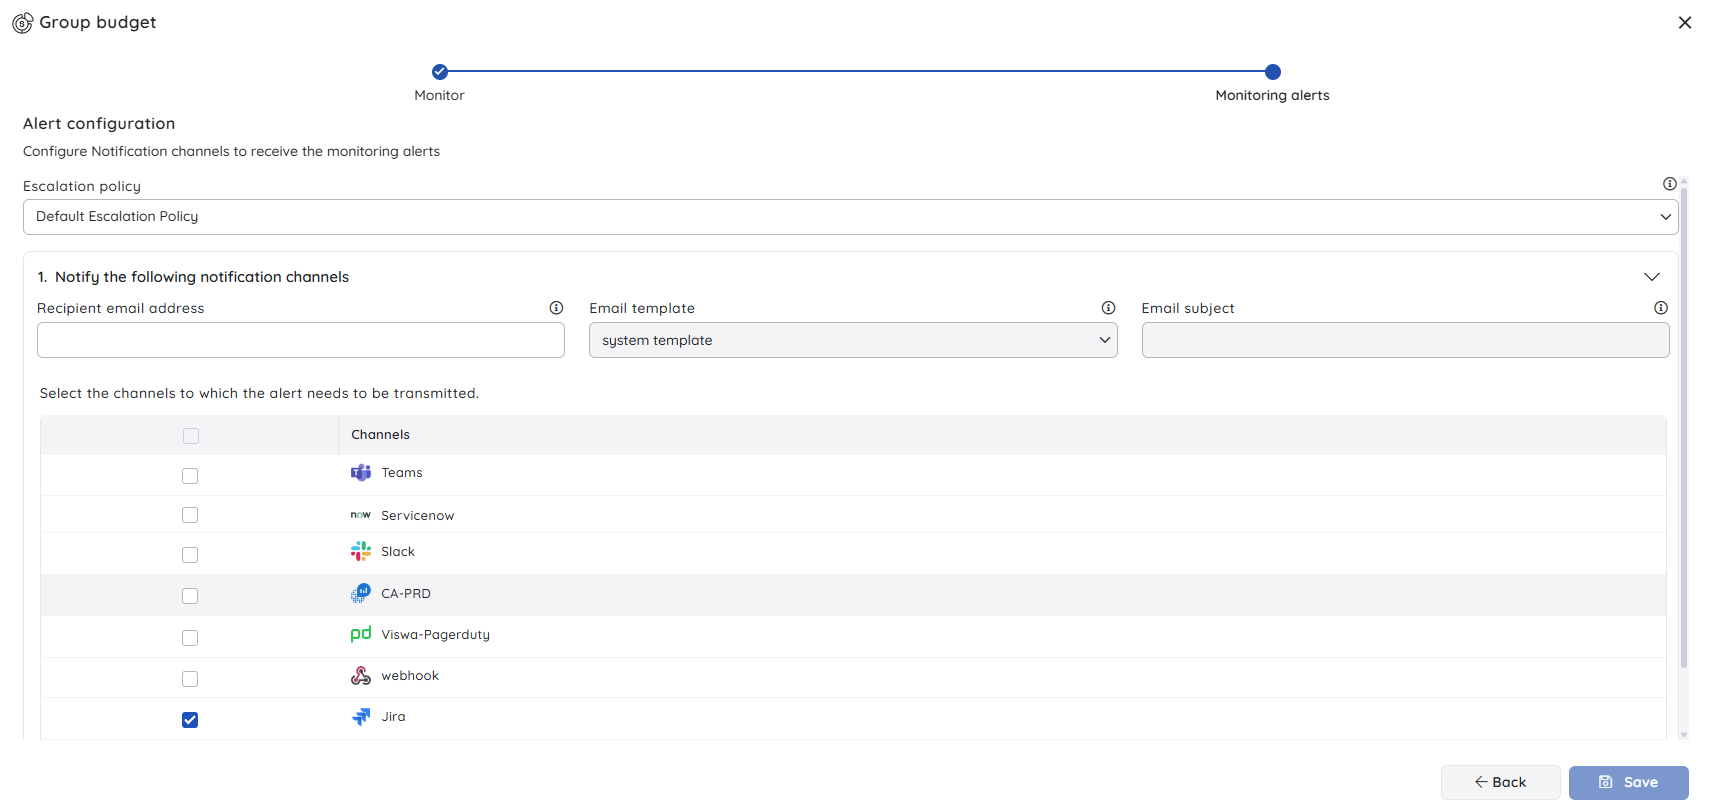
- Select the notification channels to alert when spend approaches your limit.
- Click Save.
Step 4: Configure notification channels
- Navigate to Settings > Notification channels.
- Select Add channel.
- Choose a channel type — email, Microsoft Teams, Slack, or another supported option.
- Enter the required connection details for the channel.
- Select Save and send a test notification to confirm delivery.
.png)
Step 5: Invite team members (optional)
- Navigate to Settings > Users.
- Select Add user.
- Enter the email address and select the role to assign.
- Click Add to trigger an invitation mail to the user.
.png)
Configuration
| Action | Where to configure | Notes |
|---|---|---|
| Azure subscription connection | Settings > Service principals | Requires service principal credentials |
| Budget creation | Cost Analyzer > Cost management group > Monitoring > Group budget | Scope to subscription or resource group |
| Notification channels | Settings > Notification channels | Supports email, Teams, Slack, and others |
| User invitations | Settings > Users | Role assignment required at invite time |
| Module exploration | Left navigation panel | Data availability depends on subscription connection |
Permission behavior
With access: You can connect subscriptions, create budgets, configure notification channels, and invite users if your role includes the relevant permissions.
Without access: Account-level service principal configuration and user invitation require Account owner permission. If these options are unavailable, contact your organization administrator to request the required role or to perform these steps on your behalf.
Example scenario
A cloud operations engineer joins a new organization using Turbo360. On their first login, they navigate to Settings, connect the company's primary Azure subscription using a service principal, and validate the connection. They then open Cost Analyzer, confirm data is appearing, and create a monthly budget of $10,000 for their subscription with an 80% alert threshold. Finally, they configure a Microsoft Teams notification channel so budget alerts are routed to their team's operations channel.
Limitations
- Initial data import time varies based on subscription size and the number of historical months selected for cost import — smaller subscriptions may complete within 10 minutes, while larger ones can take up to 24 hours.
- Service principal credentials must be created in Azure before connecting a subscription in Turbo360.
- Notification channel validation sends a live test message to the configured endpoint; ensure the channel is ready to receive messages before validation.
Troubleshooting
Subscription validation fails after entering service principal credentials.
Cause: The Application ID, Client Secret, or Tenant ID may be incorrect, or the service principal may lack Contributor access on the subscription in Azure.
Fix: Verify all three credential values in Azure and confirm the service principal has at least Contributor access. Expired secrets are a common cause of validation failure.Cost Analyzer shows no data after connecting a subscription.
Cause: Initial data import is still in progress.
Fix: Wait up to 24 hours depending on subscription size. If data has not appeared after that window, verify the service principal credentials in Settings > Service principals and re-validate.A test notification was not received after validating a notification channel.
Cause: The channel endpoint may be incorrect, or spam filters or webhook restrictions may be blocking delivery.
Fix: Confirm the endpoint (email address, Teams webhook URL, or Slack channel) is correct and active, then resend the test notification.An invited user reports not receiving their invitation email.
Cause: The invitation email may have been filtered as spam.
Fix: Ask them to check their spam or junk folder. If the email is not there, navigate to Settings > Users, locate the invitation, and resend it.
FAQs
How long does it take for Azure cost data to appear in Cost Analyzer after connecting a subscription?
Import time depends on the number of resources in your subscription and the number of months of historical data you selected during setup. For smaller subscriptions, data typically appears within 10 minutes. For larger subscriptions with more resources or a longer history range, the import can take up to 24 hours.Can I connect more than one Azure subscription?
Yes. You can add multiple subscriptions from a single Service principal from Settings > Service principals.What role should I assign when inviting a new team member?
Assign the most restrictive role that still allows the user to complete their intended tasks. For most operational users, a read-only or contributor role is appropriate. Account ownership should only be granted when full platform management access is required.
Related articles
Was this article helpful?