

Configuring a service map
- 05 Aug 2026
- 5 Minutes to read
- Print
- DarkLight
- Download PDF
Configuring a service map
- Updated on 05 Aug 2026
- 5 Minutes to read
- Print
- DarkLight
- Download PDF
Article summary
Did you find this summary helpful?
Thank you for your feedback!
Overview
Service map lets you build and maintain a visual diagram of the Azure resources within a Business Application. You can create multiple Service maps per application, connect resources to model data and control flows, group related resources into sub-orchestrations, and manage each diagram's lifecycle through a shared Actions menu.
Business value
A well-maintained Service map gives your team an always-current picture of how an application is wired together. It reduces onboarding time for new team members, speeds up root-cause analysis during incidents, and provides an offline-exportable architecture record for compliance and handoff scenarios.
Prerequisites
- A Business Application must exist before you can create a Service map.
- Resources must be associated with the Business Application to appear in the resource pane.
Required permissions
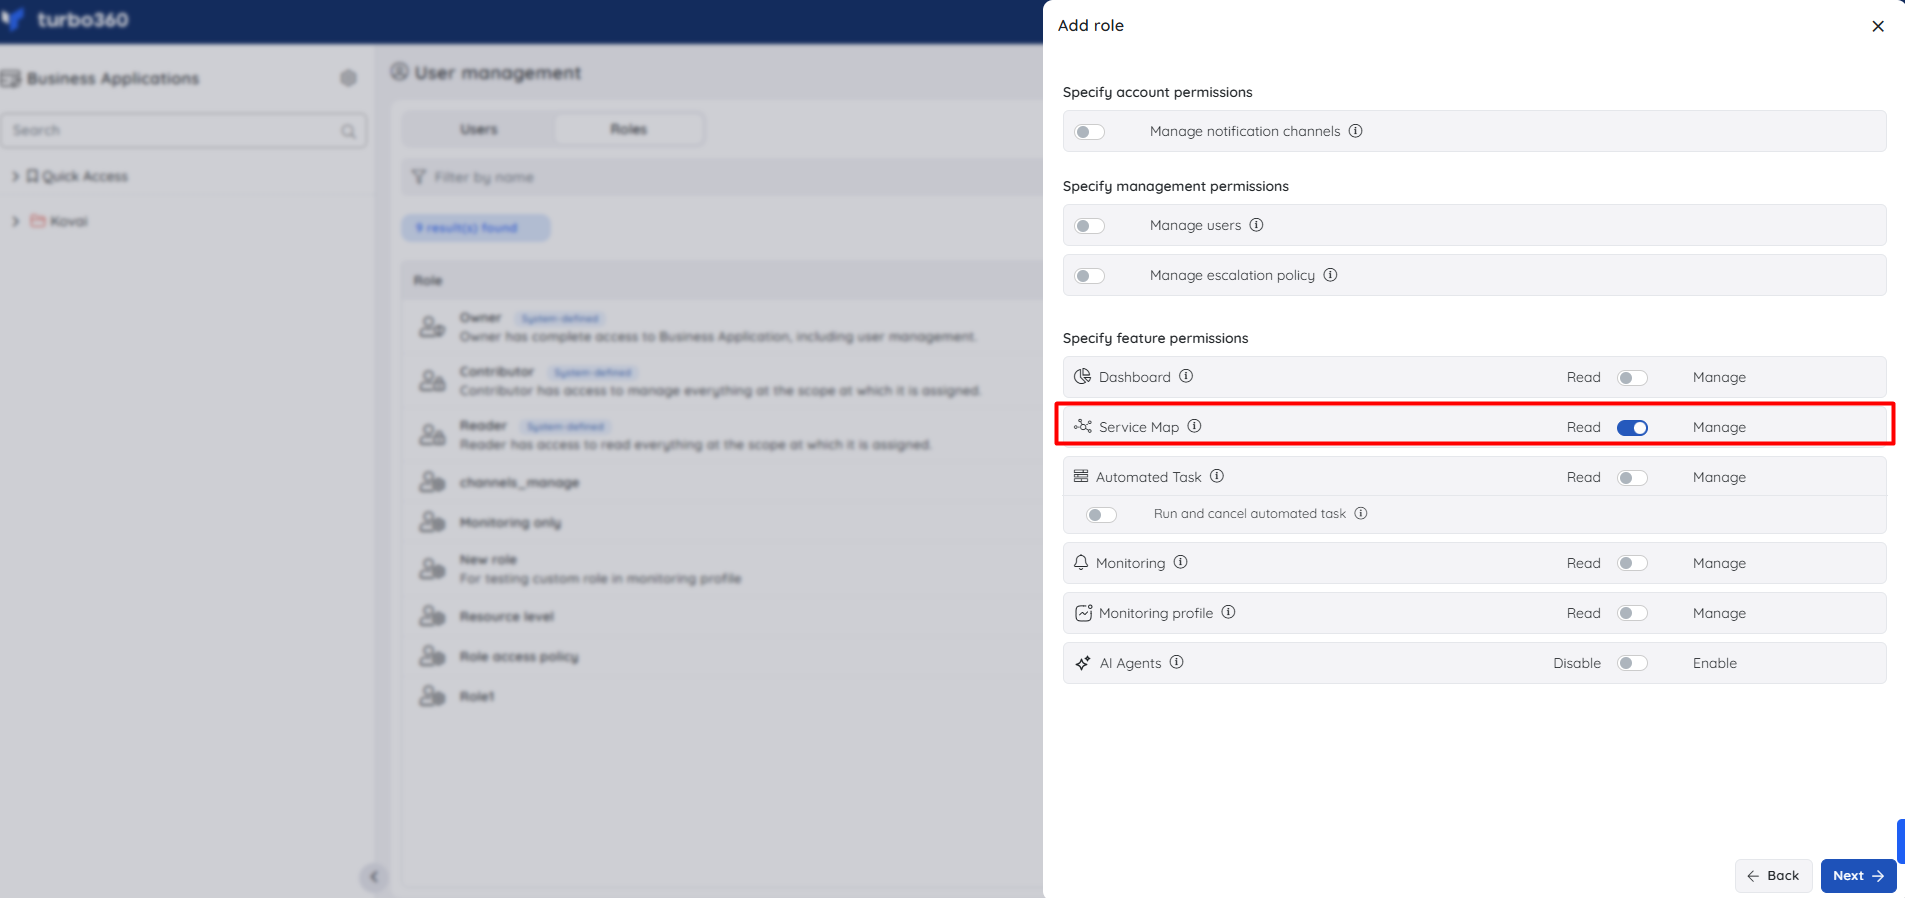
To create, edit, or delete a Service map, you need the Manage permission for Service map.
To view a Service map and download resource details, the Read permission for Service map is sufficient.
| Permission level | What you can do |
|---|---|
| Read | View Service maps, download Service maps, view resource details and monitoring issues identified by monitor |
| Manage | Create, edit, and delete Service maps; set the default Service map |
Permissions are assigned per role under Settings > User management > Roles.
How it works
Each Business Application has a Service map section accessible from the application's navigation. When you open this section, you see the canvas for the default Service map and a resource pane on the left listing all resources associated with the application. You add resources to the canvas by clicking them in the pane, then draw connections between them to represent the architecture.
Service maps persist their layout and connections independently of the underlying resources. When a resource is added to or removed from the Business Application while editing, its icon is automatically added to all existing Service maps in that application. The monitoring state of each resource icon reflects the current state based on configured monitoring rules, but this state is hidden while you are in Edit mode.
Note:
Resources associated while editing an existing Business Application will add their resource icon to all existing Service maps in that Business Application.
Steps
Use the following steps to create, edit, and manage Service maps within a Business Application. Navigate to your Business Application and select Service map from the navigation to get started.
Create a Service map
Creating a Service map gives you a dedicated canvas to model a specific orchestration or sub-orchestration within the Business Application.
- Click Add Service map in the Service map section.
- Enter a name for the Service map.
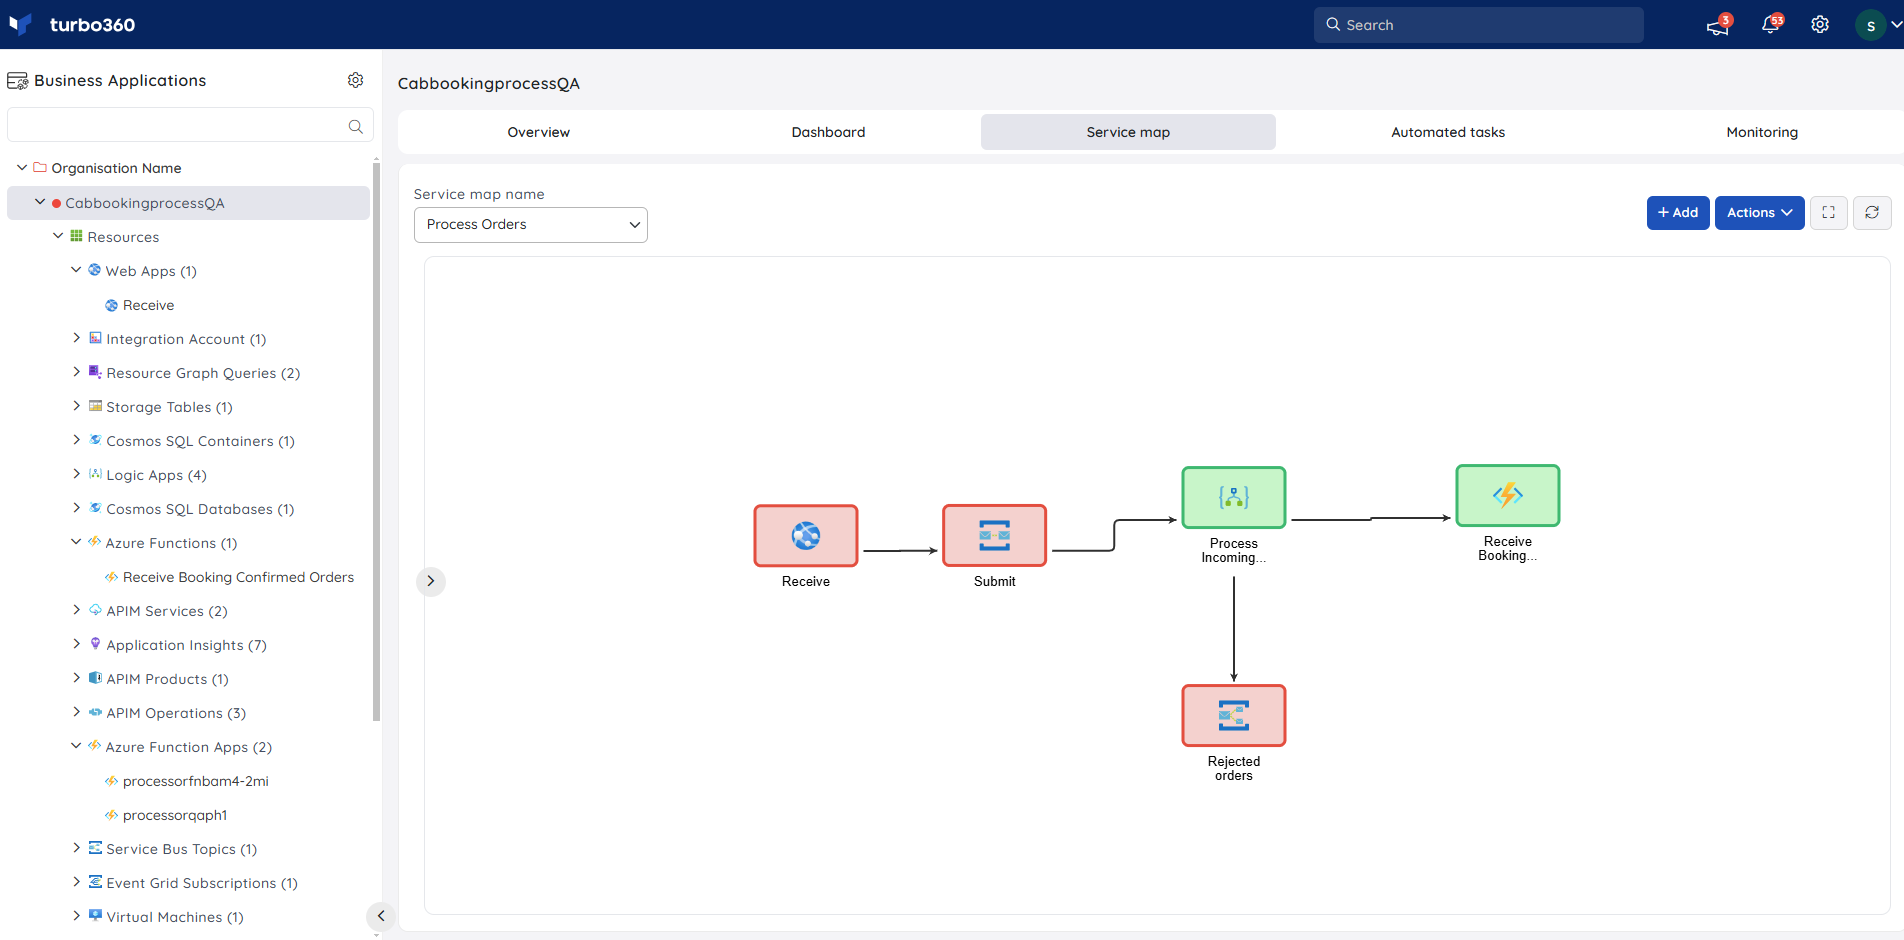
- In the resource pane on the left, click each resource you want to add to the canvas. The resource icon appears on the diagram.
- Draw connections between resources by clicking and dragging from the edge of one resource icon to another.
- Reposition icons by clicking and dragging them from their centre.
- Click Save to apply the layout. Resource icons display their current monitoring state once the diagram is saved.
Note:
The resources will be presented on the canvas with the current monitoring state once the diagram is saved.
Group and ungroup resources
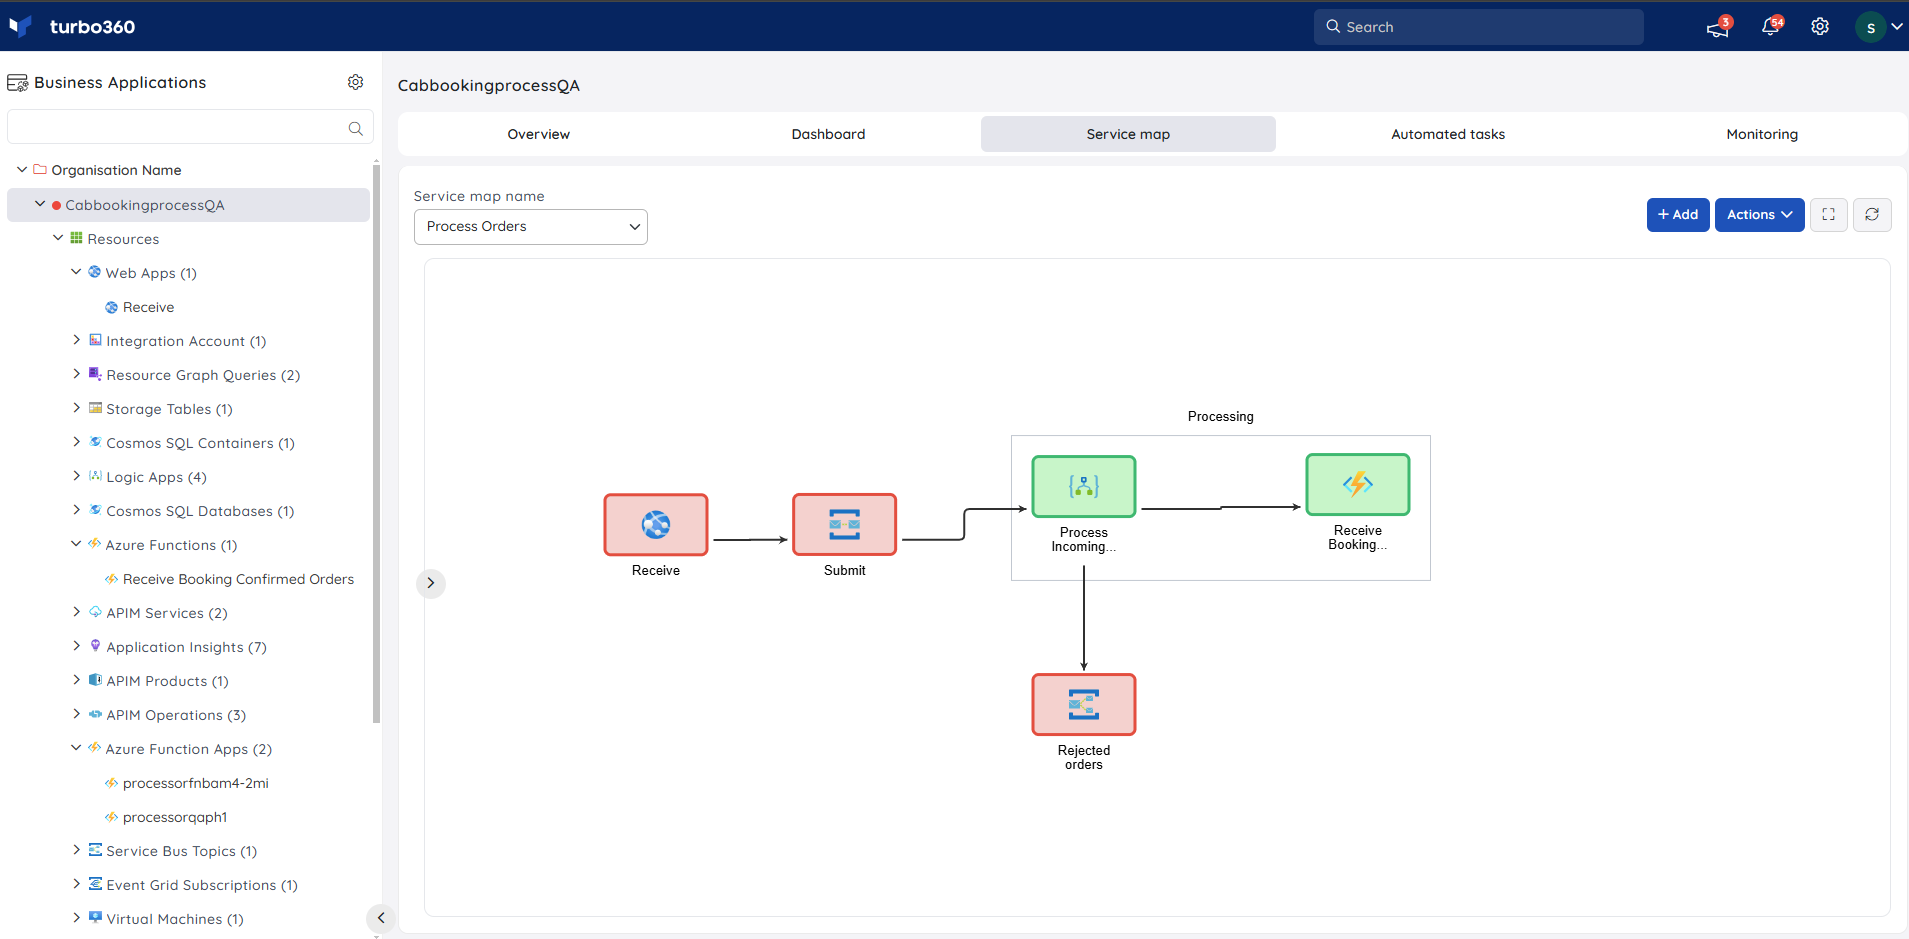
Grouping lets you cluster related resource icons into a named sub-orchestration within the Service map, making complex architectures easier to read.
- Select the resource icons you want to group on the canvas.
- Use the Grouping option to group the selected icons. Enter a name for the group.
- To ungroup, select the group and use the Ungroup option.
Set a default Service map
Setting a default Service map determines which diagram is displayed first when you open the Service map section of a Business Application.
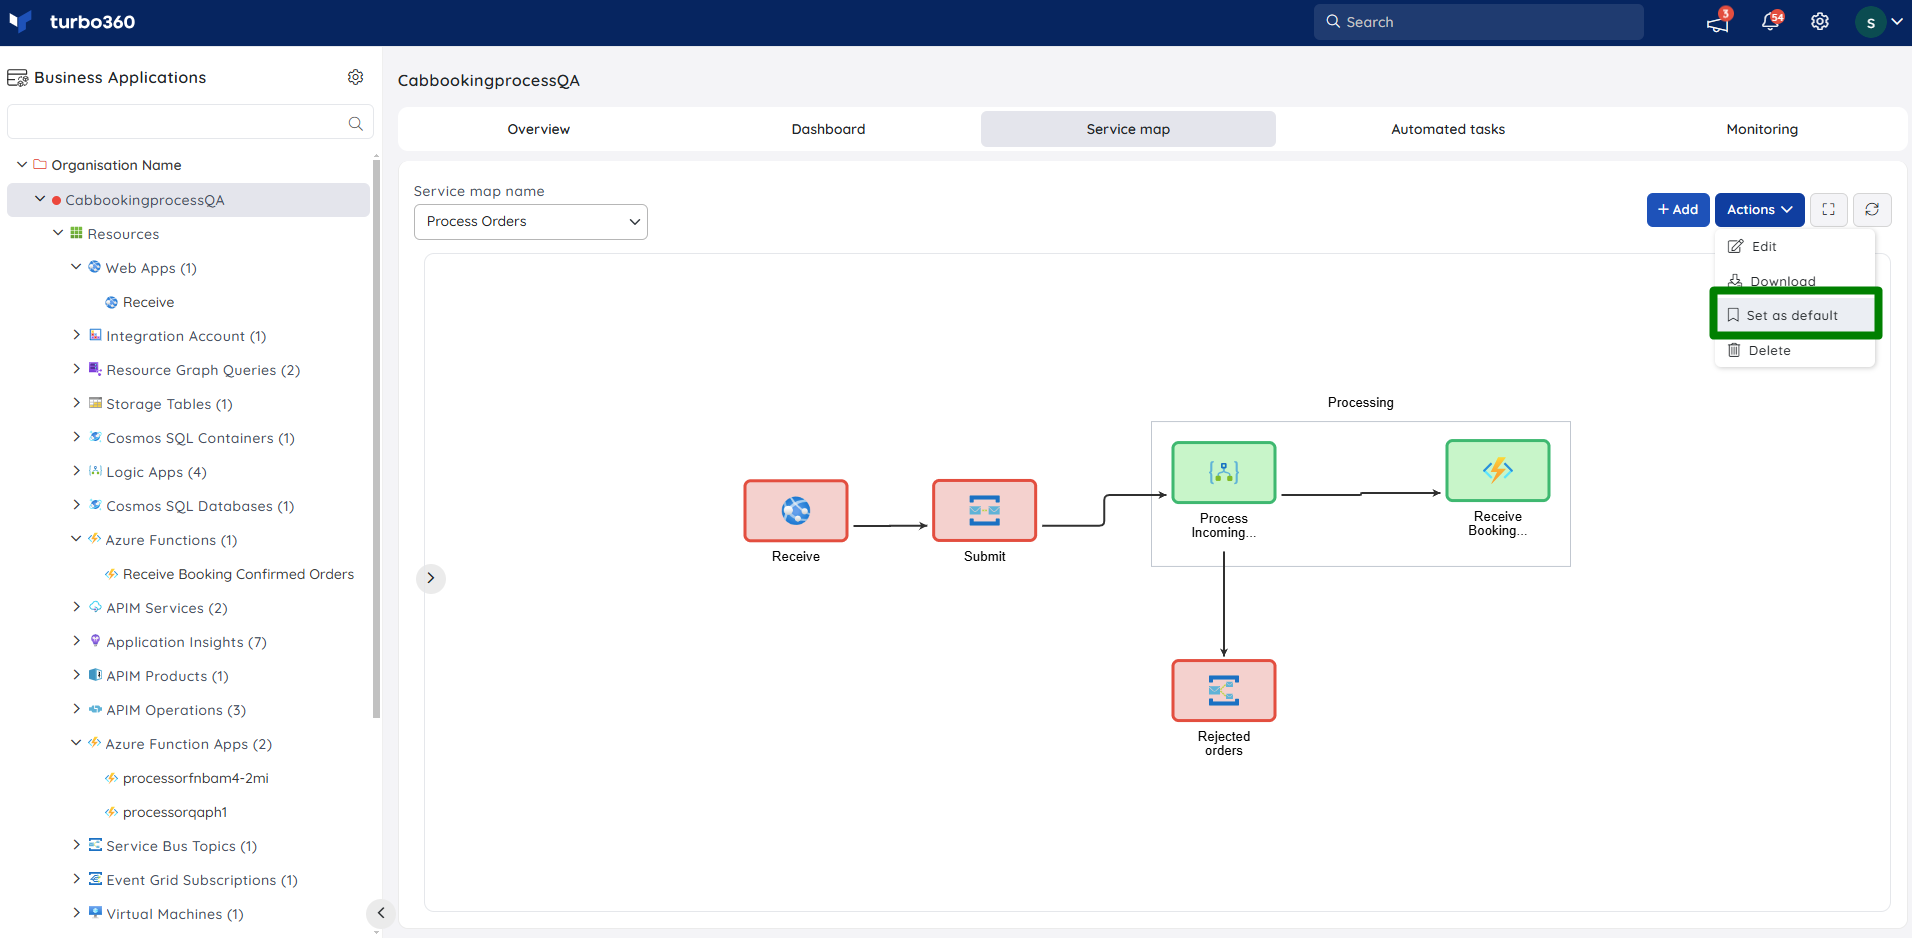
- Click the Actions dropdown on the Service map you want to set as default.
- Select Set as default.
The selected Service map now loads by default whenever you navigate to the Service map section of this Business Application.
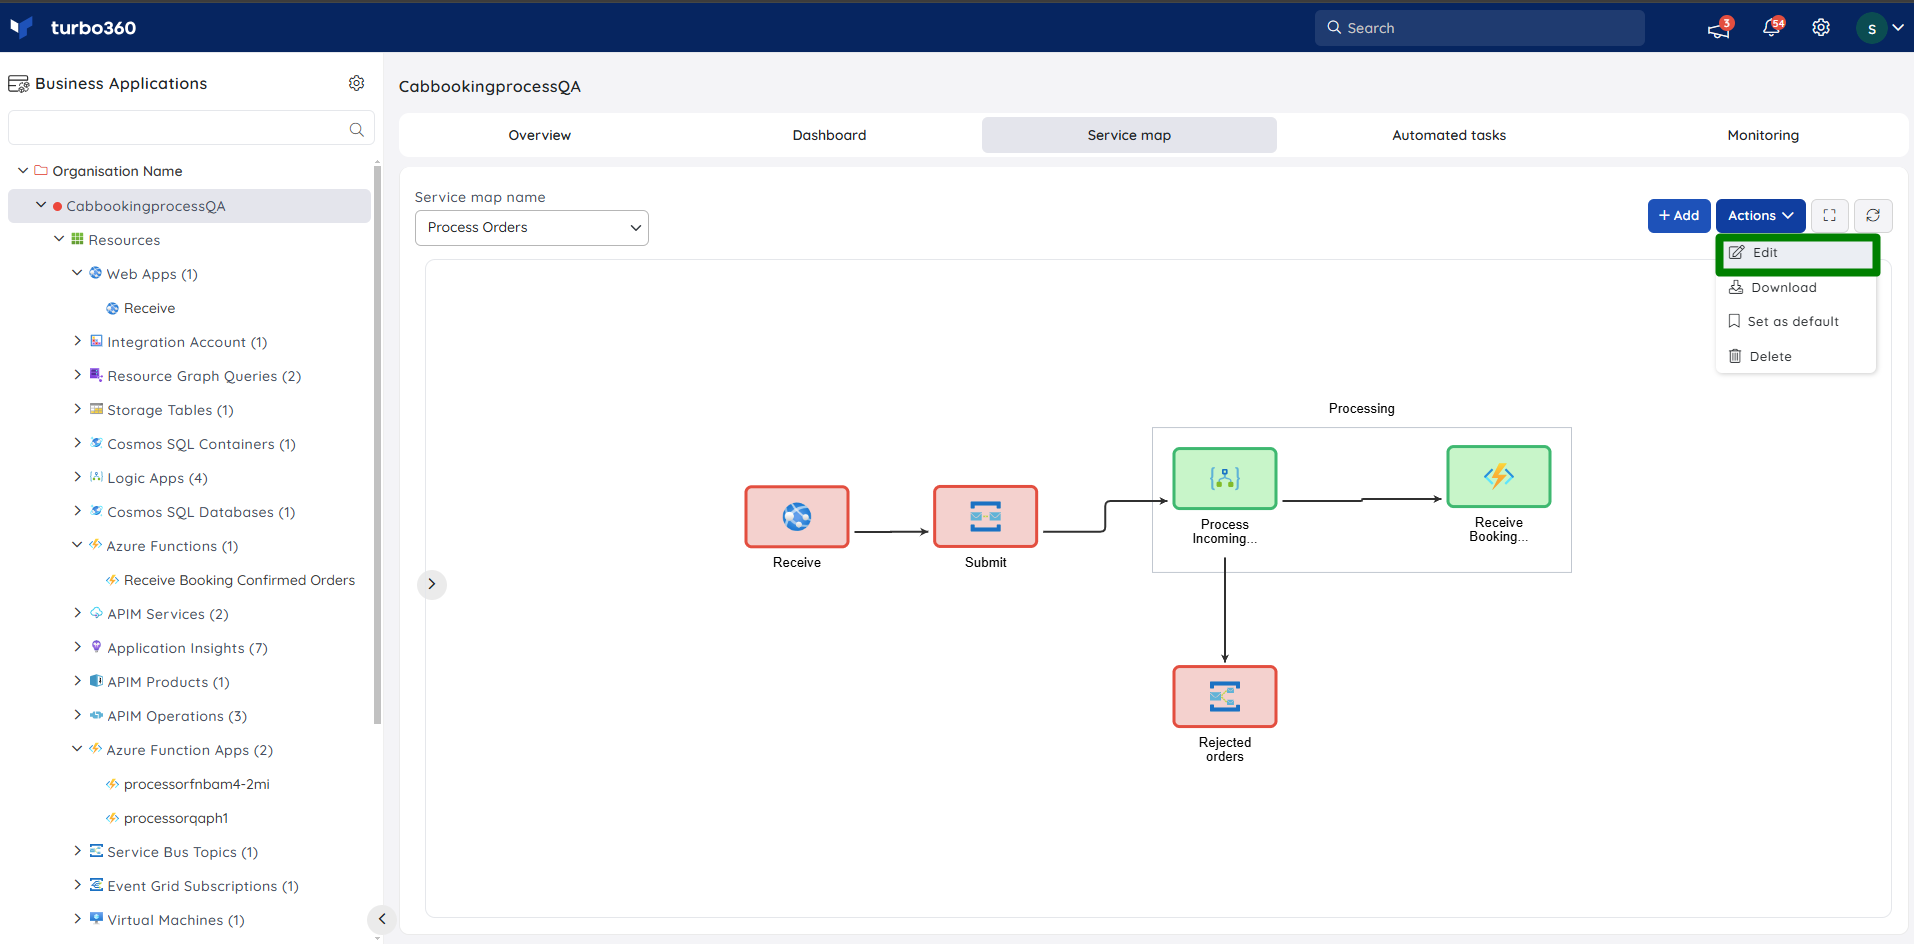
Edit a Service map
Editing a Service map lets you update its name, add or remove resources, adjust the layout, and modify connections.
- Click the Actions dropdown on the Service map you want to modify.
- Select Edit.
- Make the required changes to the name, resource layout, or connections.
- Click Update to save your changes.
Note:
The monitoring state of connected resources is hidden while you are in Edit mode.
Delete a Service map
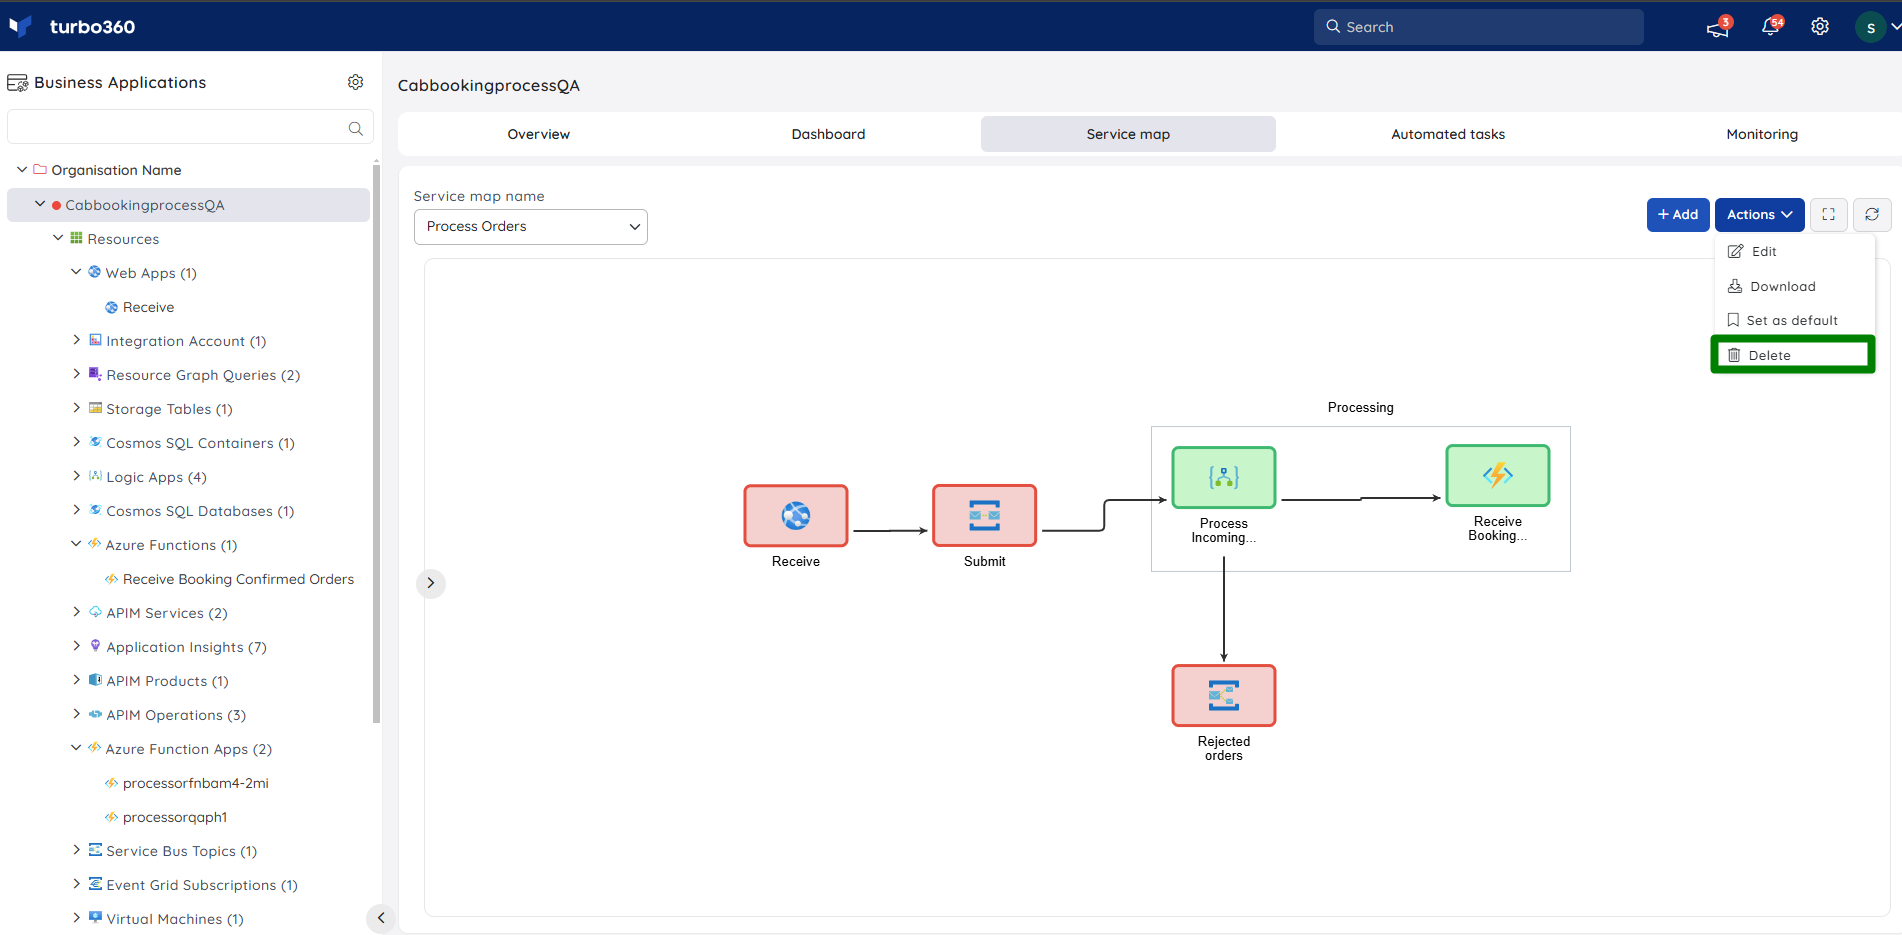
Deleting a Service map permanently removes the diagram and its layout from the Business Application.
- Click the Actions dropdown on the Service map you want to delete.
- Select Delete.
Download a Service map
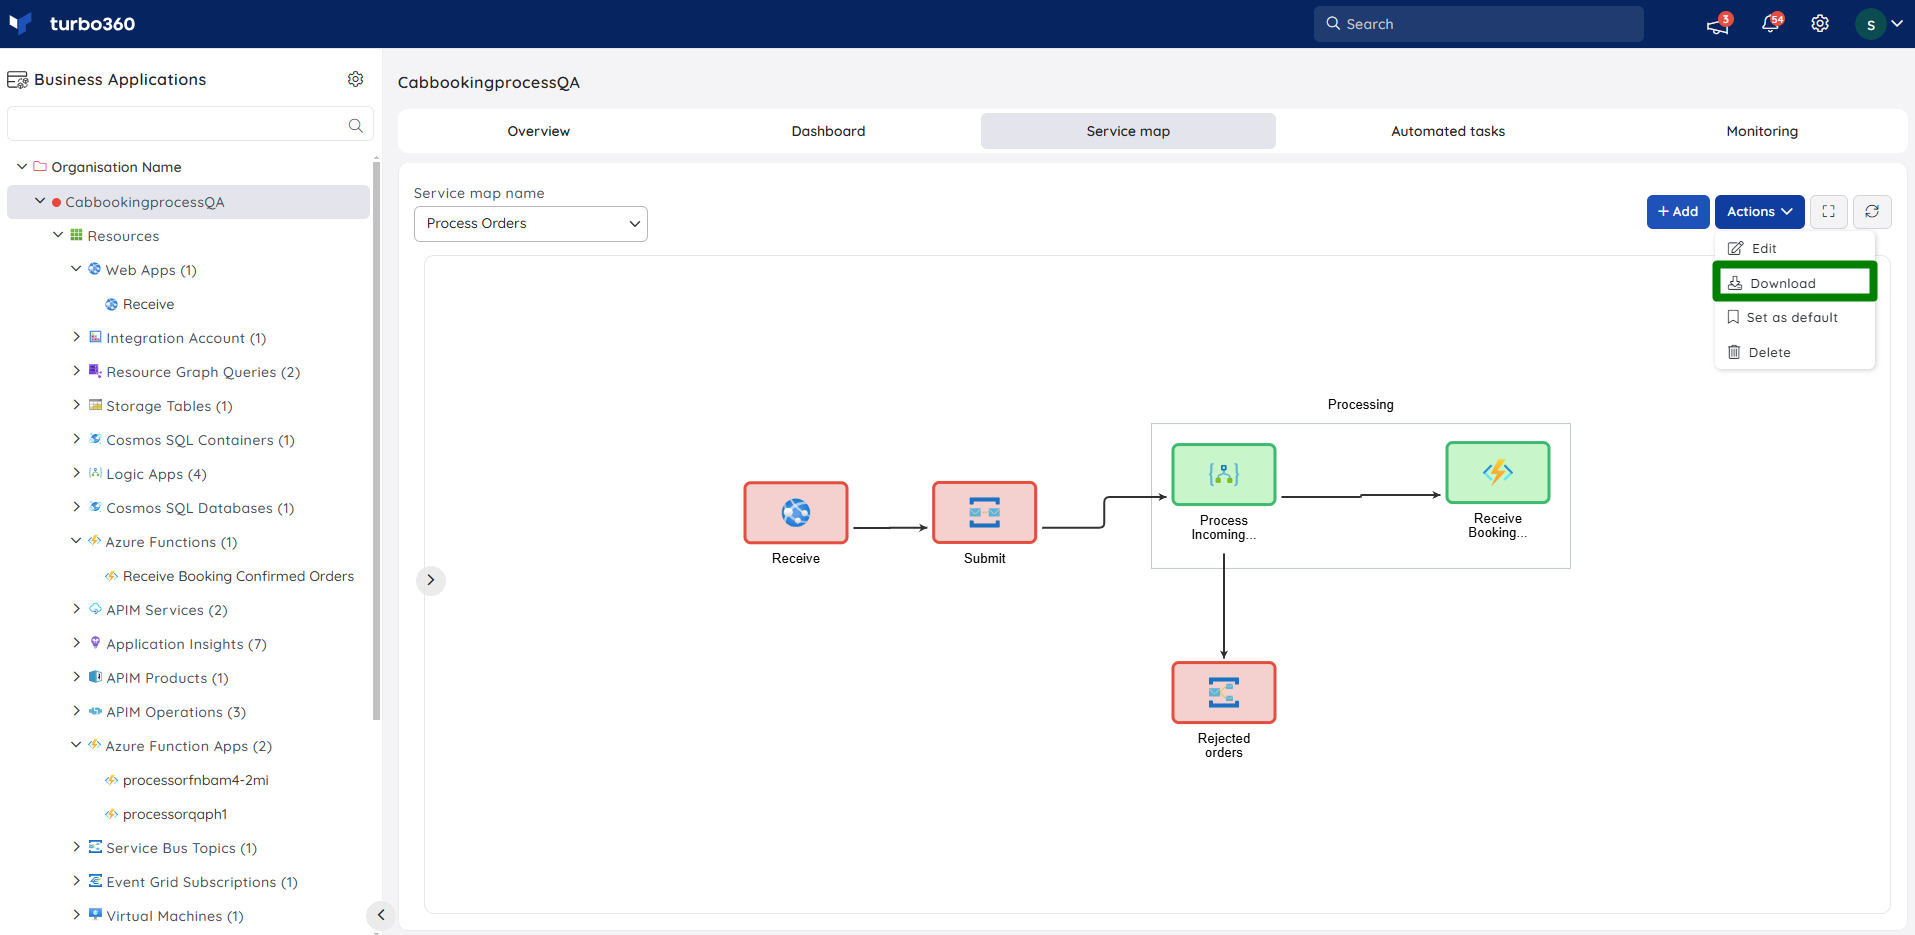
Downloading a Service map saves the current diagram as an SVG file for offline storage, documentation, or sharing.
- Click the Actions dropdown on the Service map you want to download.
- Select Download. The file is saved in SVG format.
Example scenario
A logistics company has a Business Application named Order Fulfilment that includes a Logic App, Service Bus, Azure Functions, and an Azure SQL database. They create three Service maps: one for the inbound order intake flow, one for the warehouse dispatch orchestration, and one for the outbound notification pipeline. Each map is named, grouped by function, and the inbound order intake map is set as the default. When a new Event Grid resource is added to the Business Application, its icon automatically appears on all three Service maps, ready to be connected.
Limitations
- Service map icons reflect the monitoring state at the time the diagram was last saved. The state is not live-updated while the canvas is open.
- Monitoring state is hidden during Edit mode and resumes display after saving.
- Resource links in the resource details blade are unavailable for dissociated resources or resources without the required access permissions.
- Downloaded Service maps are saved in SVG format only.
Troubleshooting
Resource does not appear in the resource pane
Cause: The resource has not been associated with the Business Application.
Fix: Navigate to the Business Application settings and associate the resource first, then return to the Service map.Monitoring state is not updating on the canvas
Cause: The Service map was not saved after the most recent monitoring cycle completed, or you are viewing the map in Edit mode.
Fix: Exit Edit mode and save the diagram. Allow one monitoring cycle to complete for the state to refresh.Actions dropdown options (Edit, Delete, Download) are not visible
Cause: Your role has Read permission for Service map but not Manage permission.
Fix: Contact your Turbo360 administrator to have the Manage permission granted for Service map on your role.Resource icon does not appear after adding a resource to the Business Application
Cause: The Service map was open or cached before the resource was associated.
Fix: Refresh the Service map page. The new resource icon should appear in the resource pane automatically.Set as default option is not available
Cause: Your role does not have Manage permission for Service map.
Fix: Contact your Turbo360 administrator to assign Manage permission for Service map to your role.
Related articles
Was this article helpful?