

Initial setup
- 05 Aug 2026
- 5 Minutes to read
- Print
- DarkLight
- Download PDF
Initial setup
- Updated on 05 Aug 2026
- 5 Minutes to read
- Print
- DarkLight
- Download PDF
Article summary
Did you find this summary helpful?
Thank you for your feedback!
Overview
Cost Analyzer is activated during the Turbo360 onboarding wizard, which launches automatically when a new account logs in for the first time. The wizard walks you through service principal validation, subscription selection, module selection, and per-module configuration in a single guided flow.
This article covers the Cost Analyzer-specific steps within the wizard.
Business value
- Activate Cost Analyzer and connect your Azure subscriptions in a single guided session
- Control exactly which resource groups Cost Analyzer can access from day one
- Choose how many months of historical billing data to import during setup
Prerequisites
Before starting the wizard, ensure the following are in place:
- Active Turbo360 account
- Azure App Registration (service principal) with Reader and Billing Reader access on the target subscriptions
- Tenant ID, Client ID, and Client secret available
Required permissions
| Permission | Scope | Purpose |
|---|---|---|
| Reader | Azure subscription | Allows Cost Analyzer to retrieve billing data |
| Billing Reader | Azure subscription | Required for Cost Analyzer cost data access |
Dependencies
- Active Azure subscription connected to Turbo360
- Service principal configured with the correct permissions
How it works
The onboarding wizard runs through five steps. Cost Analyzer is configured in step 3 — Module setup, after you have validated your service principal and selected your subscriptions in steps 1 and 2.
During the Cost Analyzer setup step, you choose which resource groups to include and how many months of historical cost data to import. You can select specific resource groups to scope Cost Analyzer's access, or skip selection to grant full access across all resources in the selected subscriptions.
Once setup is complete, Cost Analyzer immediately begins importing historical billing data for all connected subscriptions.
Steps
Step 1 — Validate service principal and select subscriptions
When the wizard launches, enter your service principal credentials and validate them. Then select the Azure subscriptions you want to connect to Turbo360.
The subscriptions you choose here determine which resources and resource groups are available throughout the rest of the wizard, including the Cost Analyzer setup step.
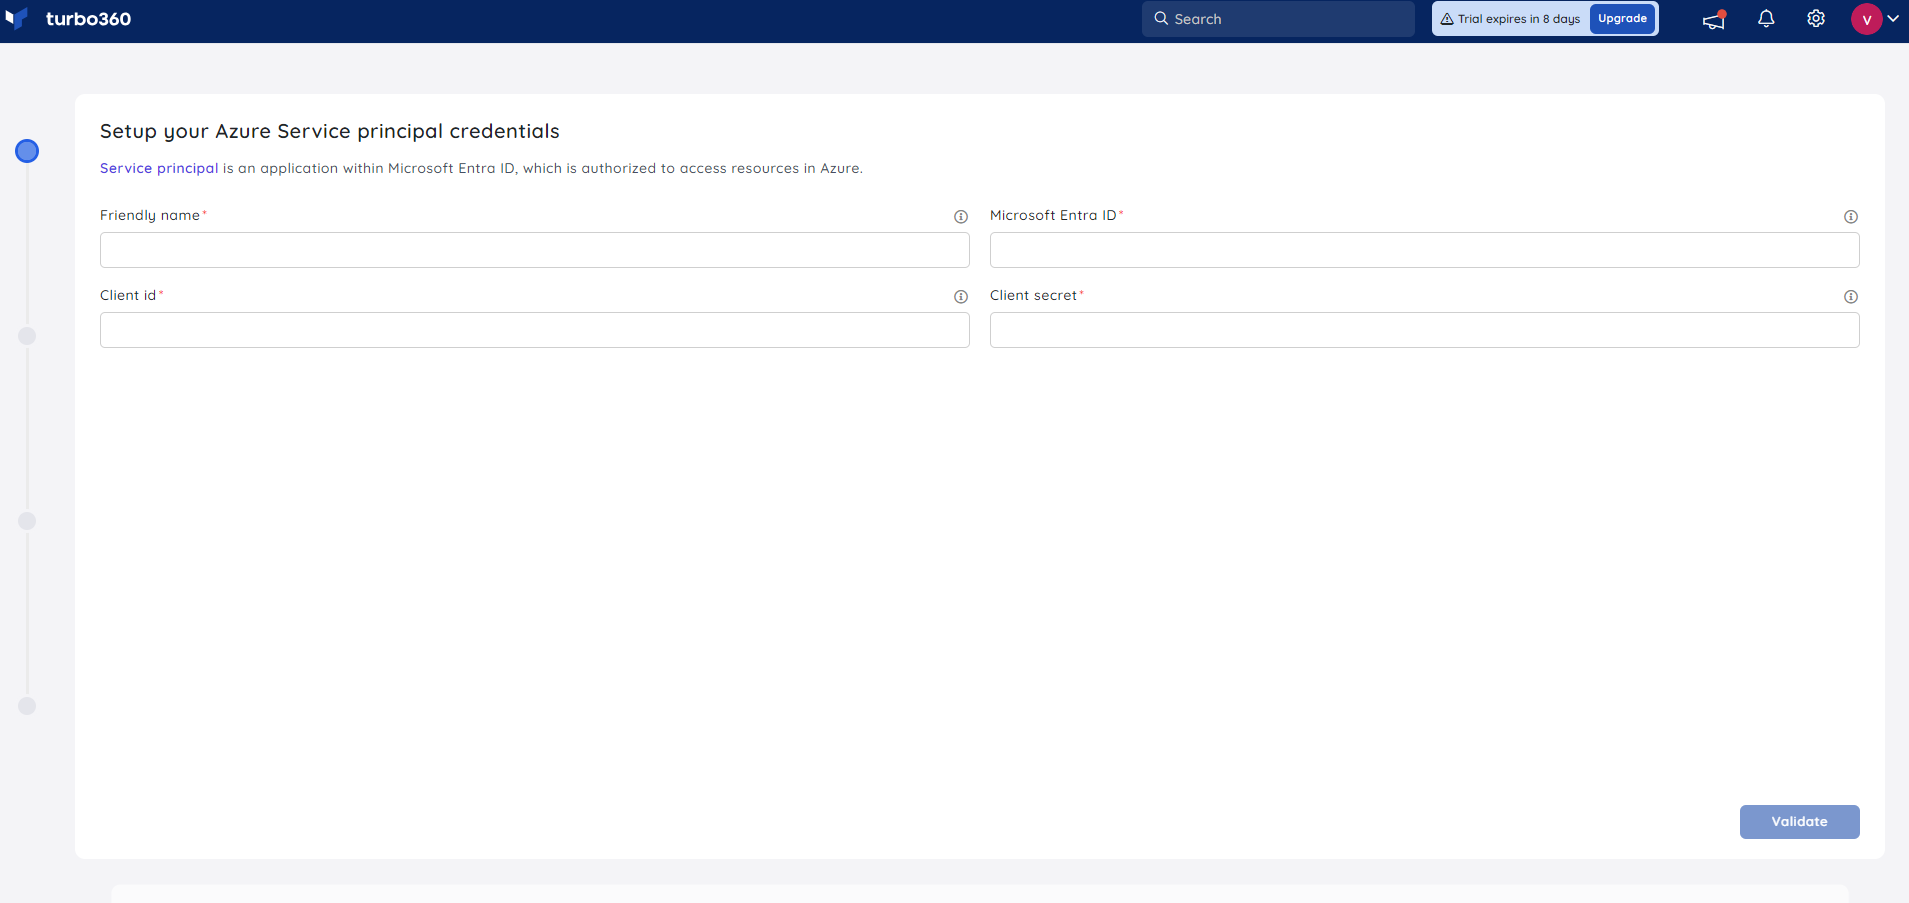
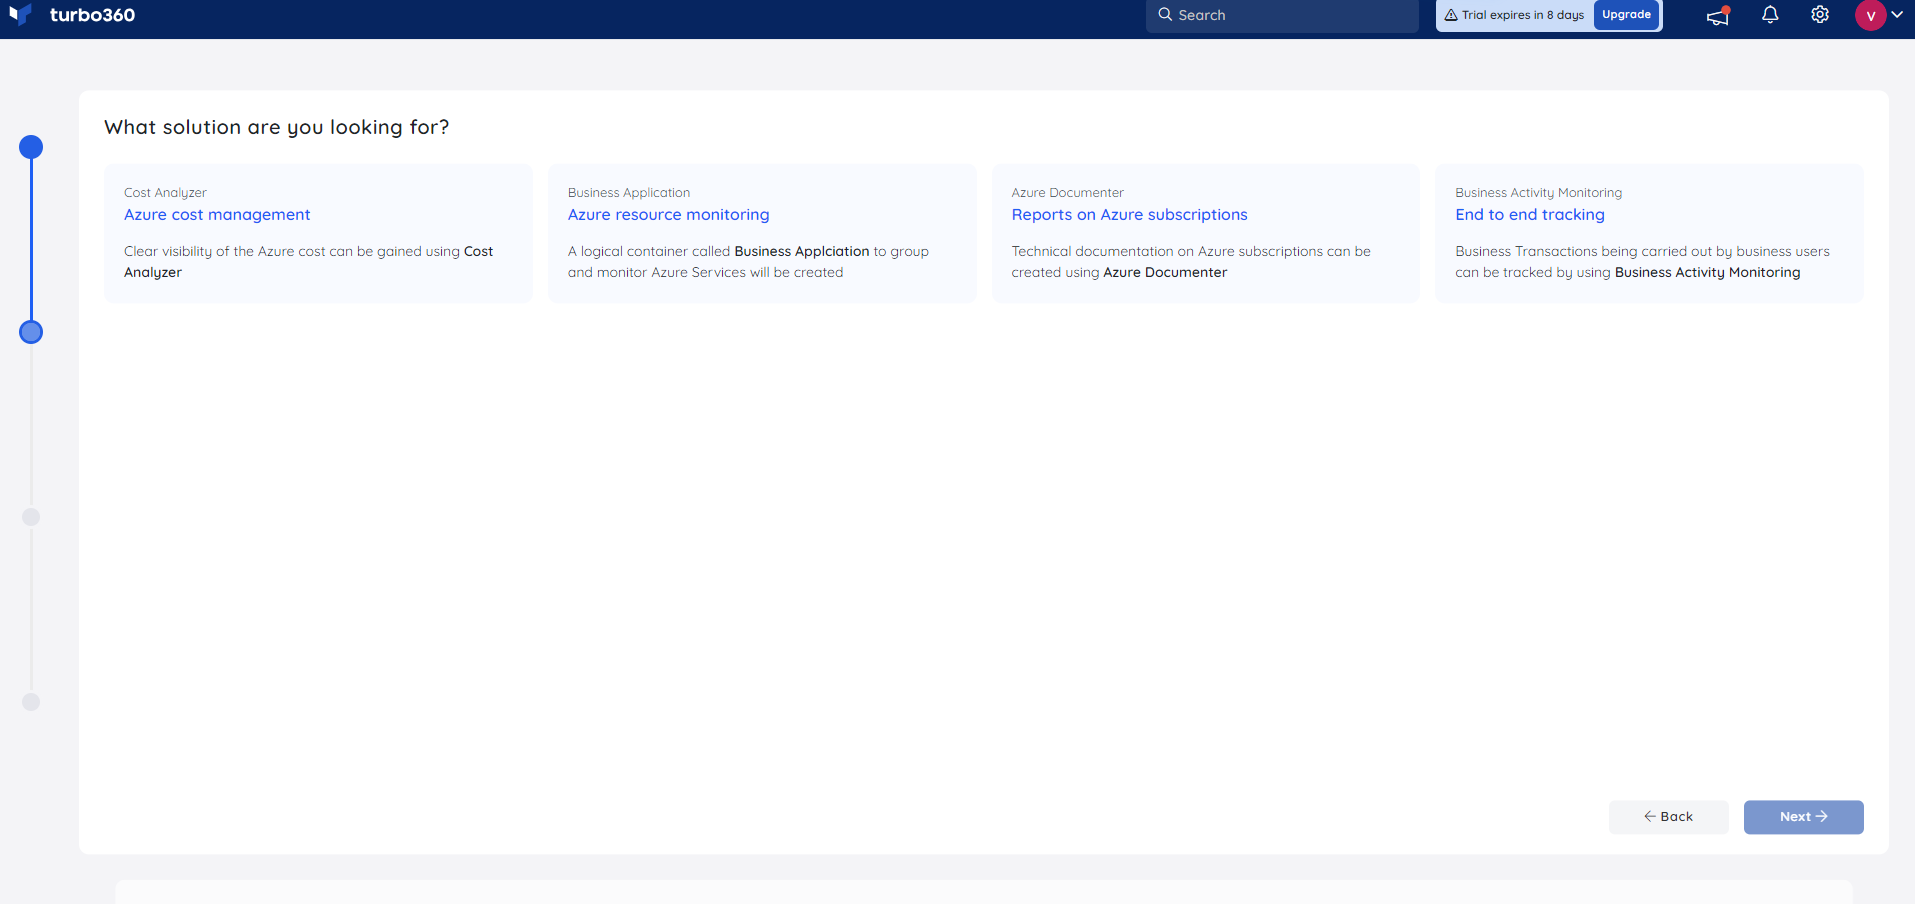
Step 2 — Select Cost Analyzer module in Onboarding
Select Cost Analyzer from the list of available modules. You can activate additional modules in the same session or return to activate them later from the Turbo360 Home screen.
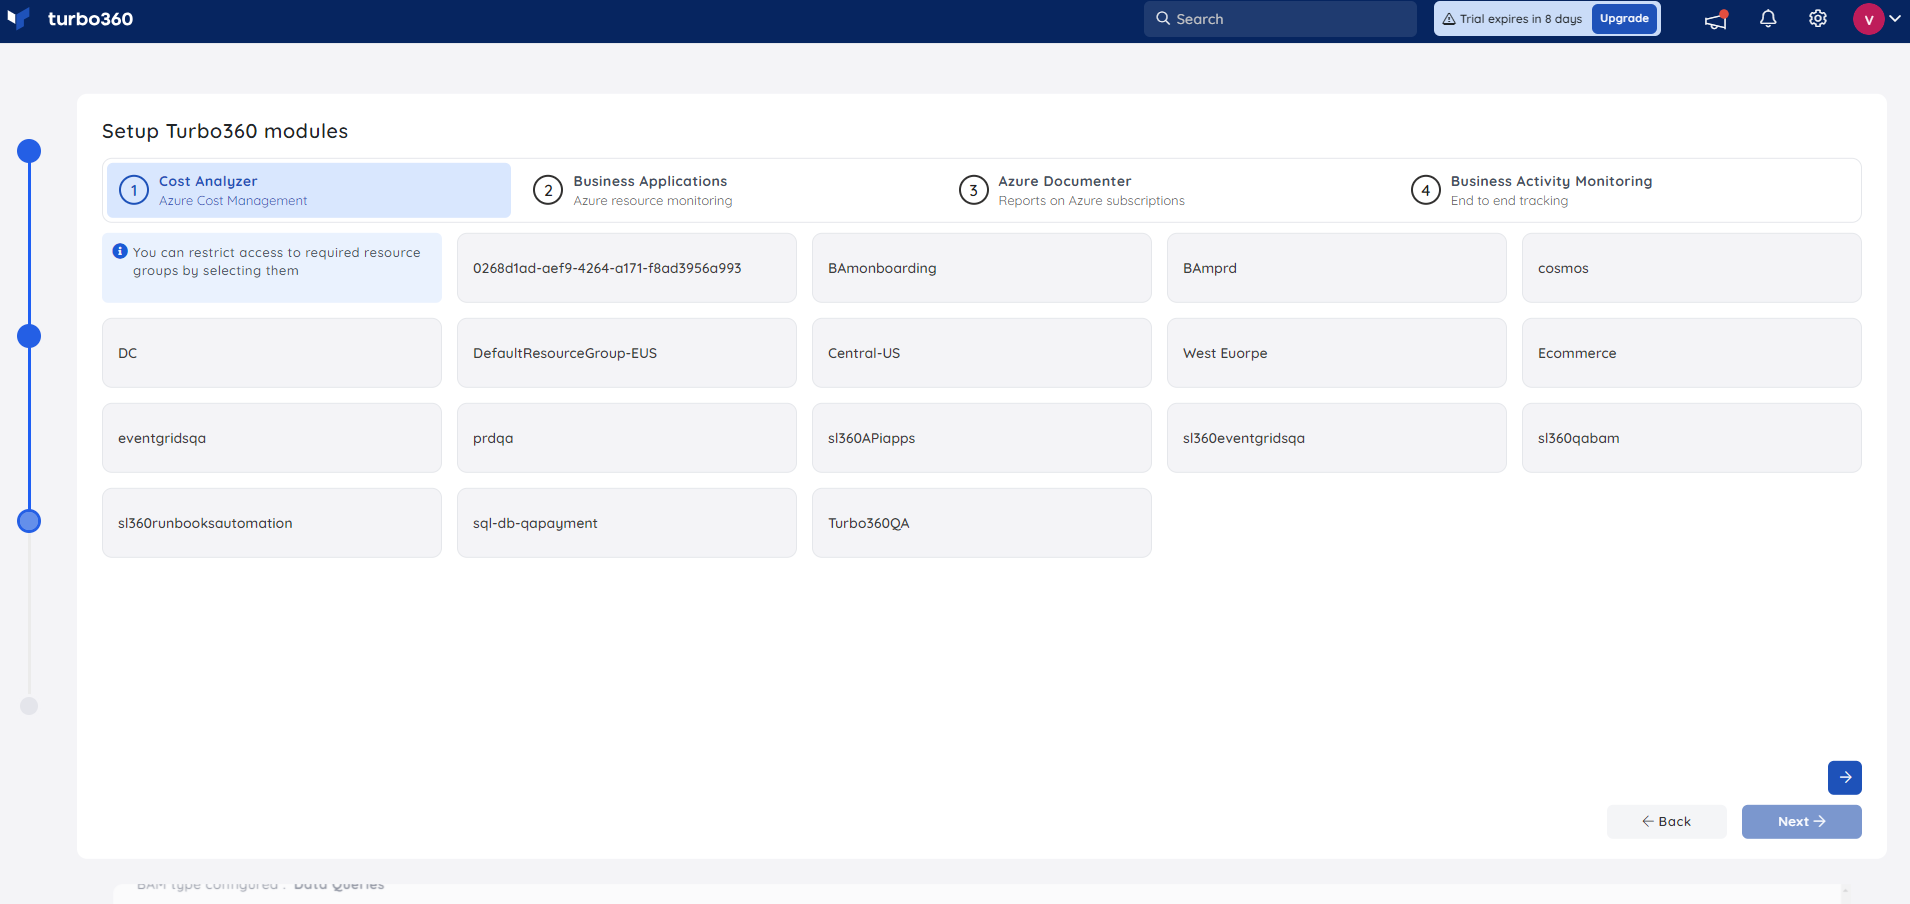
Step 3 — Configure Cost Analyzer
Two configuration options are presented during this step:
Resource group selection — Select the resource groups you want Cost Analyzer to access within the selected subscriptions. To grant full access to all resources across the selected subscriptions, skip this selection.
Historical data import — Select the number of months of historical cost data to import. Cost Analyzer supports up to 12 months. Selecting fewer months reduces the initial import time.
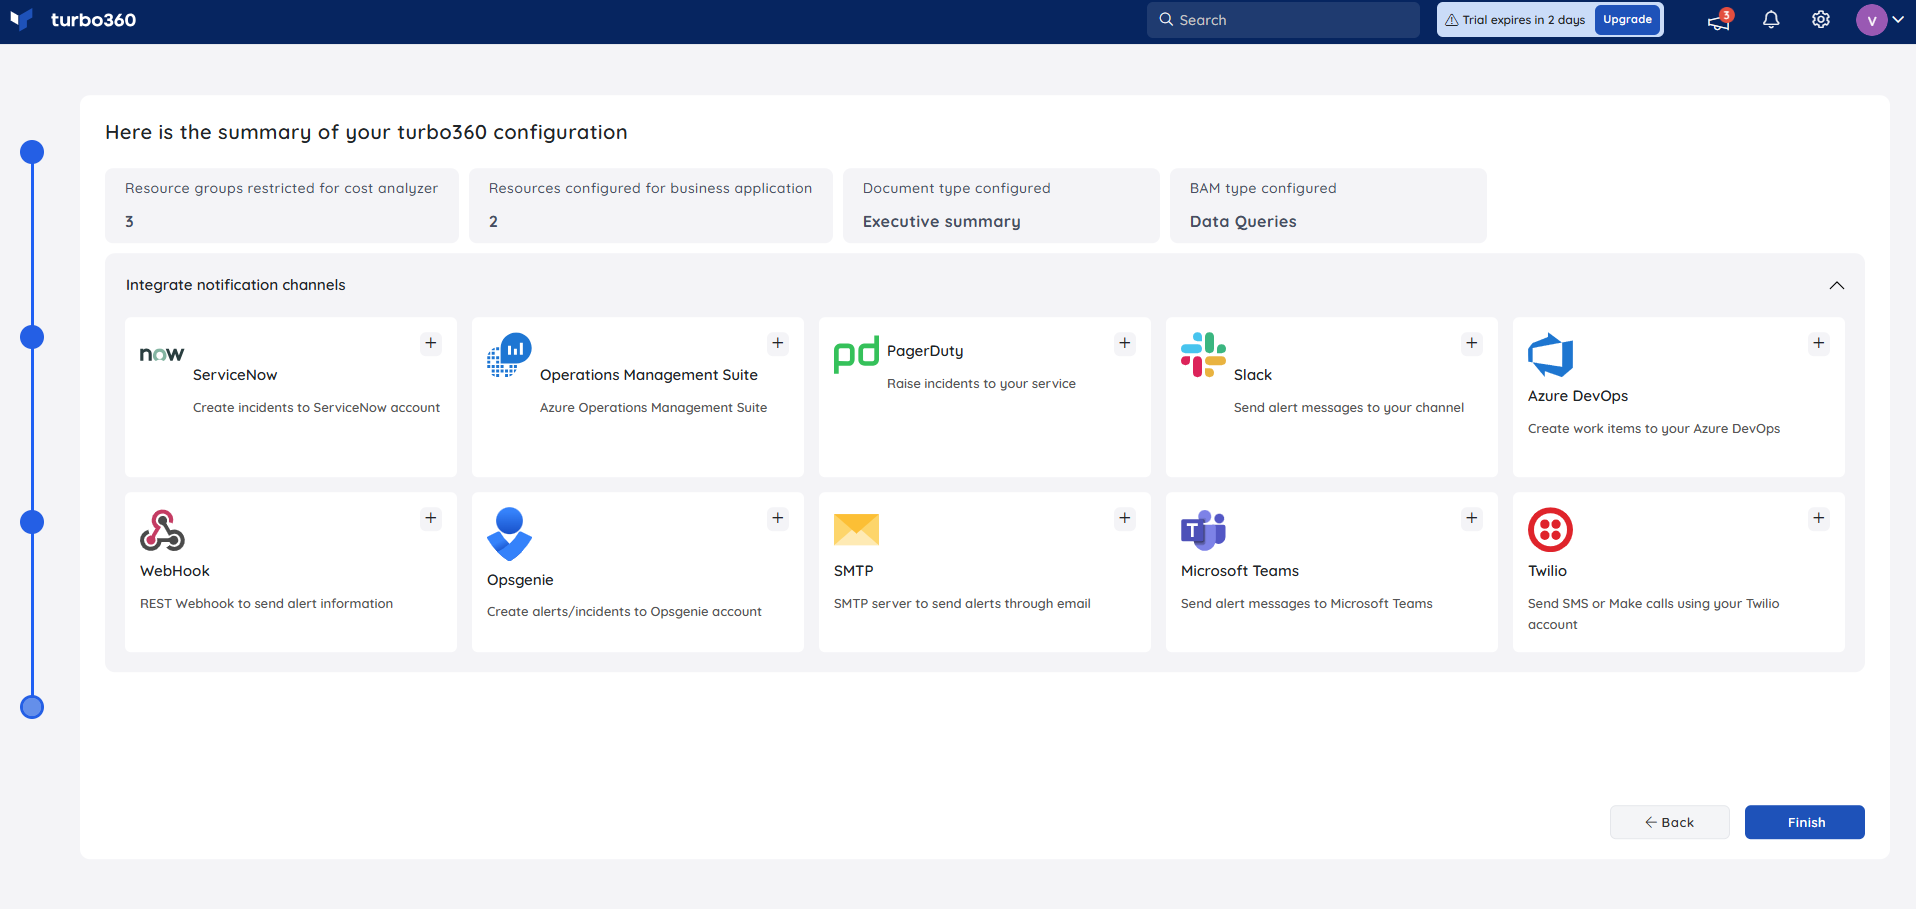
Step 4 — Configure notification channels
Set up your preferred notification services for alerts. A summary of all configured modules is shown for review before you proceed.
Step 5 — Finish setup
Click Finish. Turbo360 provisions your account within seconds. Cost Analyzer begins importing billing data for all connected subscriptions immediately.
Configuration
| Option | Description |
|---|---|
| Service principal | App Registration with Reader and Billing Reader access on target subscriptions |
| Subscription selection | The Azure subscriptions to connect. Scopes all Cost Analyzer data and resource visibility. |
| Resource group selection | Specific resource groups within the selected subscriptions, or full subscription access if skipped. |
| Historical data import | Number of months of historical cost data to import. Maximum is 12 months. Can be updated after setup via Cost imports > Settings. |
| Notification channels | Preferred services for alert and notification delivery. |
Permission behavior
With Account owner access: You can complete the onboarding wizard, configure Cost Analyzer, and select resource groups.
Without Account owner access: You cannot access the onboarding wizard. Contact your Turbo360 administrator to complete setup.
Example scenario
A cloud administrator signs up for Turbo360. The wizard launches on first login. They validate their service principal, select two Azure subscriptions, activate Cost Analyzer, select three specific resource groups, choose to import 6 months of historical data, configure email notifications, and click Finish. Cost Analyzer begins pulling billing data immediately. They later expand the scope by updating the service principal access policy from within Cost Analyzer.
Limitations
- Resource group options are limited to what the service principal has access to at the time of setup.
- To expand subscription or resource group access after setup, update the service principal access policy from within Cost Analyzer under Settings > Service principals.
- Cost Analyzer imports a maximum of 12 months of historical billing data. The months setting can be updated after setup via Cost imports > Settings.
- Data availability depends on Azure Cost Management sync cycles and can be delayed by up to 24 hours.
Troubleshooting
Service principal validation fails
Cause: The Tenant ID, Client ID, or Client secret may be incorrect, or the service principal lacks the required permissions.
Fix: Verify all three values are correct and confirm the service principal has Reader and Billing Reader access on the target subscriptions.No subscriptions appear in the selection step
Cause: The service principal does not have access to any subscriptions.
Fix: Assign the required roles on at least one subscription in Azure, then retry.Resource groups are missing in the Cost Analyzer step
Cause: The selected subscription may have no resource groups, or the service principal lacks permission to list them.
Fix: Confirm resource groups exist and the service principal has list access.Setup does not complete after clicking Finish
Cause: A background provisioning step may have failed.
Fix: Refresh the page and check module status. If Cost Analyzer is not active, contact Turbo360 support.Billing data is not appearing after setup
Cause: Azure Cost Management data can lag by up to 24 hours.
Fix: Wait for the first sync cycle before investigating further.
FAQs
Does the wizard appear every time I log in?
No. The wizard launches only on first login for a new account, or when a new account is created from Manage Accounts in a SaaS environment.Can I activate Cost Analyzer after skipping it during setup?
Yes. Click Get started on the Cost Analyzer card from the Turbo360 Home screen to activate it at any time.Can I change the resource group selection after setup?
Yes. Update the service principal access policy from within Cost Analyzer under Settings > Service principals to modify subscription and resource group access.What if I skip resource group selection during setup?
Cost Analyzer is granted full access to all resources in the selected subscriptions. You can narrow this scope later by updating the service principal configuration.Can I change the number of months imported after setup?
Yes. Go to Cost imports, click the three-dot menu in the top right, and select Settings. Enter the number of previous months to import and click Save.
Related articles
Was this article helpful?