

Creating your first Business Application
- 05 Aug 2026
- 4 Minutes to read
- Print
- DarkLight
- Download PDF
Creating your first Business Application
- Updated on 05 Aug 2026
- 4 Minutes to read
- Print
- DarkLight
- Download PDF
Article summary
Did you find this summary helpful?
Thank you for your feedback!
Overview
A Business Application is a logical container that groups Azure resources — such as Service Bus, Logic Apps, Event Hubs, Event Grid, and Azure Function Apps — that together form a line-of-business solution. Resources can span different Azure subscriptions, regions, and resource groups within a single Business Application.
Business value
Business Applications give you a single pane of glass across distributed Azure resources. Instead of monitoring each resource independently, you can track health, configure alerts, and manage automated tasks at the application level — reducing operational overhead and accelerating incident response.
Prerequisites
- A Turbo360 account with an active organization
- An Azure subscription connected to Turbo360
- A service principal with access to the Azure resources you want to associate
Required permissions
You must have the Account owner, Owner or Contributor role in Turbo360 to create a Business Application.
How it works
Turbo360 provides a step-by-step wizard that guides you through creating a Business Application. The wizard collects the application name, service principal, subscription scope, resource selection, monitoring rules, and alert settings in sequence. Once you complete all steps and confirm the summary, Turbo360 provisions the Business Application and begins monitoring the associated resources.
Steps
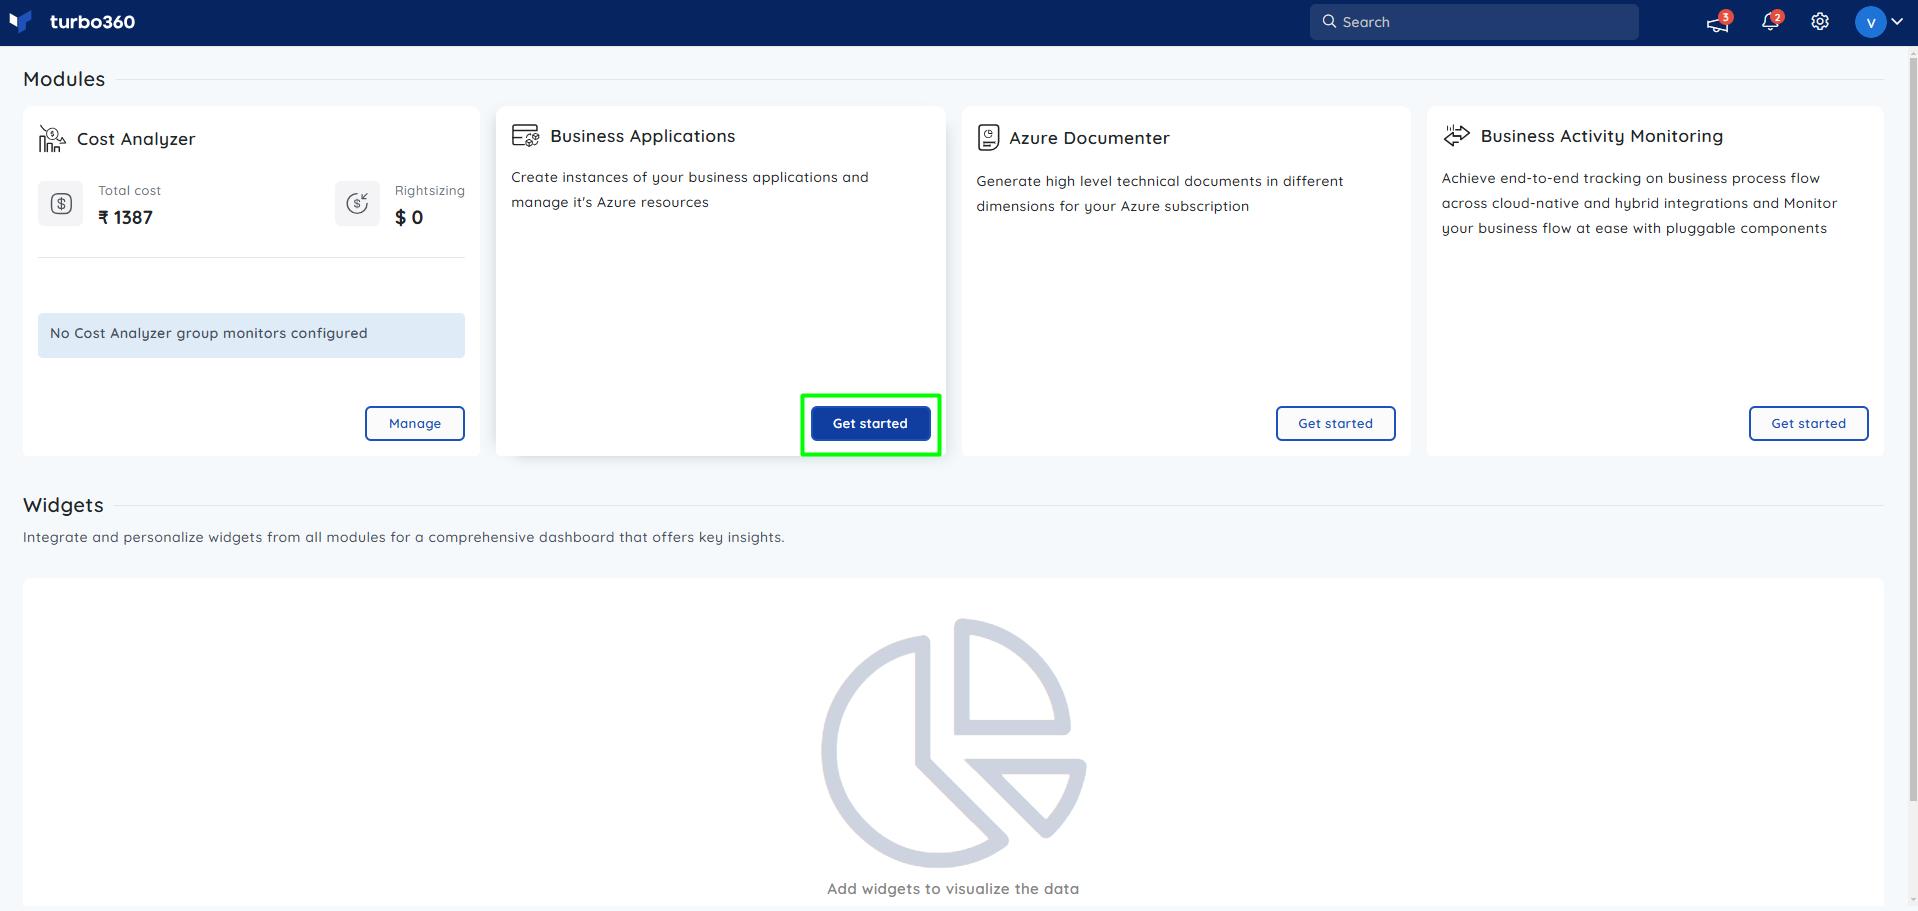
Go to the Turbo360 home screen and click Get Started in the Business Applications module.
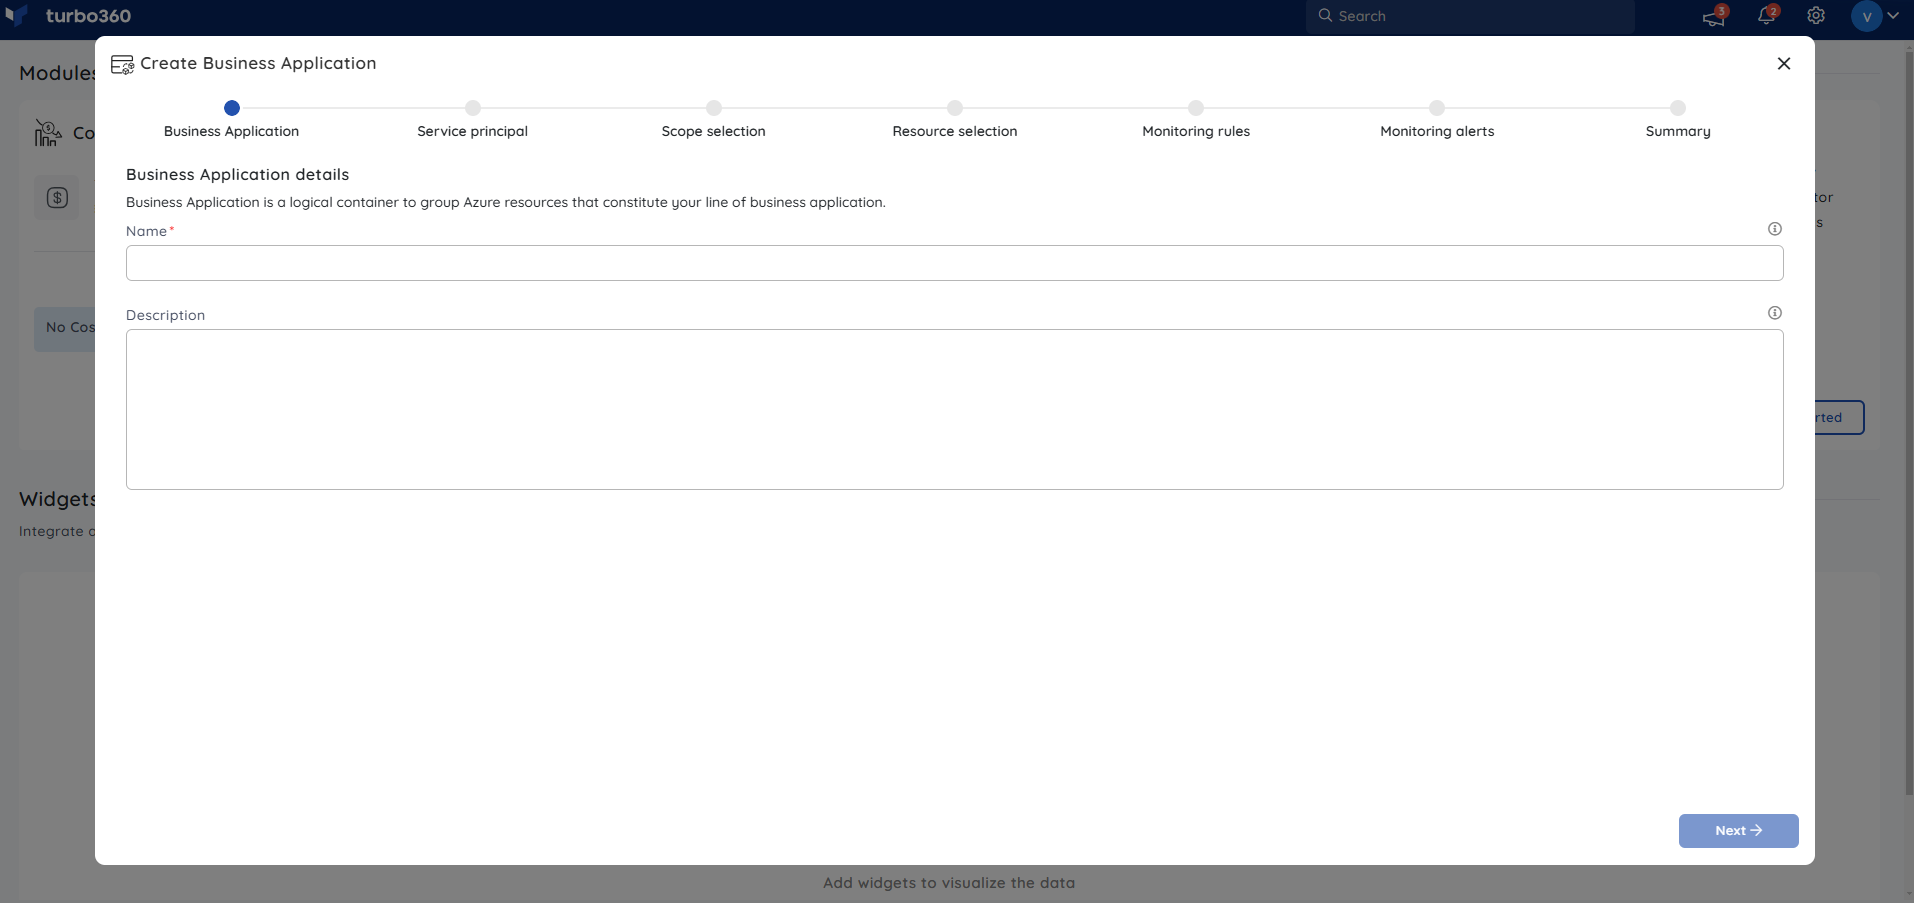
Enter the Business Application Name. Under Service Principal information, either add a new service principal or deselect Add new Service Principal and choose a previously configured service principal from another module.
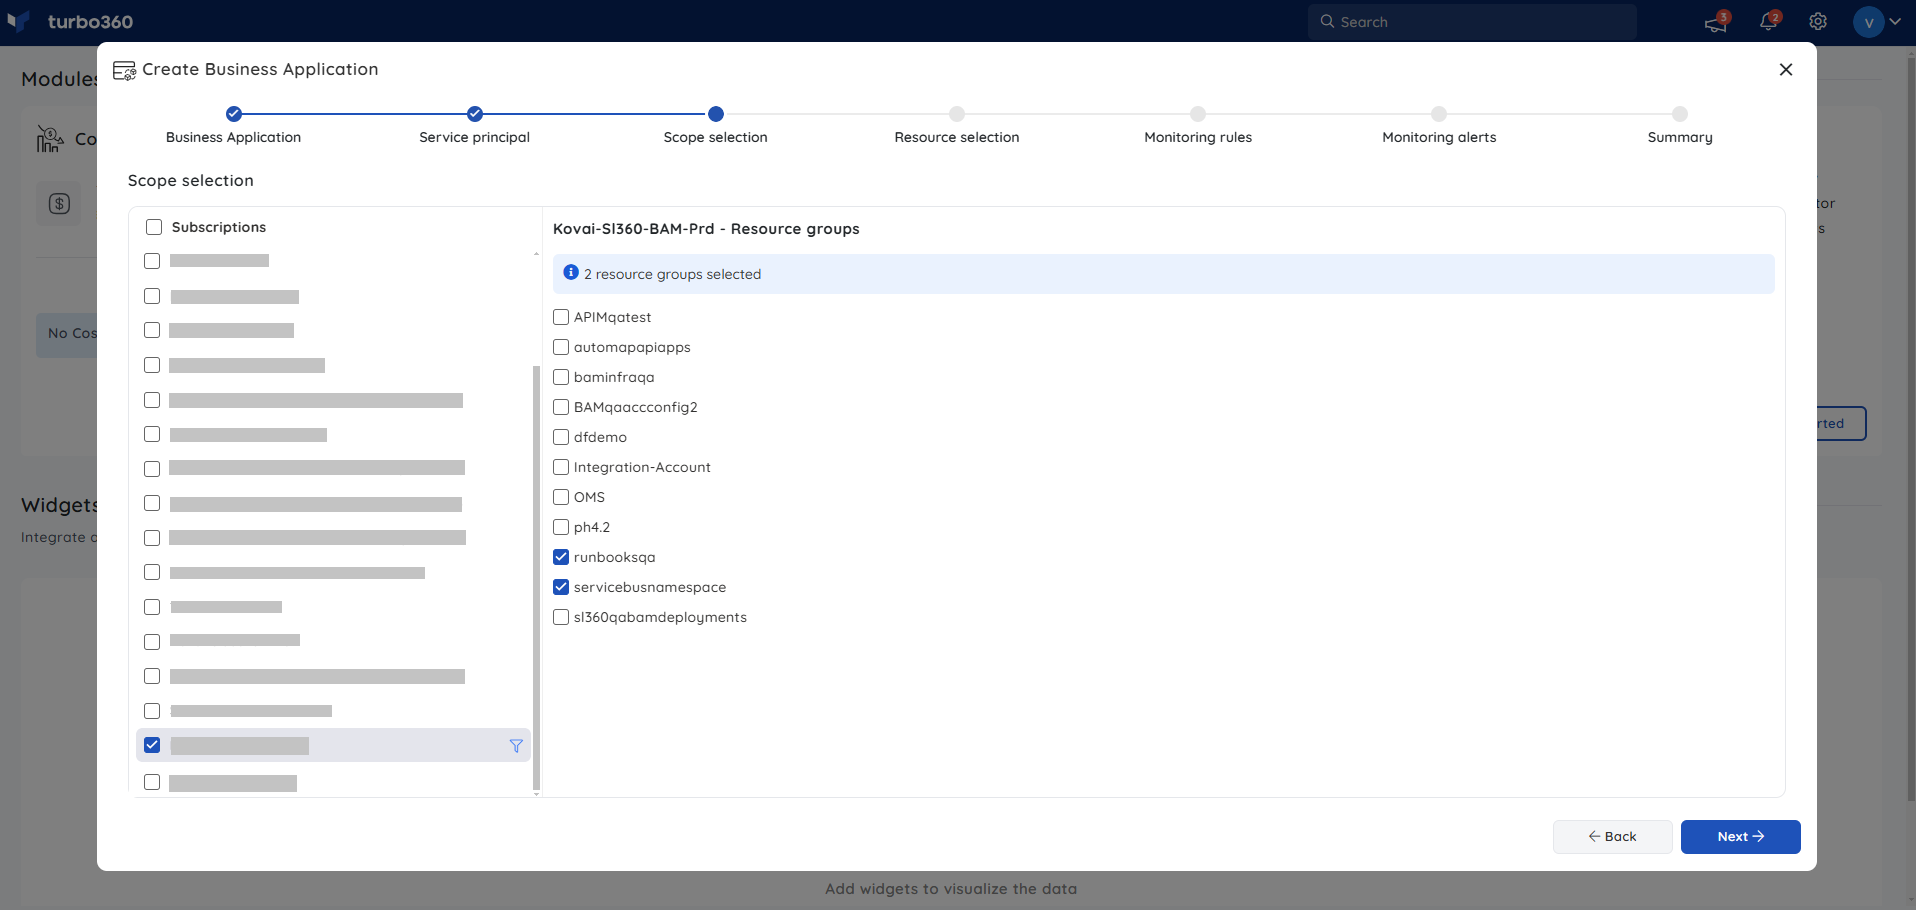
Define the access scope for the service principal. Enable the checkbox next to the subscription to grant access to all resource groups within it, or expand the subscription and select specific resource groups to restrict scope to those resource groups only.
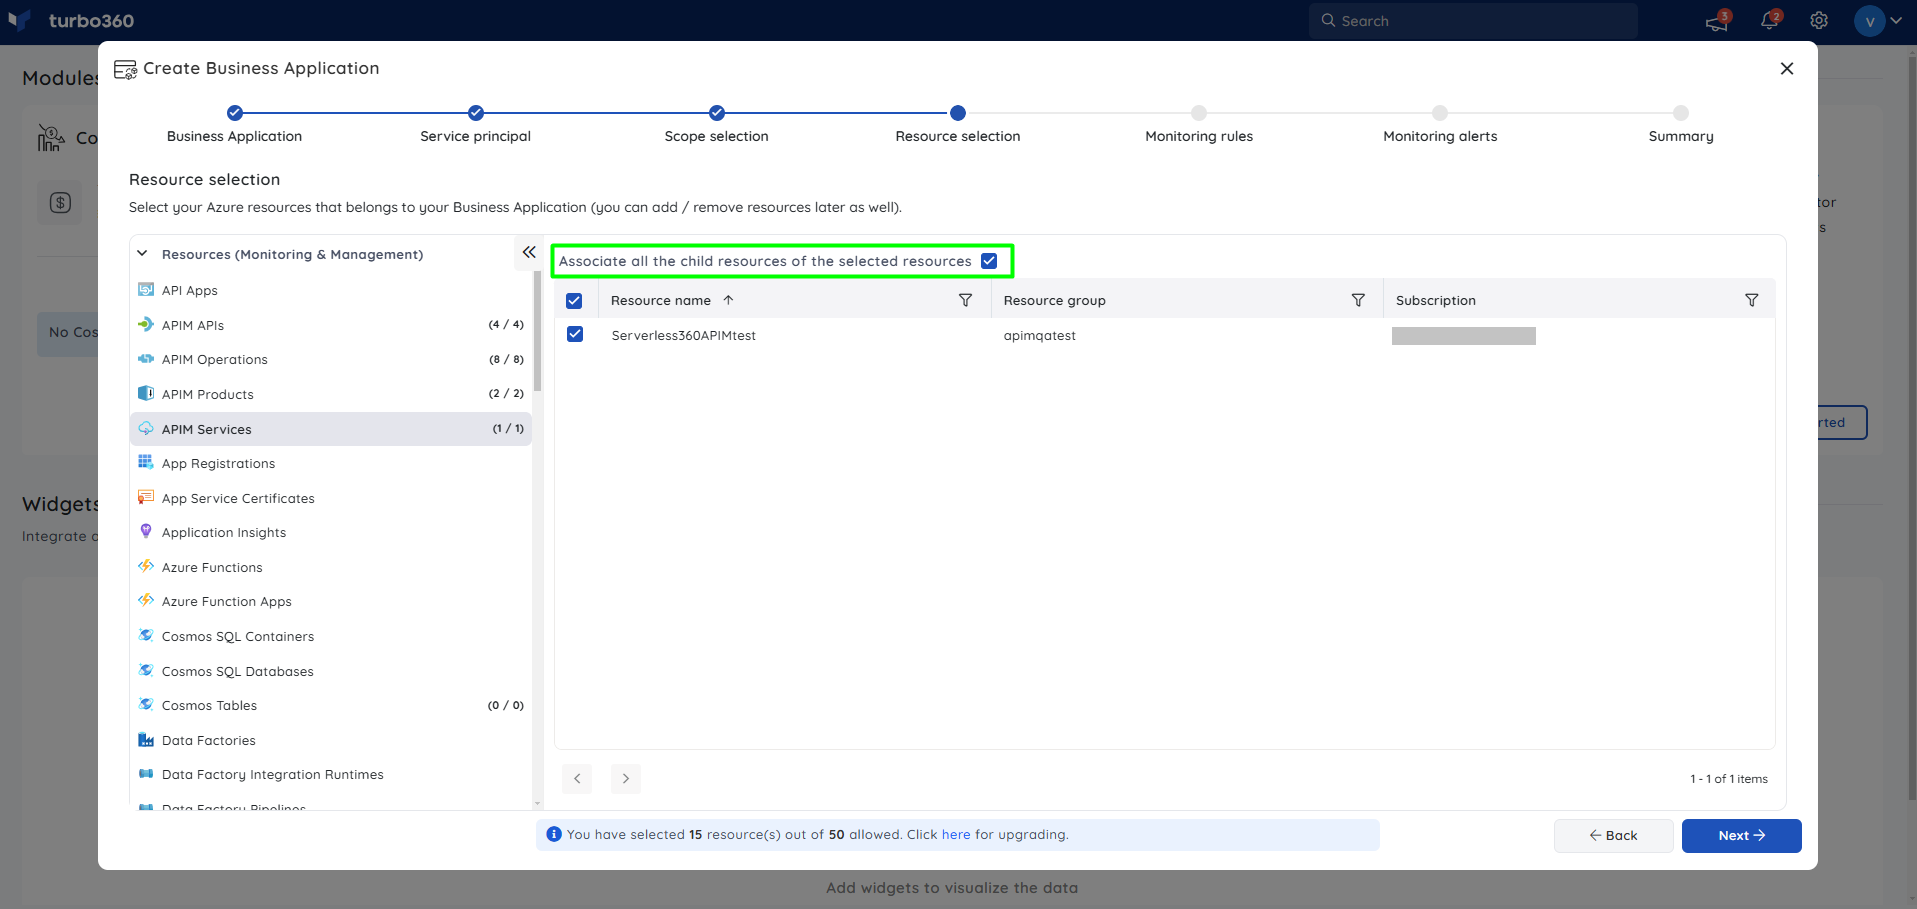
Select the Azure resources to associate with the Business Application. Click a parent resource type to pre-load its child resource types. Use the Associate all the child resources of the selected resources checkbox to select all child resources at once. Click Next to proceed.
To view the full list of supported parent and child resource types, see Supported Azure resources.
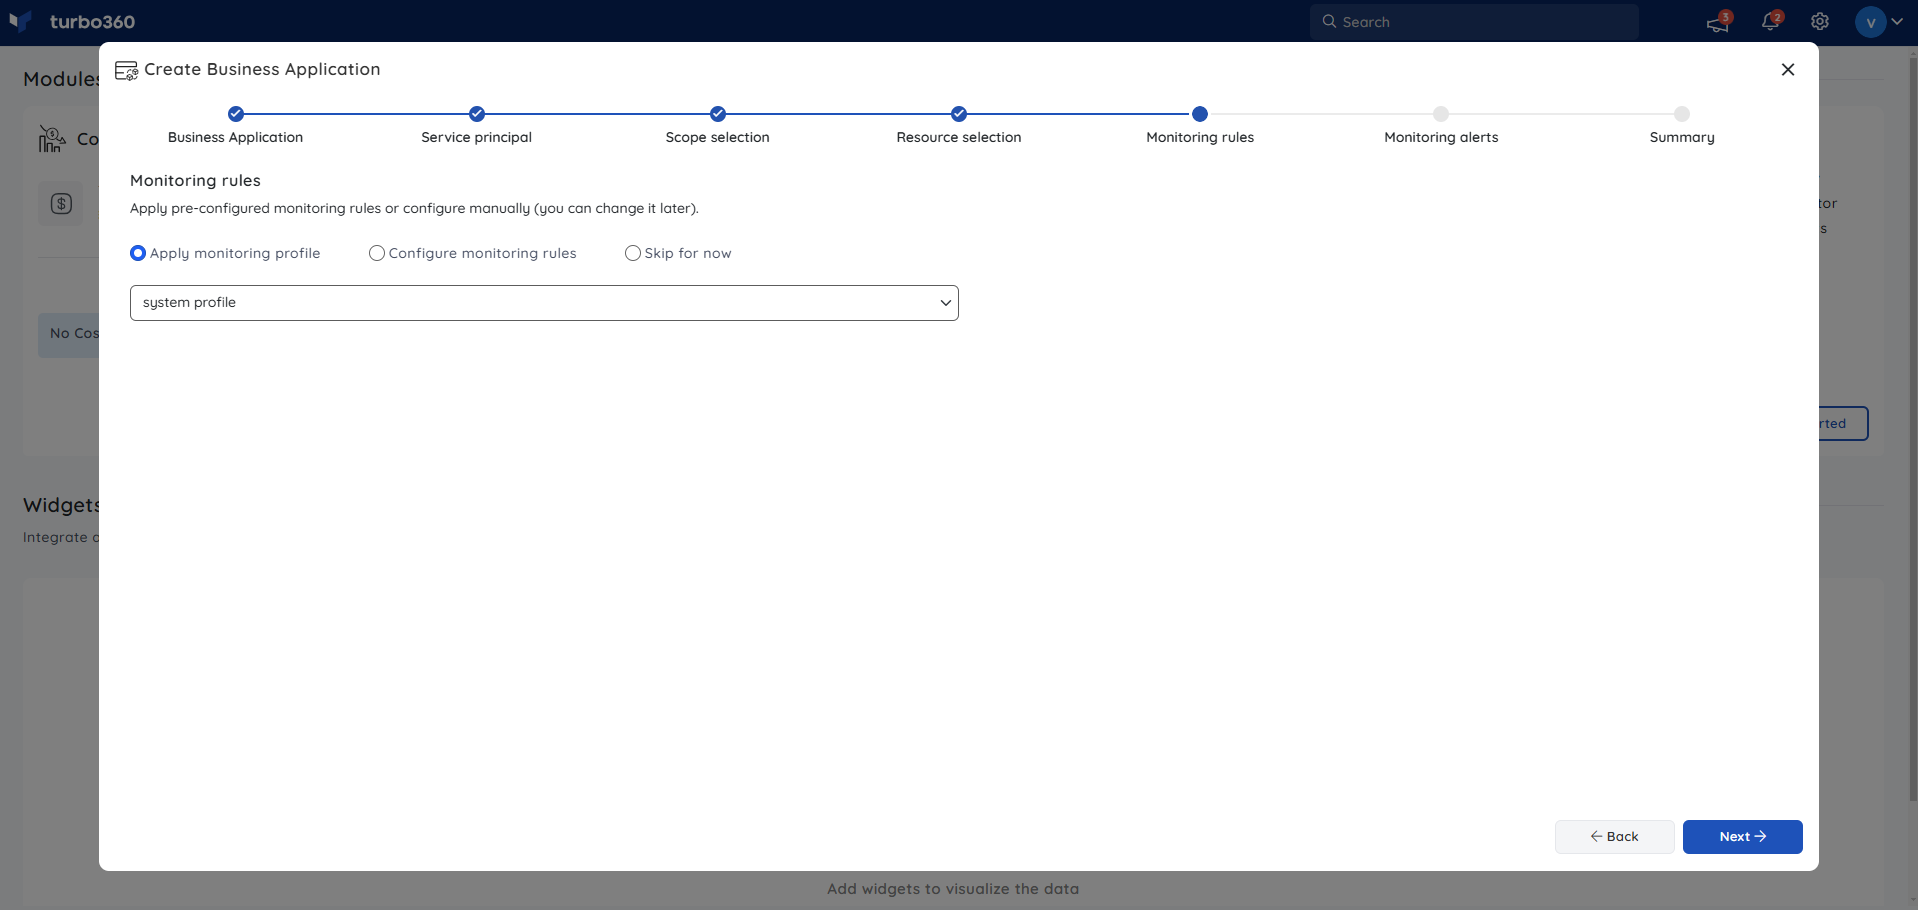
In the Monitoring rules section, apply a monitoring profile, configure monitoring rules for individual resources, or select Skip for now if you do not want to configure monitoring at this stage.
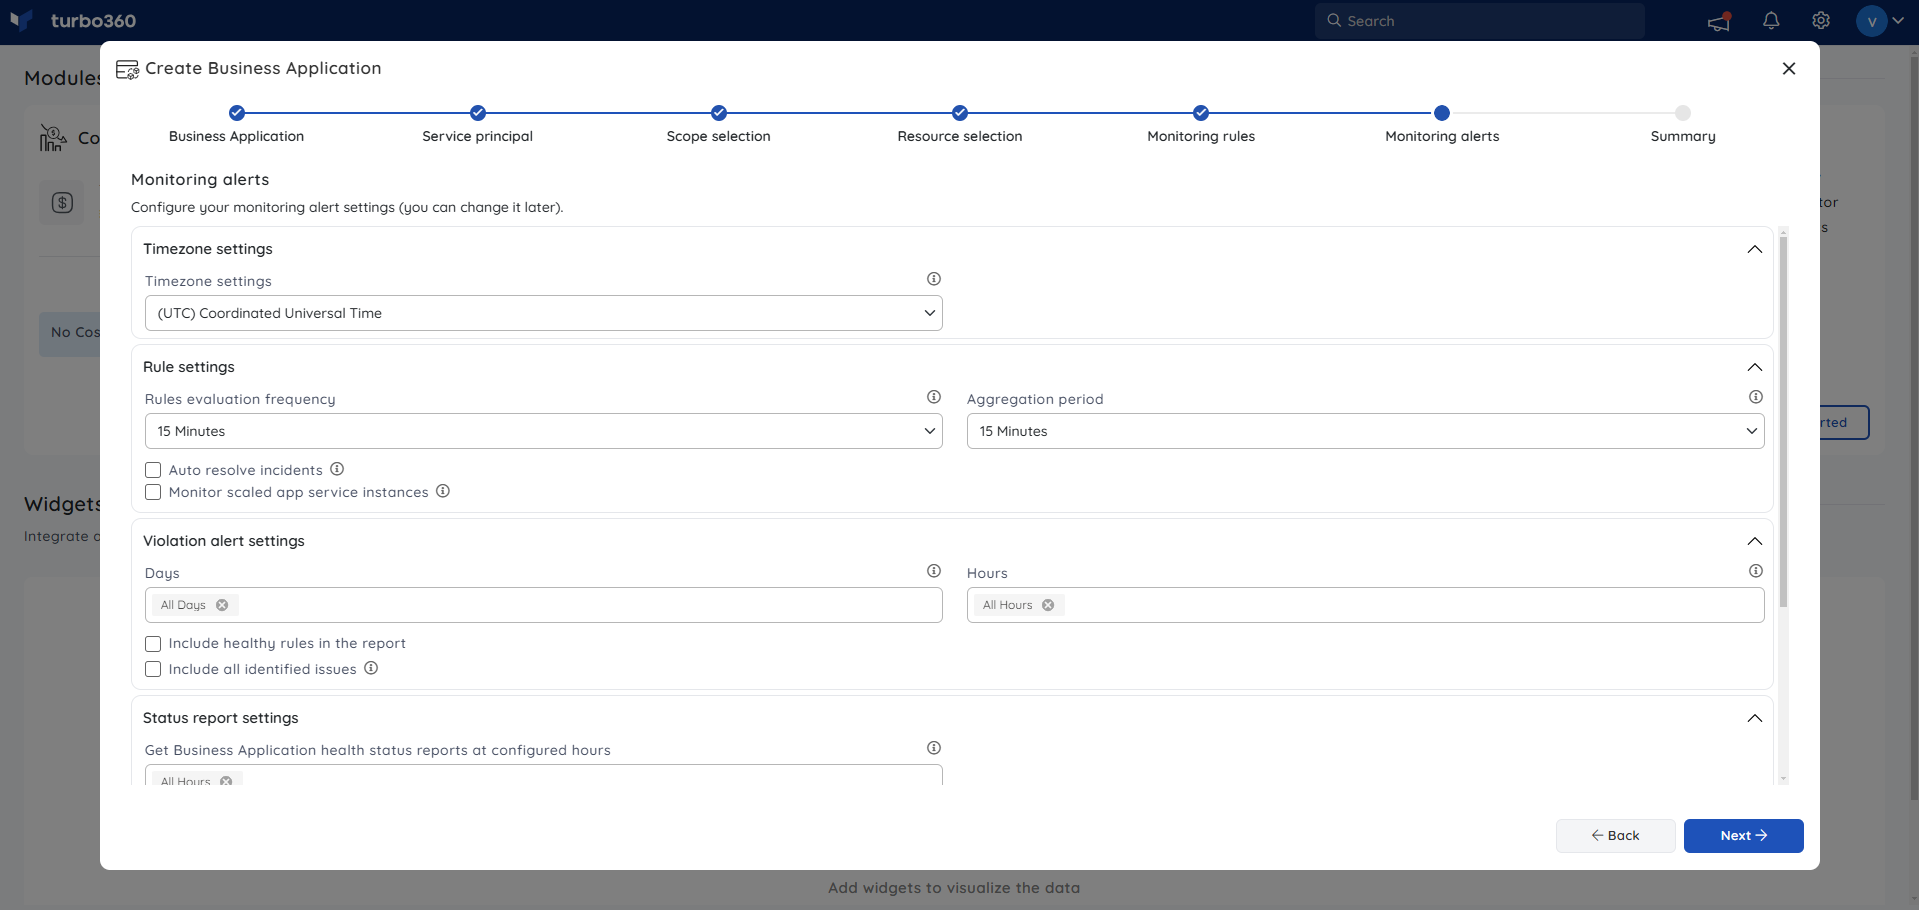
In the Monitoring alerts section, configure alert settings to receive violation alerts and status reports. Set the schedule for when the monitor should evaluate and notify.
Review the configuration summary. Verify all details, then click Create Business Application to complete the process.
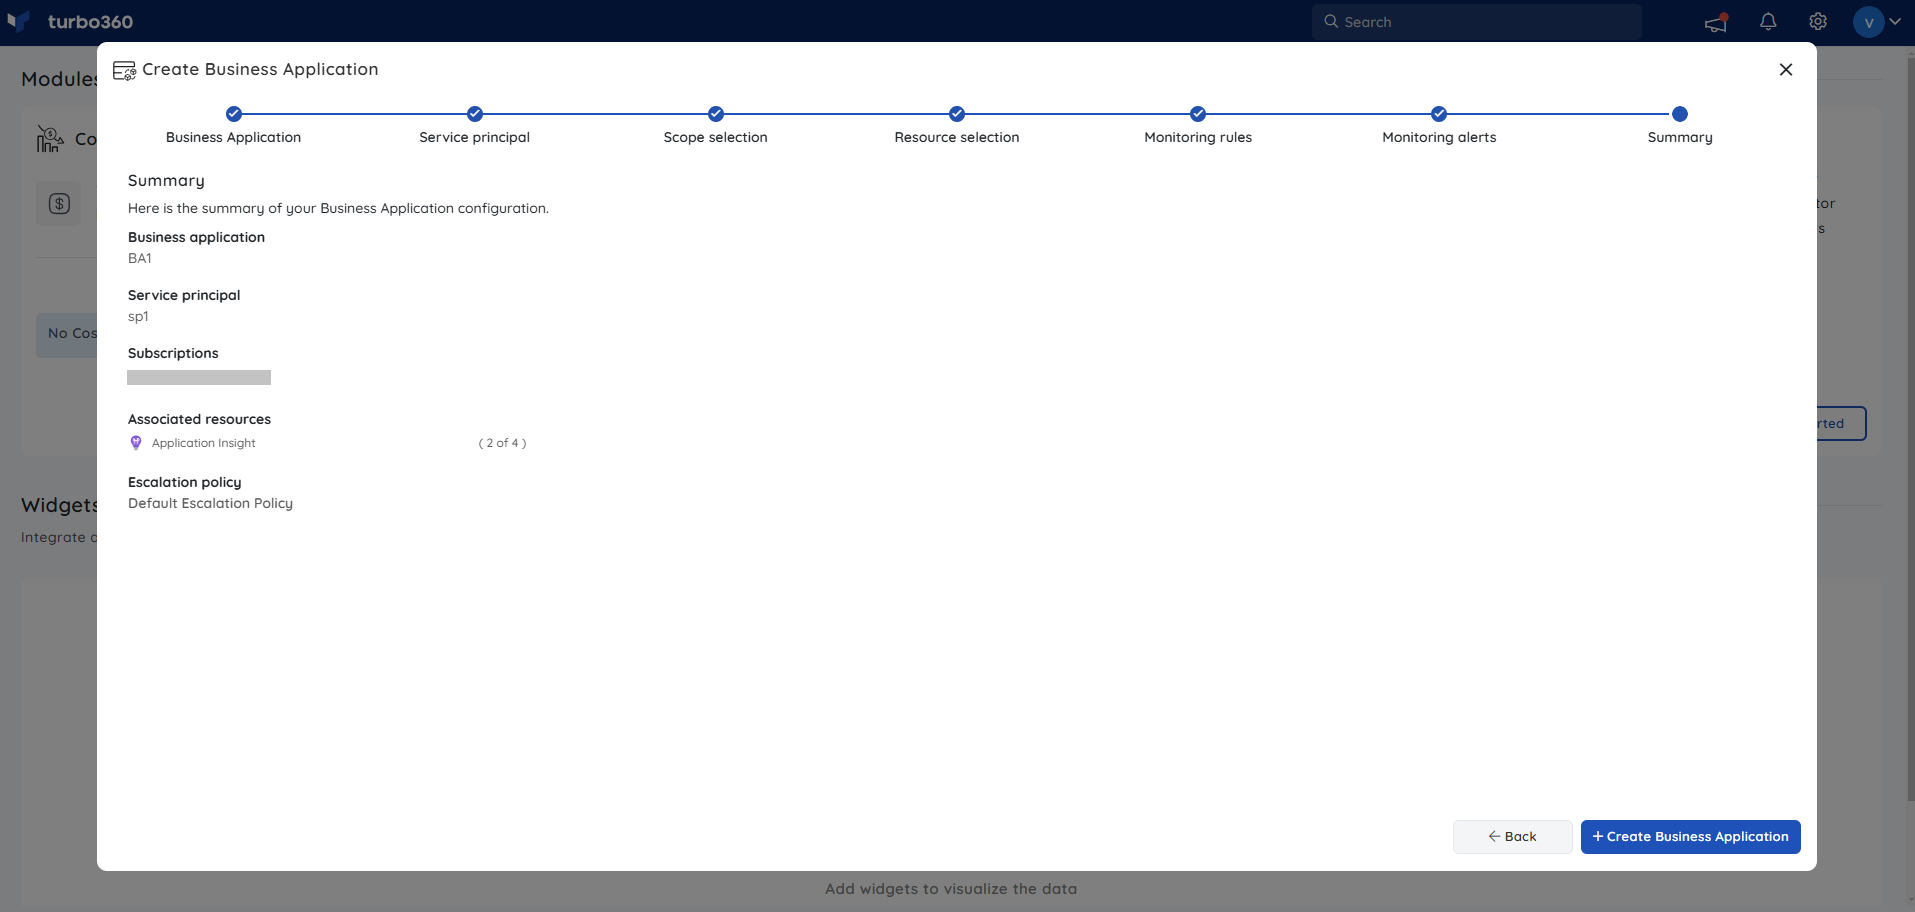
The Business Application is created and the associated resources are now available for monitoring and management.
Example scenario
A team running an order processing solution has Azure resources spread across two subscriptions — a Logic App in the production subscription and a Service Bus namespace in a shared services subscription. They create a Business Application named Order Processing, add a service principal scoped to both subscriptions, associate the Logic App and Service Bus resources, apply a monitoring profile for message processing, and configure email alerts for violations. After creation, they have a single view of the entire solution's health.
Troubleshooting
The Get Started button is not visible on the home screen
Cause: The Business Applications module may not be enabled for your organization, or your role does not include access to it.
Fix: Contact your Turbo360 administrator to verify that Business Applications is enabled and that your role includes access to the module.Service principal authentication fails during setup
Cause: The service principal credentials entered are incorrect, expired, or the service principal does not have the required permissions on the target subscription.
Fix: Verify the client ID, client secret, and tenant ID. Confirm the service principal has at least Reader access on the subscription. See Service principal setup for required permissions.No resources appear when selecting Azure resources in step 4
Cause: The service principal scope defined in step 3 does not include the subscriptions or resource groups where the resources reside, or the resource types are not supported.
Fix: Go back and verify the subscription scope selection in step 3. Confirm the target resources are in a supported resource group within the scoped subscription. Check the supported resource types list.The Business Application is created but shows no monitoring data
Cause: Monitoring rules were skipped during setup, or the monitoring profile has not yet completed its first evaluation cycle.
Fix: Open the Business Application, navigate to Monitoring rules, and configure or apply a monitoring profile. Allow one full evaluation cycle to complete before expecting data. See Monitoring a Business Application.Create Business Application button is disabled on the summary screen
Cause: One or more required fields are incomplete or contain validation errors.
Fix: Review each wizard step for missing or invalid input — particularly the service principal and resource selection steps. Correct any flagged fields before returning to the summary.
Related articles
Was this article helpful?