

Managing Business Applications
- 05 Aug 2026
- 7 Minutes to read
- Print
- DarkLight
- Download PDF
Managing Business Applications
- Updated on 05 Aug 2026
- 7 Minutes to read
- Print
- DarkLight
- Download PDF
Article summary
Did you find this summary helpful?
Thank you for your feedback!
Overview
Business Applications represent individual business orchestrations — such as order processing, payment handling, or delivery tracking — within your enterprise. You create and manage them within Business Application Groups, which represent broader business units. This article covers how to create, edit, rename, move, group, and delete Business Applications, and how to use features like health monitoring, pause monitoring, management operations, Quick Access, and access permissions.
Business value
Managing Business Applications through a structured group hierarchy lets you visualize complex enterprise operations as discrete, monitorable units. This reduces the effort required to identify failures, control resource state, and maintain governance across large Azure environments.
Required permissions
To create a Business Application, you must hold one of the following roles:
- Account owner
- Owner at the Business Applications module level or at the target Business Application Group level
- Contributor at the Business Applications module level or at the target Business Application Group level
How it works
Each Business Application contains a set of associated Azure resources. Turbo360 evaluates the monitoring state of those resources and surfaces an aggregated health status for the Business Application using color-coded indicators:
- Green — all resources in the Business Application are healthy.
- Amber — at least one resource is in a warning state.
- Red — at least one resource is in an error state.
The health indicator in the tree view is driven by the most recent alert incidents across both profile monitoring and resource-level monitoring. Manually closing the latest alert incidents for all active profiles and resource-level rules resets the Business Application to a healthy state. An up alert is not triggered in this scenario.
Business Applications can be organized into Business Application Groups, which represent business units. A group can contain multiple Business Applications and nested sub-groups, enabling visualization and monitoring of complex hierarchical operations.
Steps
Add a Business Application
You can create a Business Application in two ways.
Using the Add button:
- Click Add on the Business Application home screen.
- Select Business Application from the drop-down.
- Complete the step-by-step wizard to provide the required details.
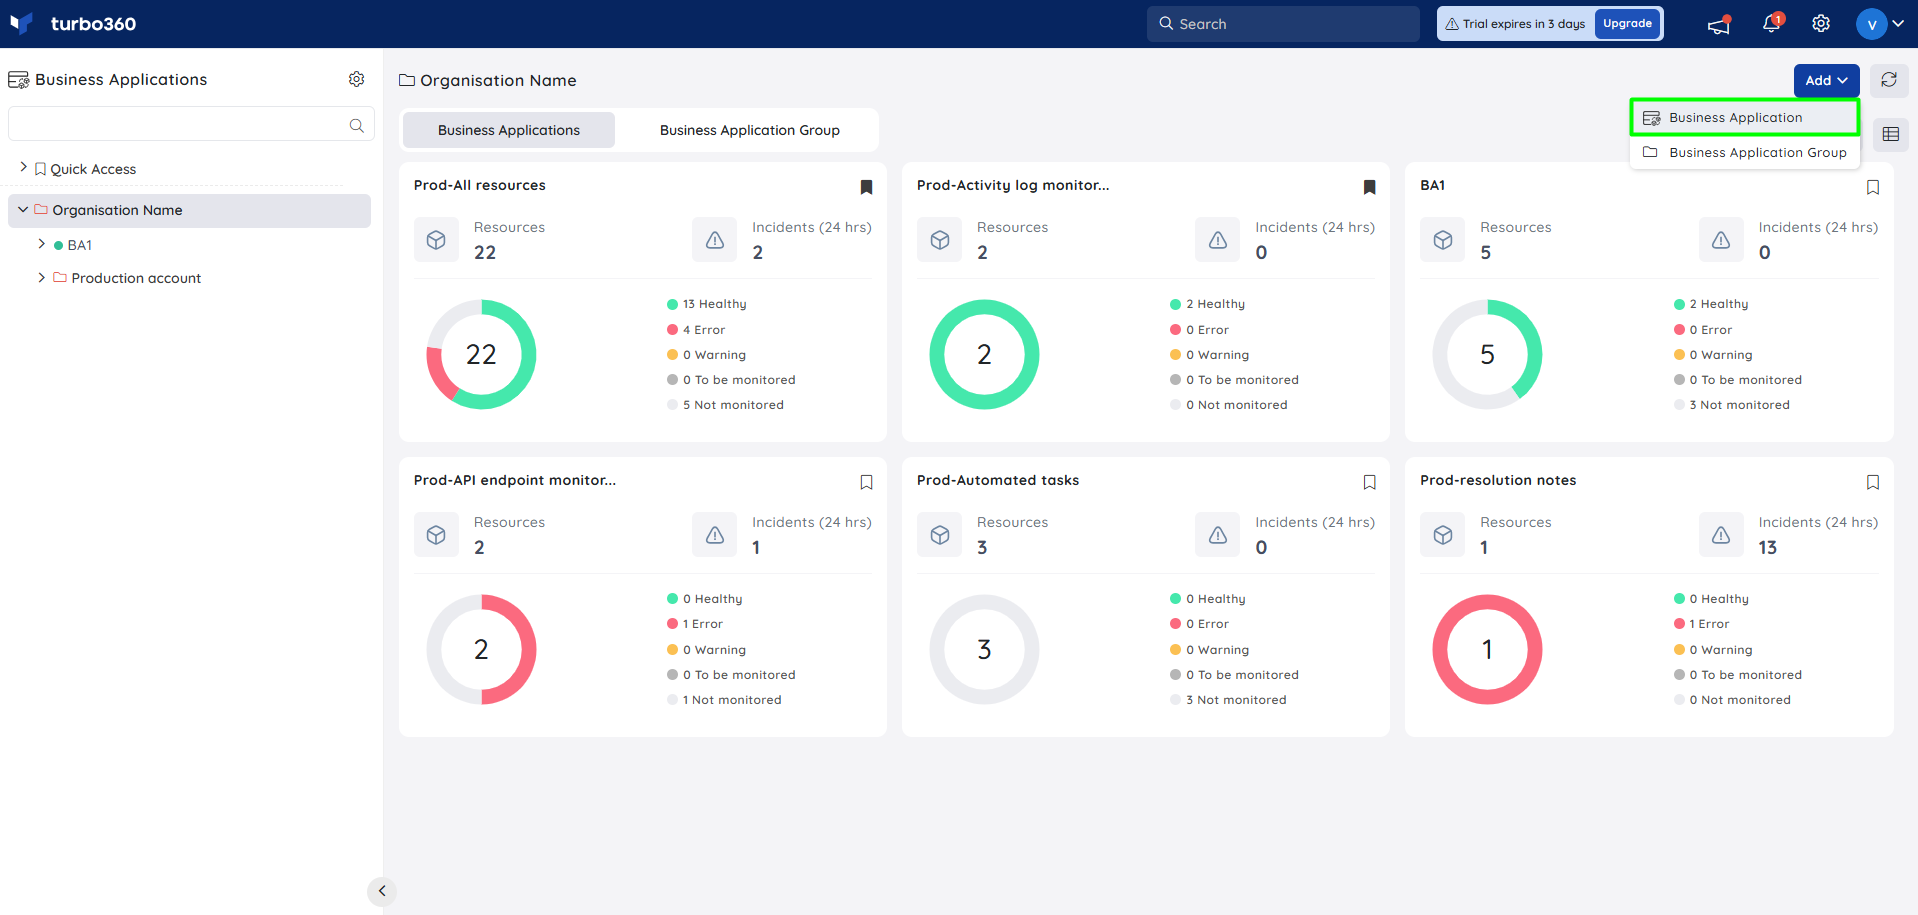
Refer to the Creating your first Business Application article for the full creation process.
Using the Context menu ( ⋮ ):
- Click the Context menu ( ⋮ ) next to any Business Application Group in the tree view.
- Select New Business Application.
- Complete the step-by-step wizard.
The Business Application is created inside the selected group.
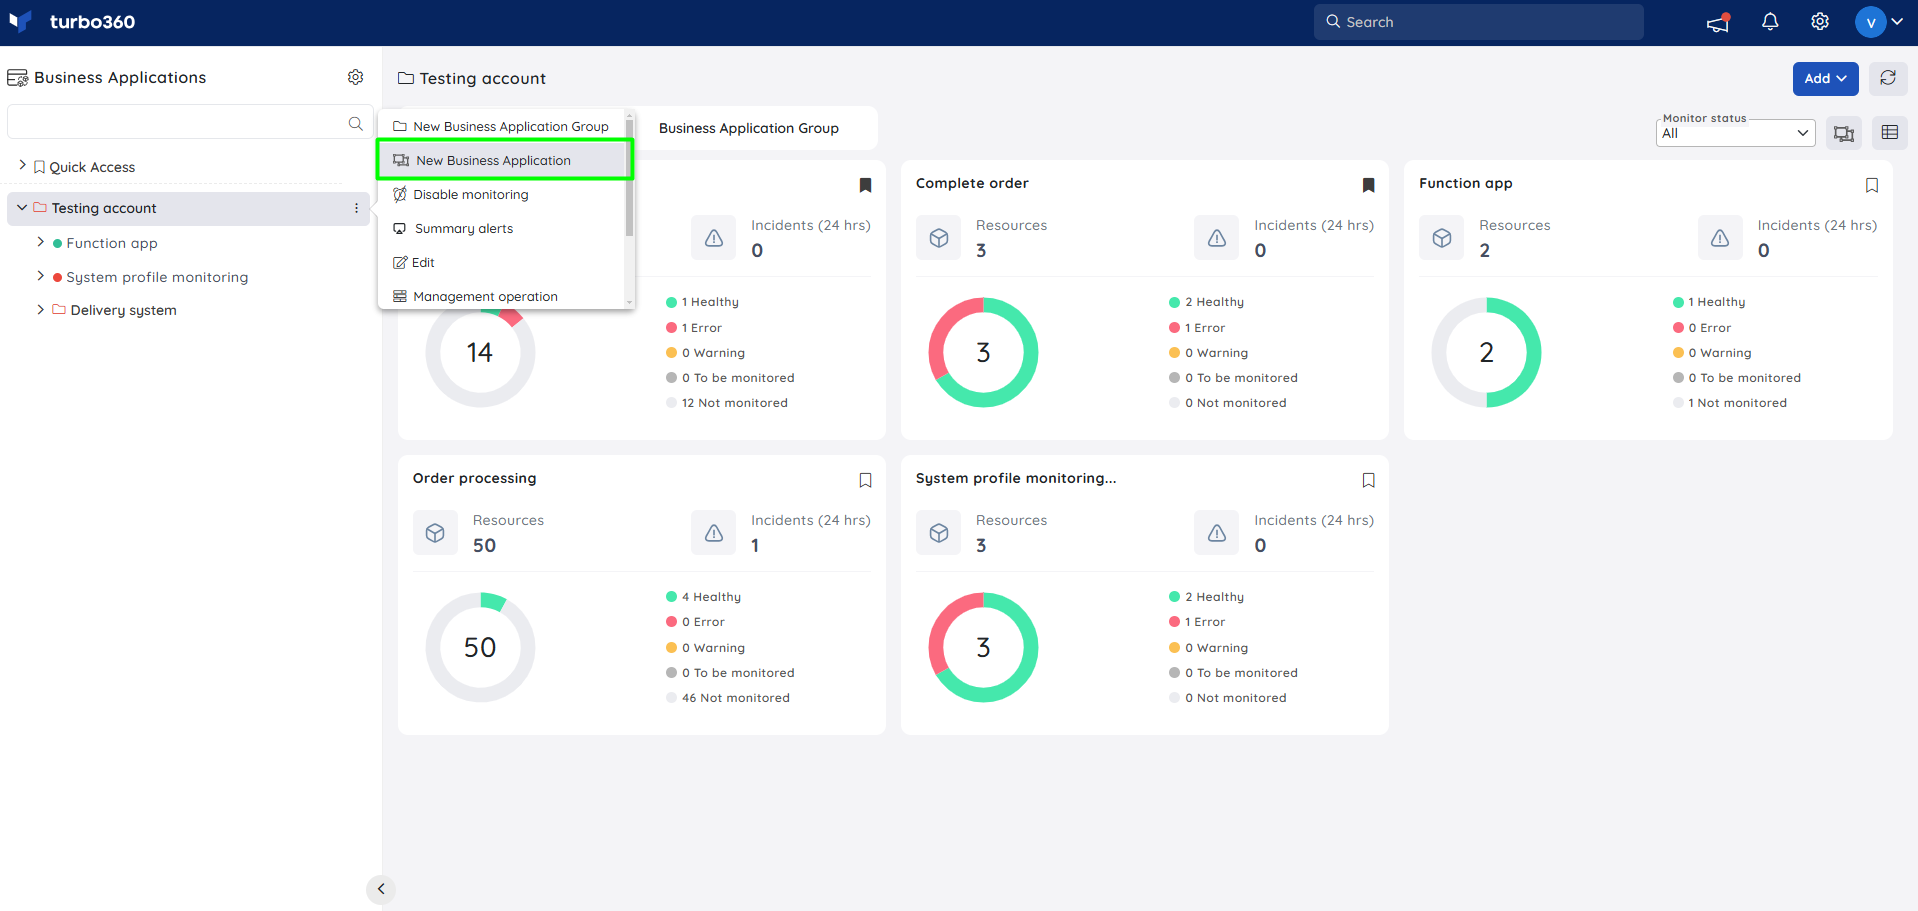
Refer to the Creating your first Business Application article for the full creation process.
Edit a Business Application
Editing a Business Application lets you update resource selection, service principal information, and monitoring alert configuration. The monitoring state resets on save, and monitoring resumes at the next rule evaluation interval.
Using the Context menu ( ⋮ ):
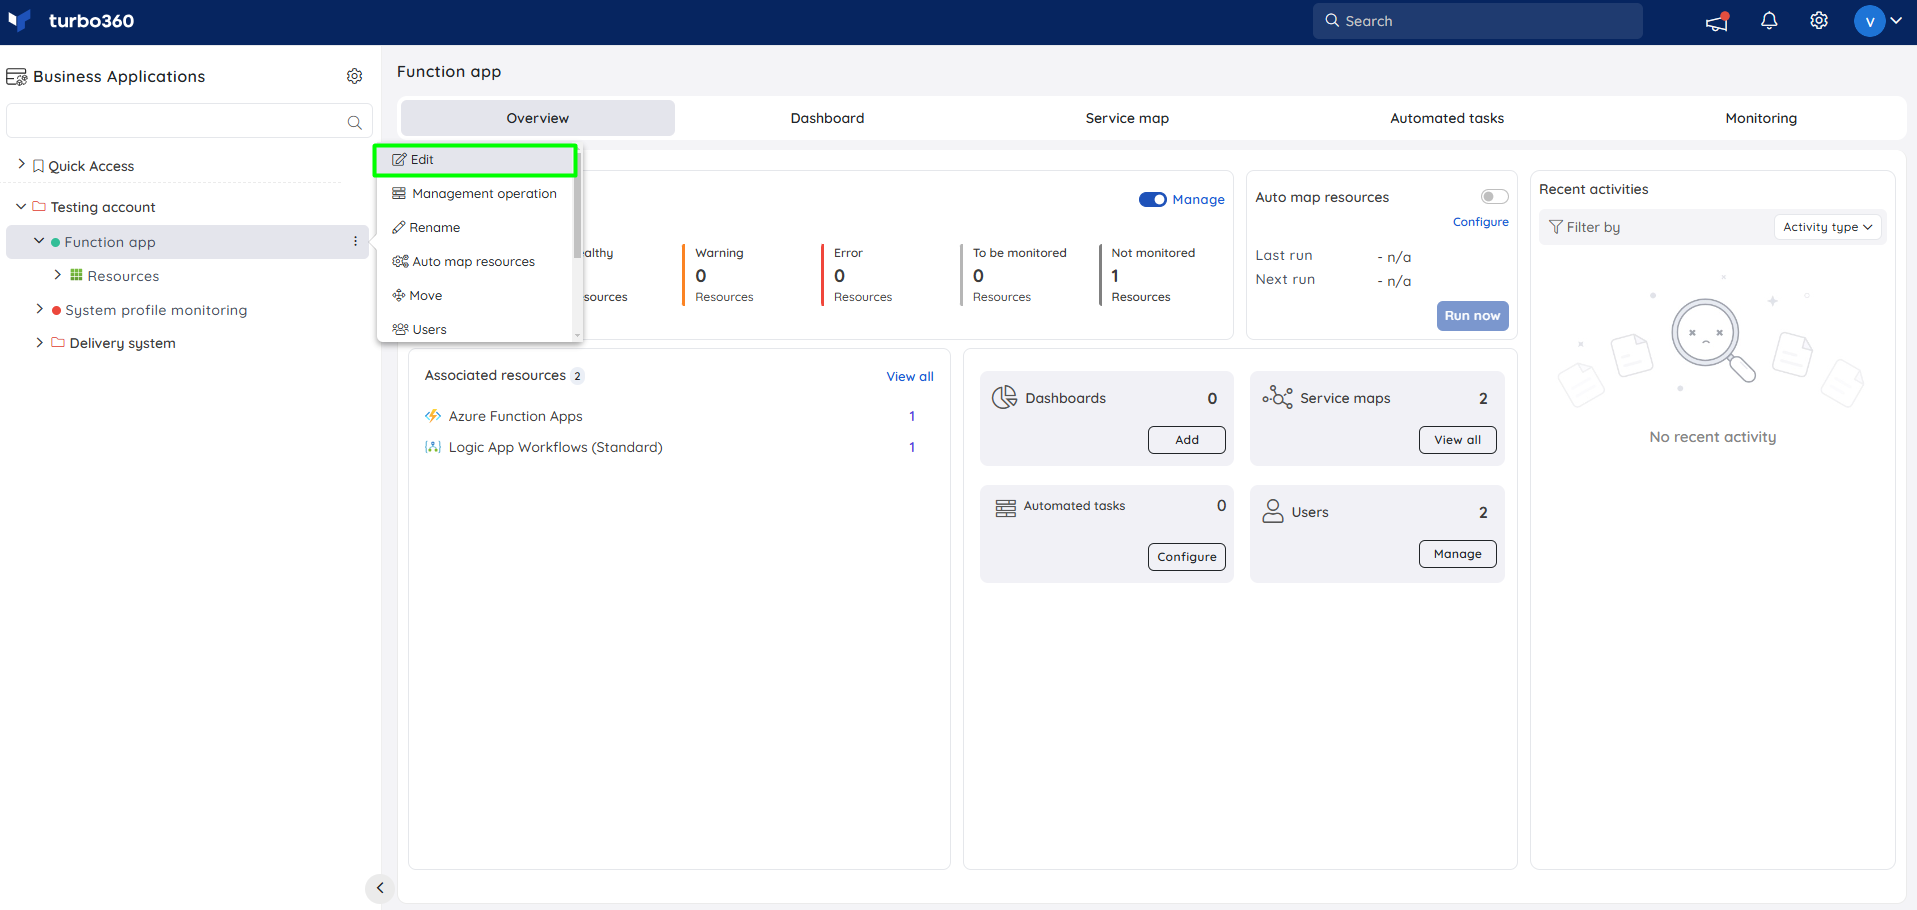
- Click the Context menu ( ⋮ ) next to the Business Application in the tree view.
- Select Edit.
Using the list view:
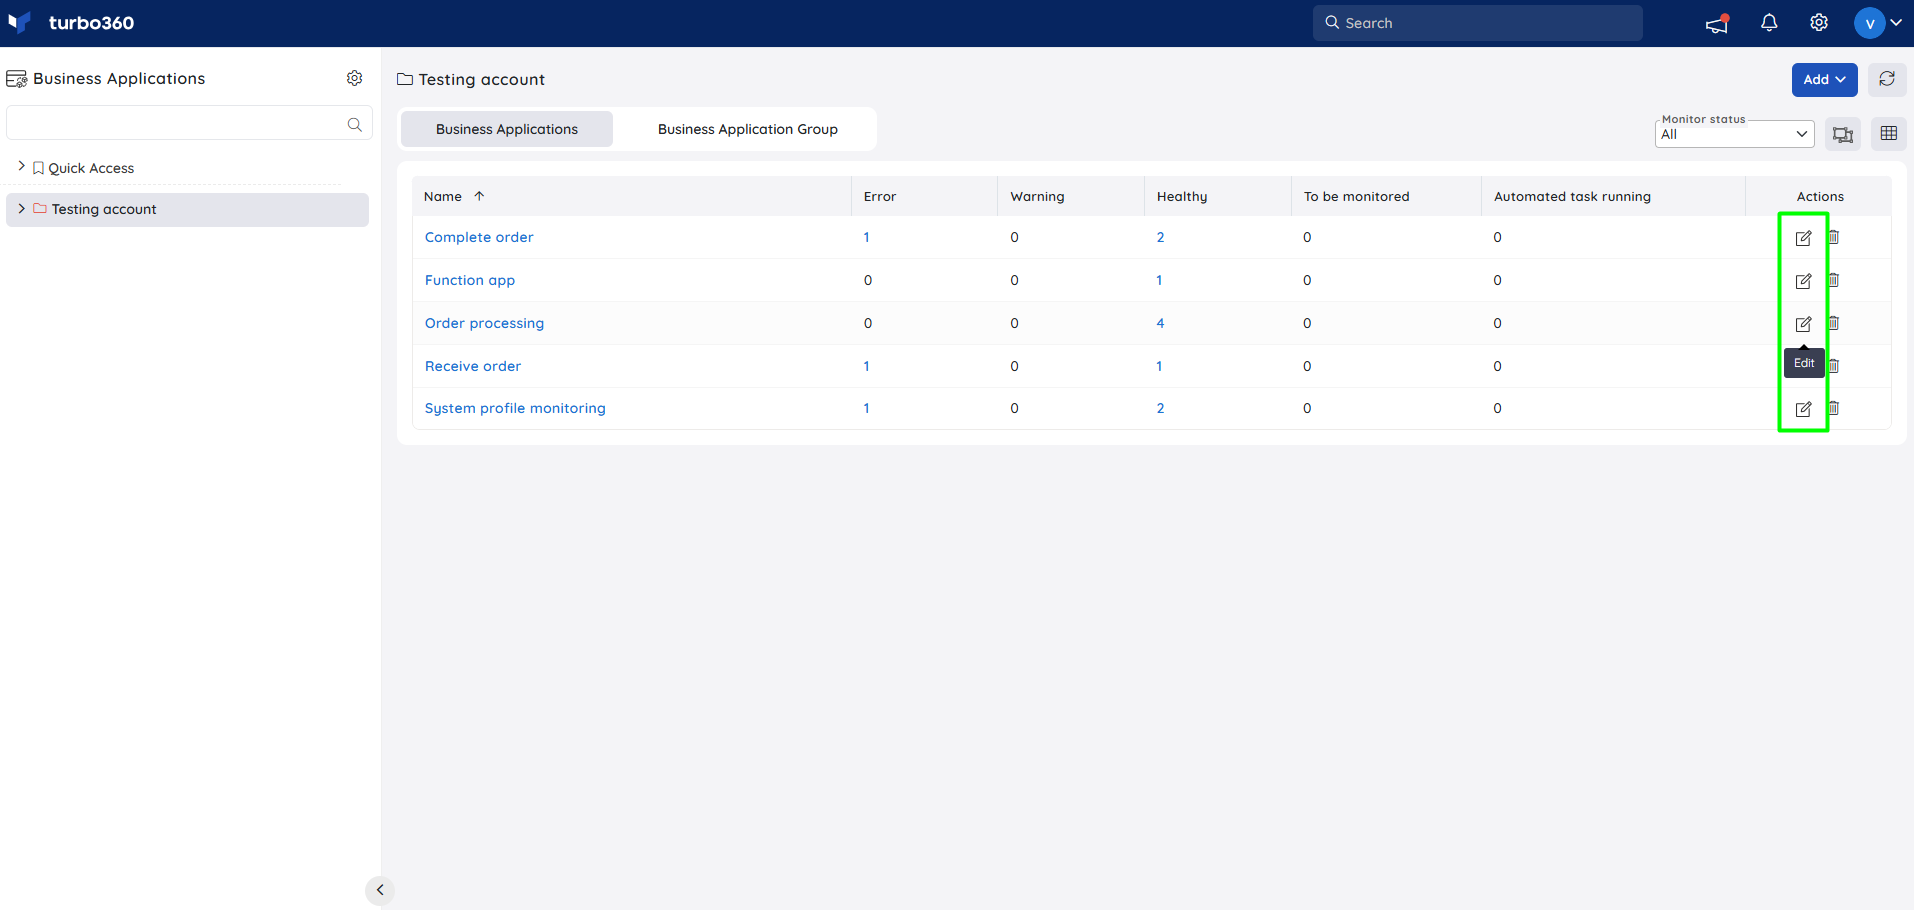
- Click the Edit icon next to the Business Application in the list view.
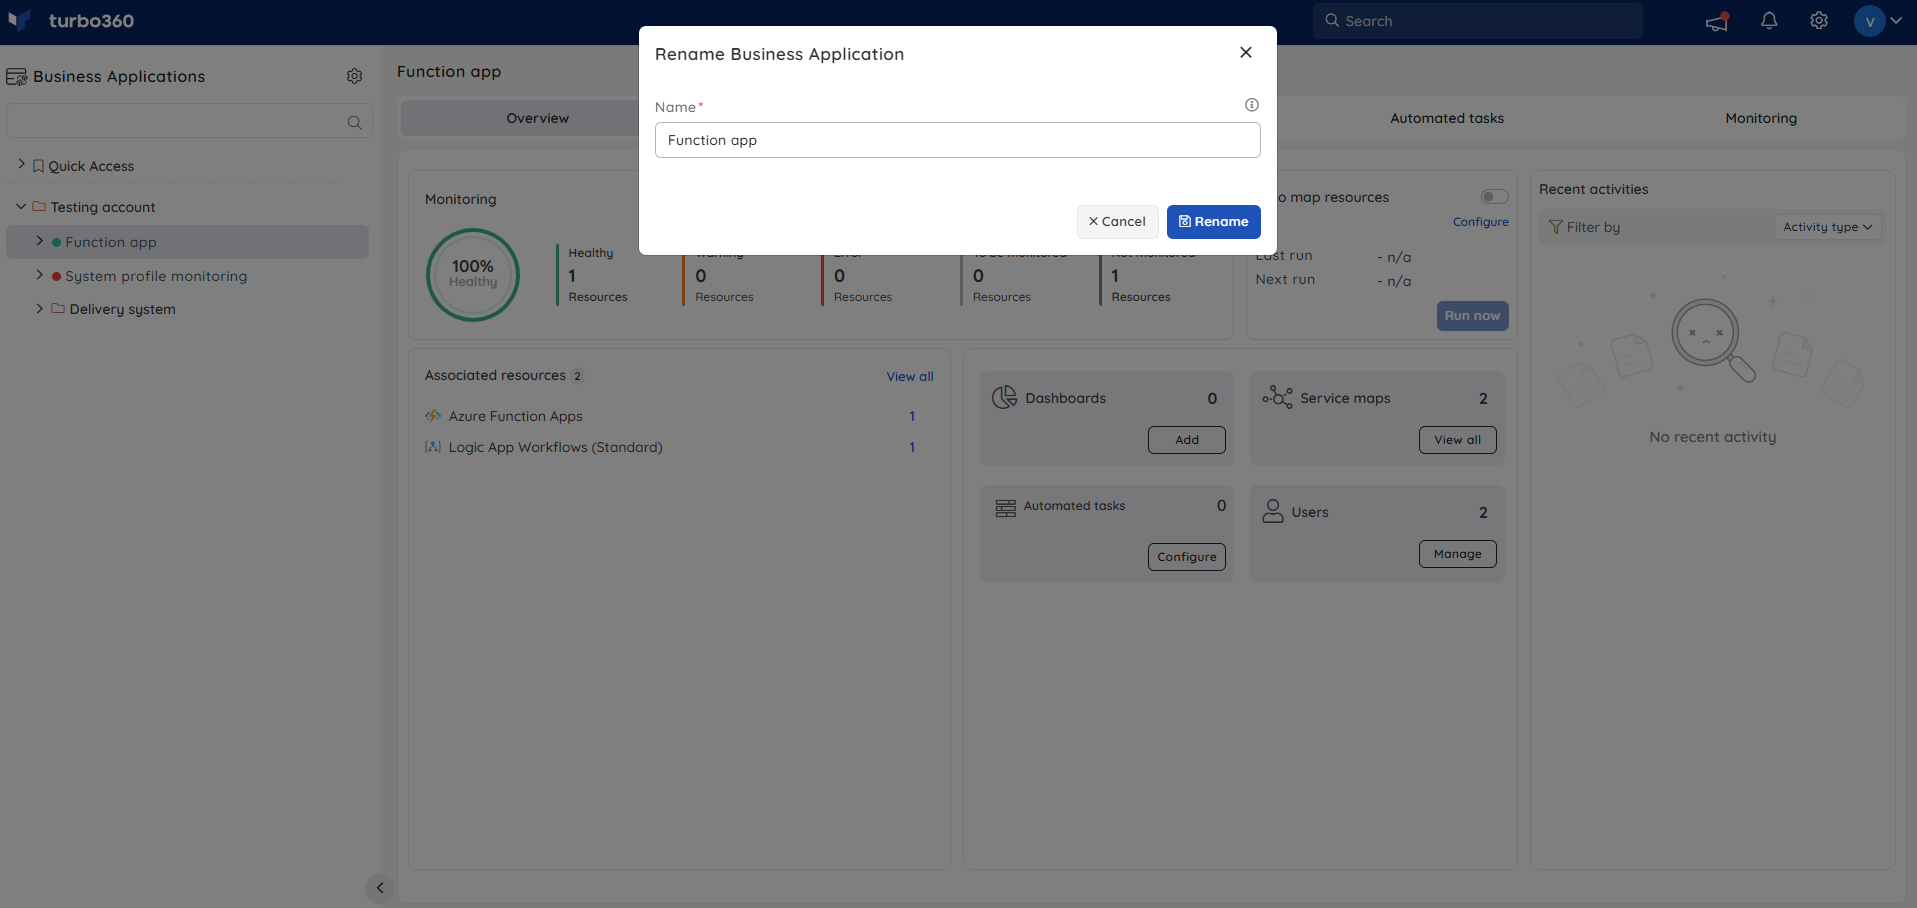
Rename a Business Application
- Click the Context menu ( ⋮ ) next to the Business Application in the tree view.
- Select Rename.
- Enter the new name and click Rename.
Move a Business Application
- Click the Context menu ( ⋮ ) next to the Business Application in the tree view.
- Select Move.
- Choose the destination group and click Move.
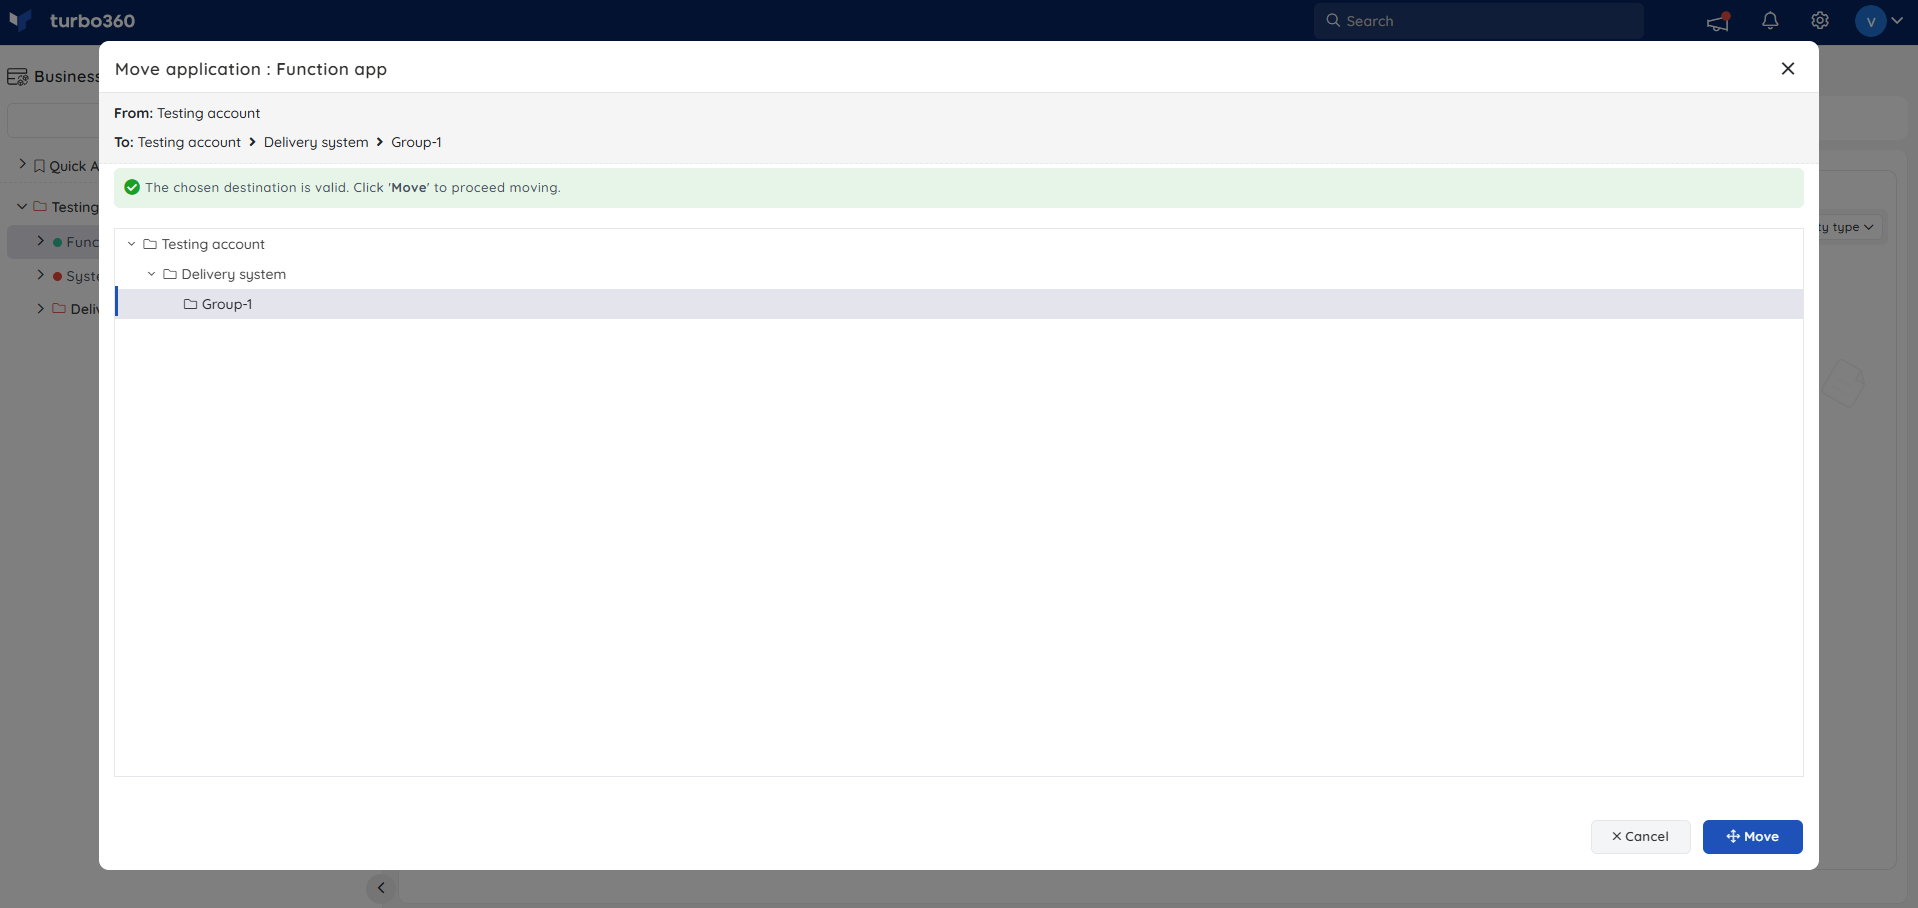
When a Business Application is moved to a new group, the destination group's permissions replace the source permissions. For example, if you have Contributor permission on the destination group and Reader permission on the Business Application, the application inherits Contributor after the move.
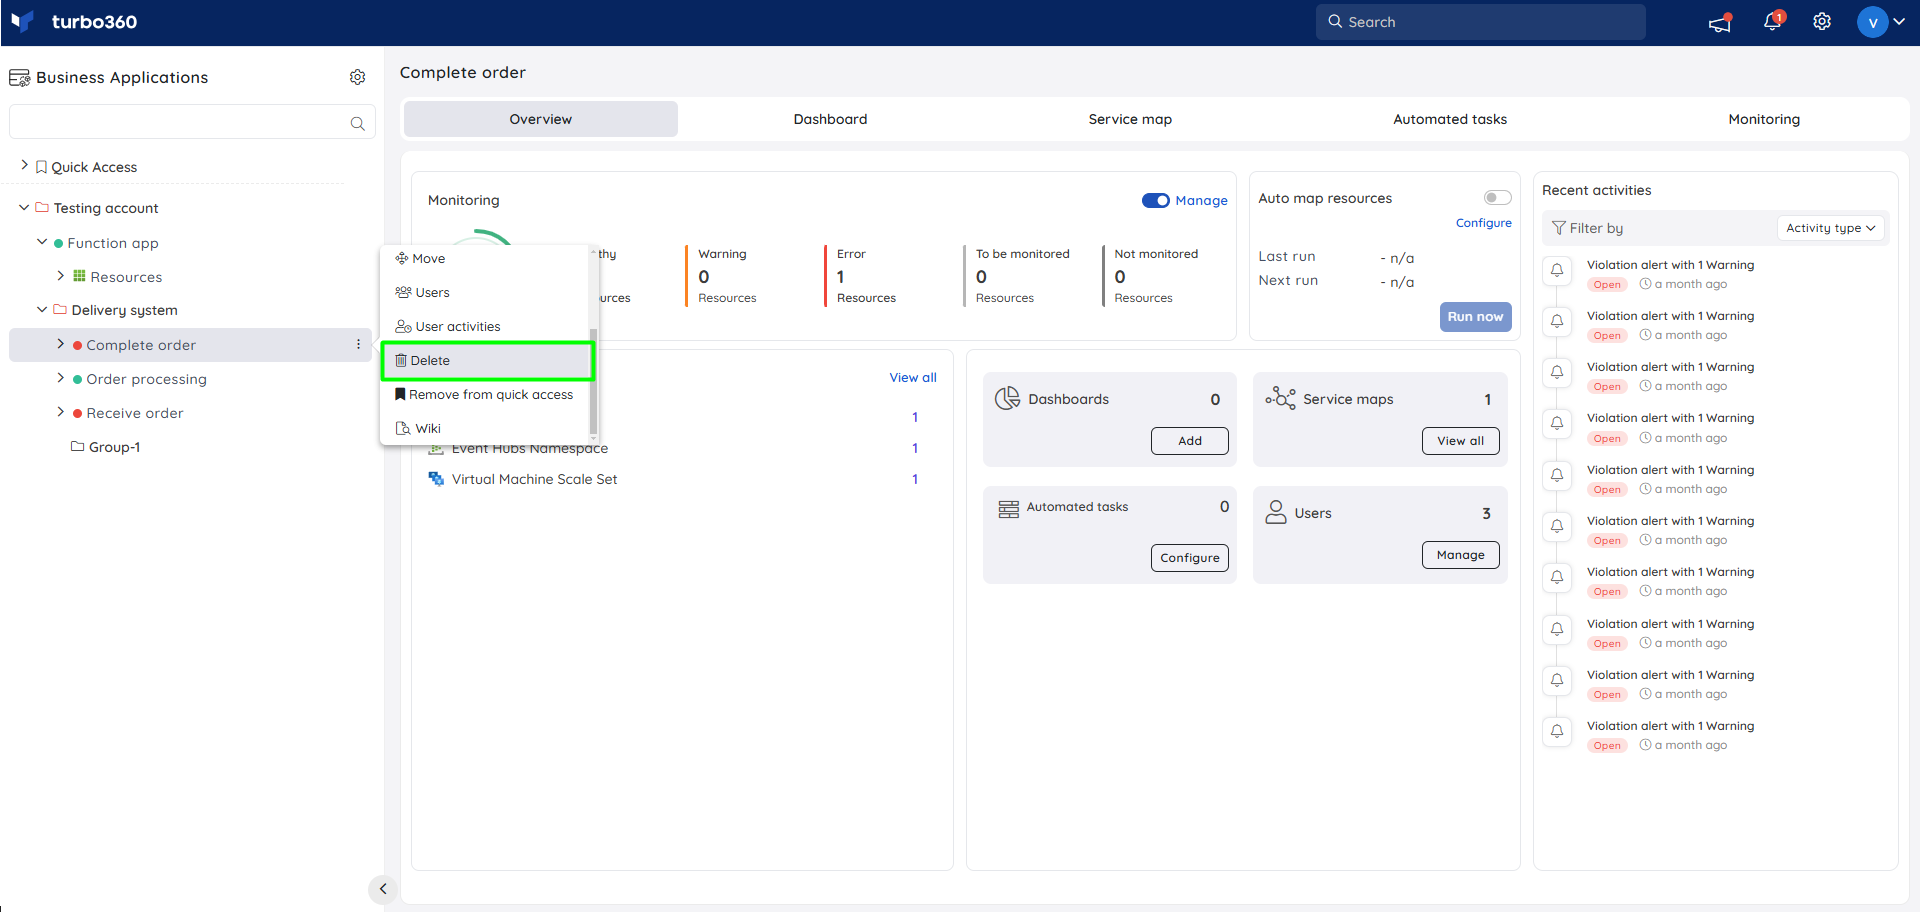
Delete a Business Application
Using the Context menu ( ⋮ ):
- Click the Context menu ( ⋮ ) next to the Business Application in the tree view.
- Select Delete.
Using the list view:
- Click the Delete icon next to the Business Application in the list view.
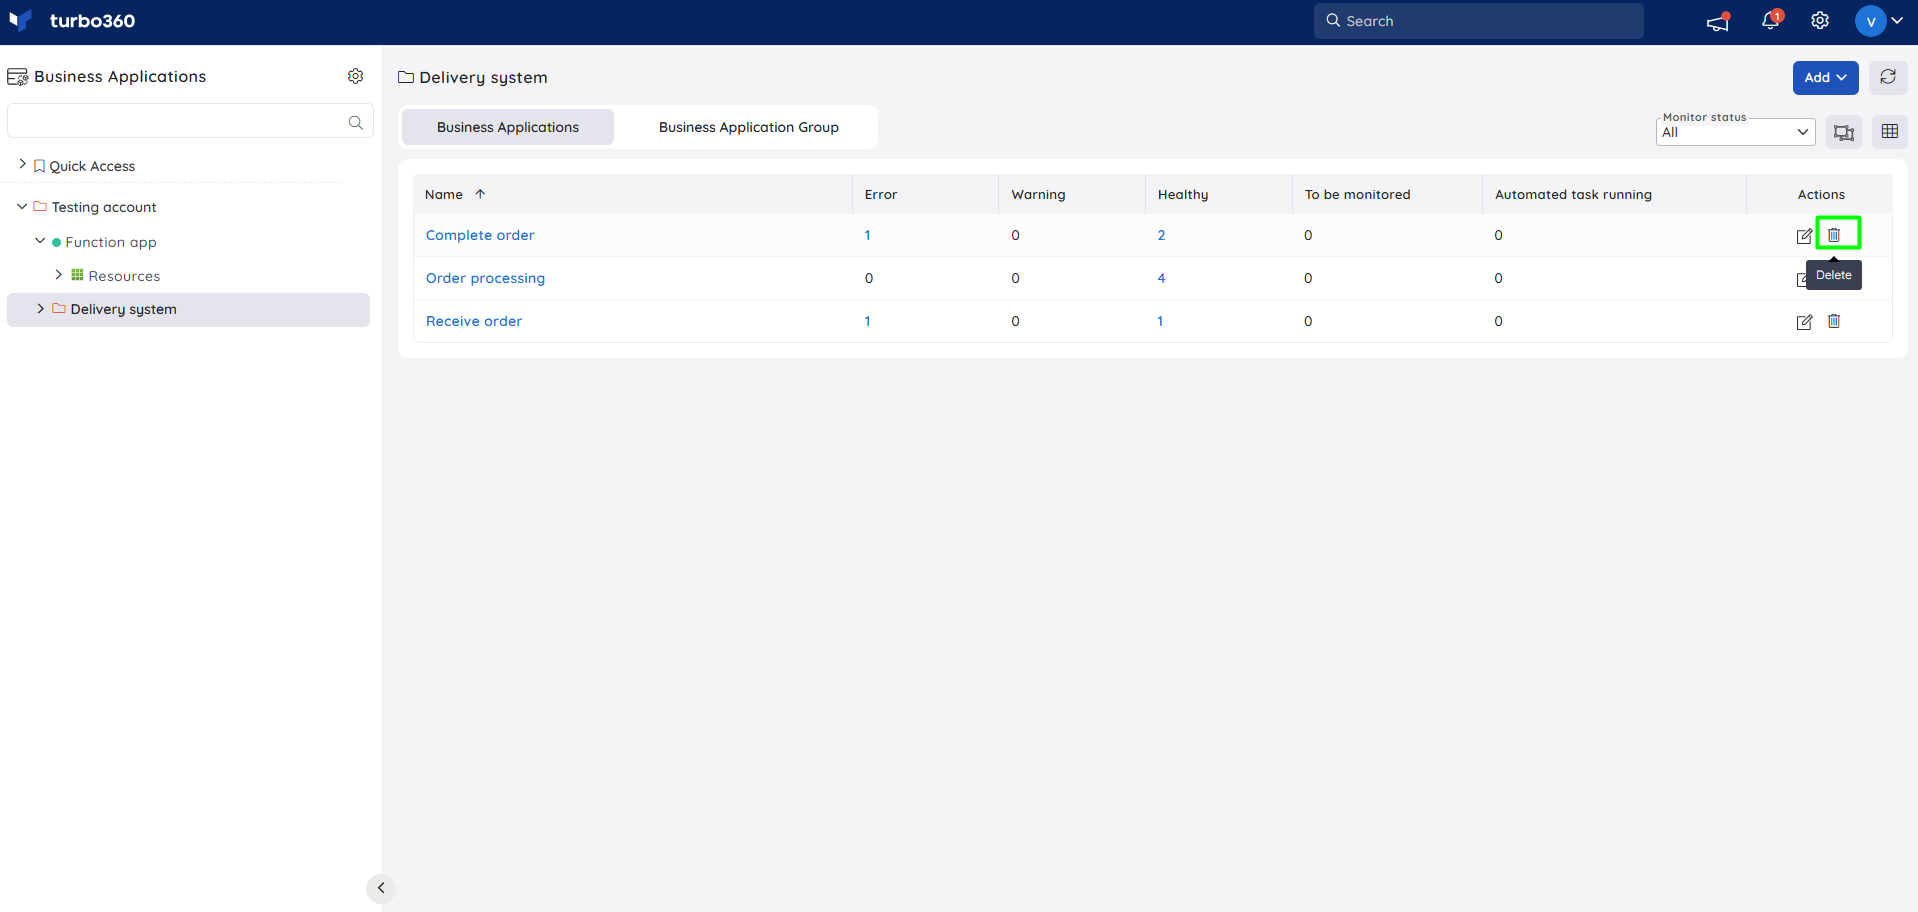
Deletion takes approximately one minute. License consumption updates after at least one minute.
Group Business Applications
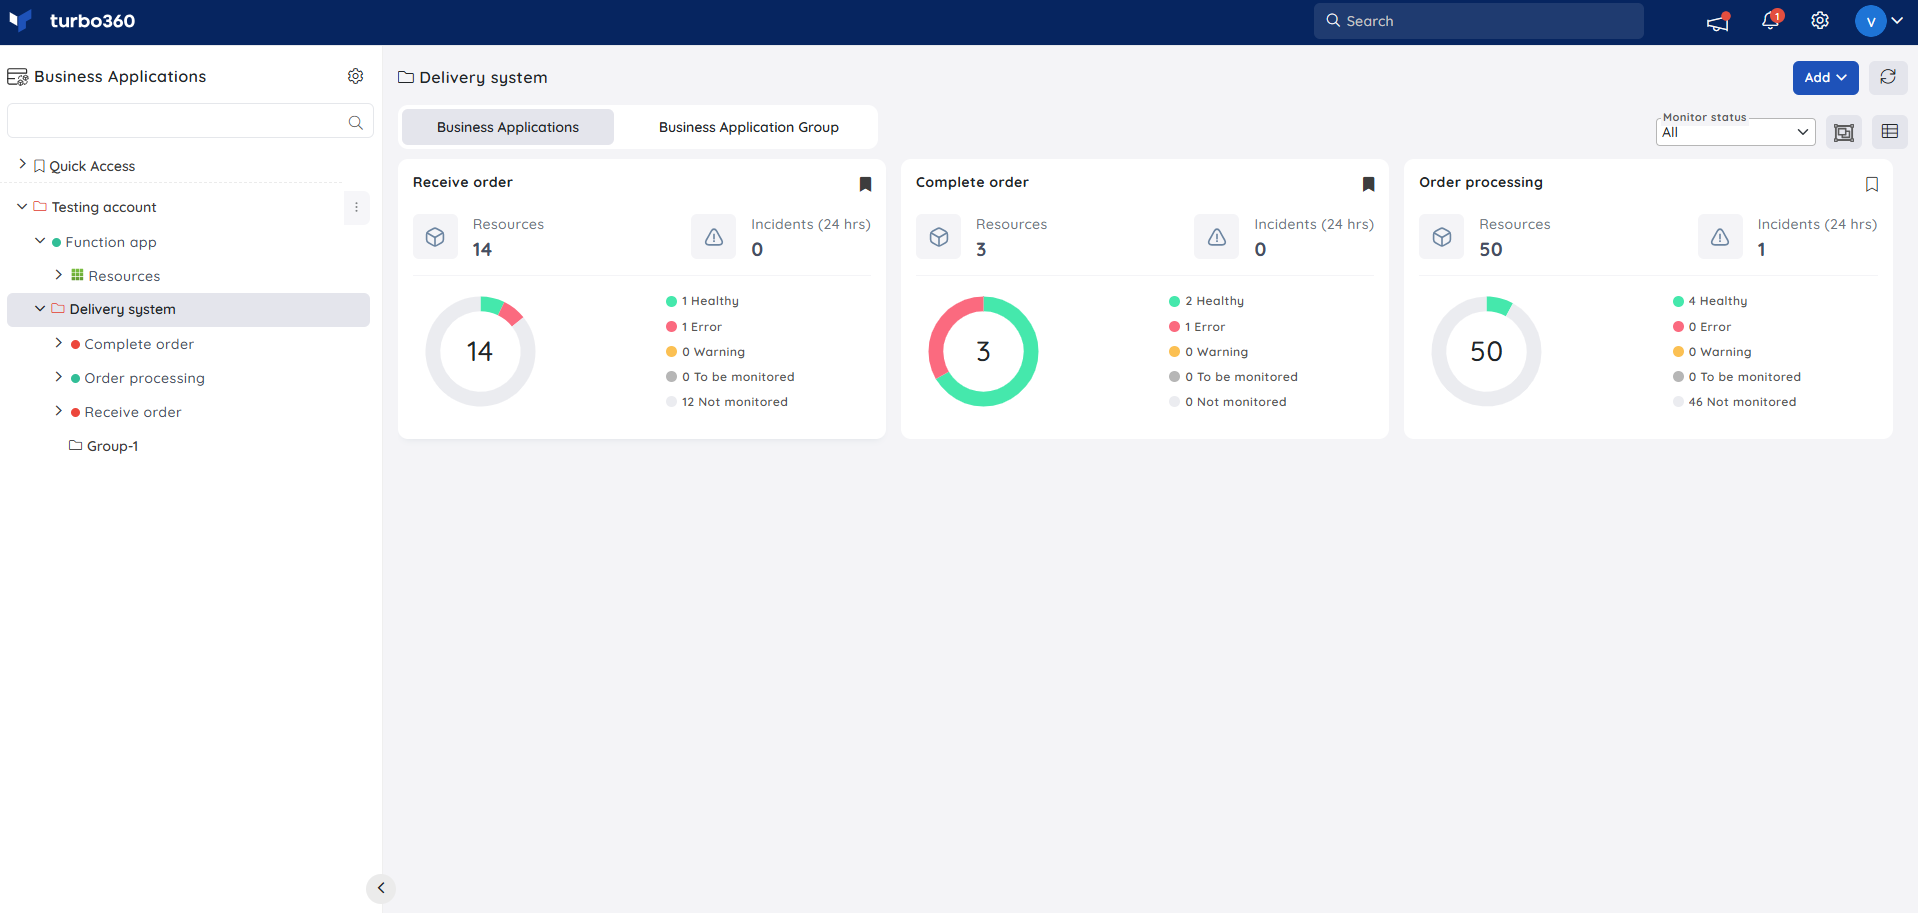
Business Applications can be organized under a Business Application Group to represent a business unit. For example, an Order processing unit might contain three Business Applications — receiving orders, processing orders, and completing orders — grouped under an Order processing Business Application Group.
Pause monitoring
Pause monitoring temporarily halts real-time monitoring for a Business Application without affecting overall service operations. Use it during maintenance windows, testing, or planned high-impact activities.
When monitoring is paused:
- Data collection stops — the Business Application moves to a Not monitored state and no metrics are gathered.
- Alerts are suppressed — no alerts or notifications are triggered during the pause period.
- Historical data is unaffected — existing logs and historical data remain intact and accessible.
- Resume is manual or automatic — you can turn off the pause toggle manually, or monitoring resumes automatically when the specified end date and time is reached.
To configure pause monitoring:
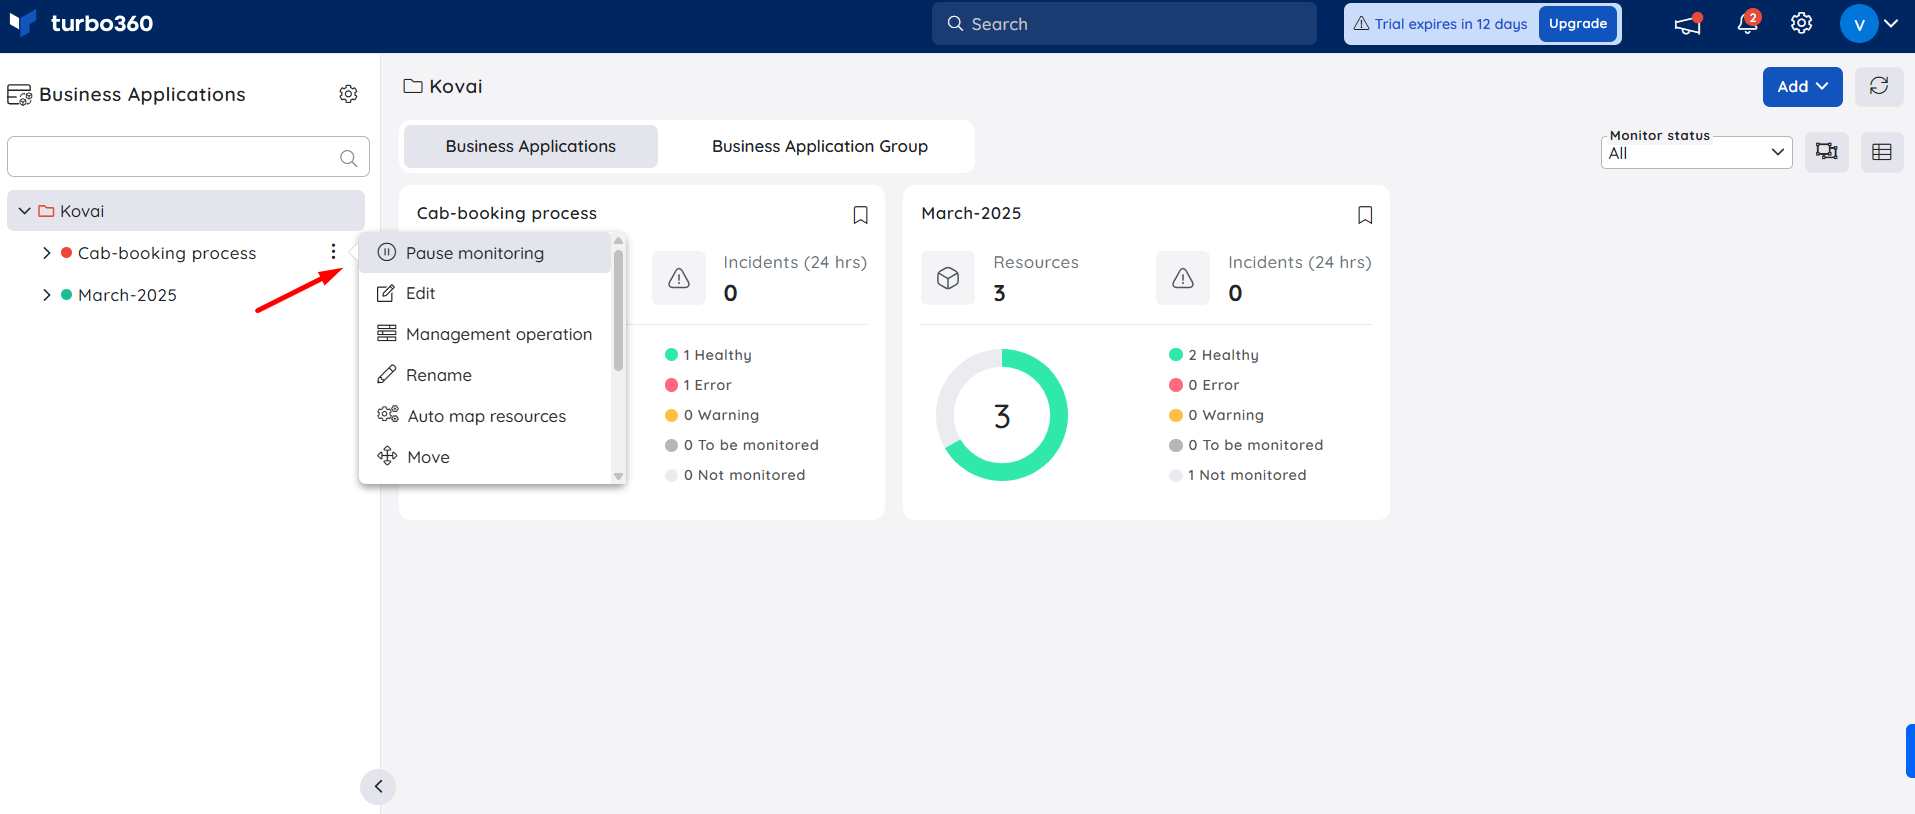
- Click the Context menu ( ⋮ ) next to the Business Application in the tree view.
- Select Pause monitoring.
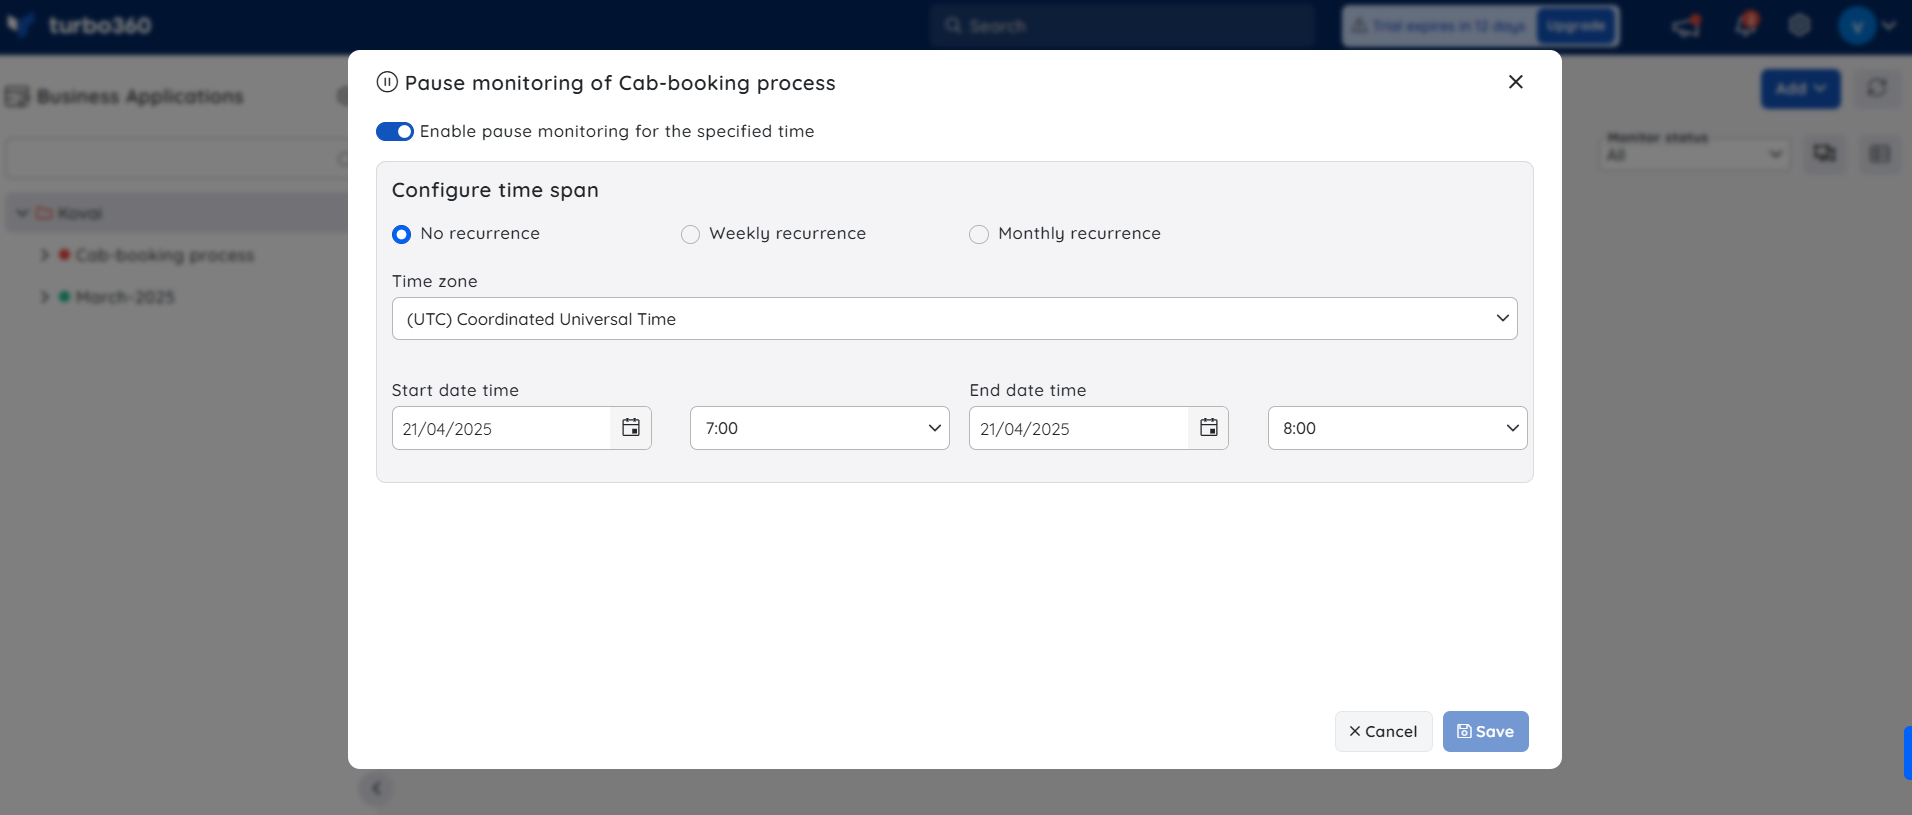
- Enable the toggle.
- Choose a recurrence option:
- No Recurrence — define a one-time window with a start time, end time, and time zone.
- Weekly or Monthly — automatically pause monitoring on specified days and times within the defined start and end dates.
- Click Save.
Management operations
Management operations let you start, stop, restart, enable, disable, or change the state of all compatible resources within a Business Application simultaneously.
Compatible resources and their supported operations:
| Resource type | Supported operations |
|---|---|
| API App | Start / Stop / Restart |
| APIM Product | Publish / Unpublish |
| Azure Function | Enable / Disable |
| Azure Function App | Start / Stop / Restart |
| Databrick Compute Cluster | Start / Stop / Restart |
| Databrick Workflow Delta Live Table | Start / Stop / Restart |
| Event Hub | Enable / Disable |
| Kubernetes | Start / Stop / Restart |
| Logic App | Enable / Disable |
| Logic App (Standard) | Enable / Disable |
| Logic App Workflow (Standard) | Enable / Disable |
| Power Automate | Enable / Disable |
| Service Bus Queue | Active / Disabled |
| Service Bus Topic | Active / Disabled |
| Service Bus Topic Subscription | Active / Disabled |
| Virtual Machine | Start / Stop / Restart |
| Web App | Start / Stop / Restart |
| Web Job | Start / Stop / Restart |
To run a management operation:
- Click the Context menu ( ⋮ ) next to the Business Application in the tree view.
- Select Management Operations.
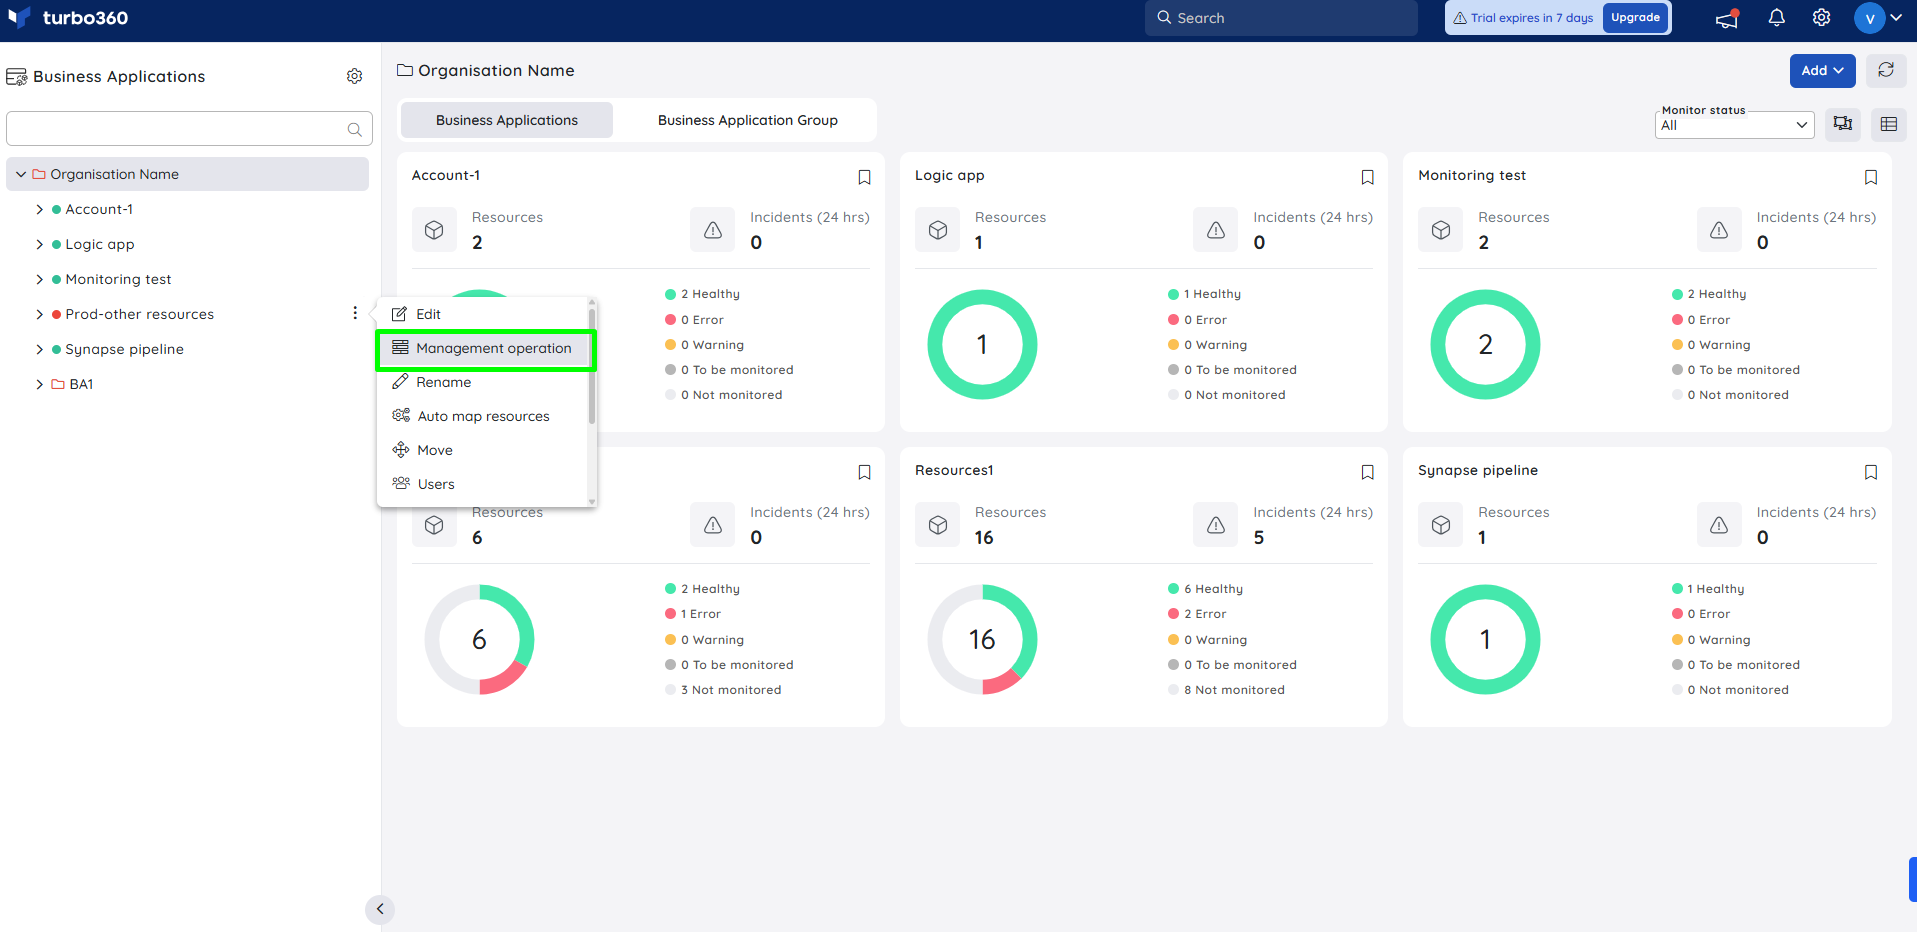
- Select the desired operation. Start maps to Publish, Active state, and Enable; Stop maps to Unpublish and Disabled state.
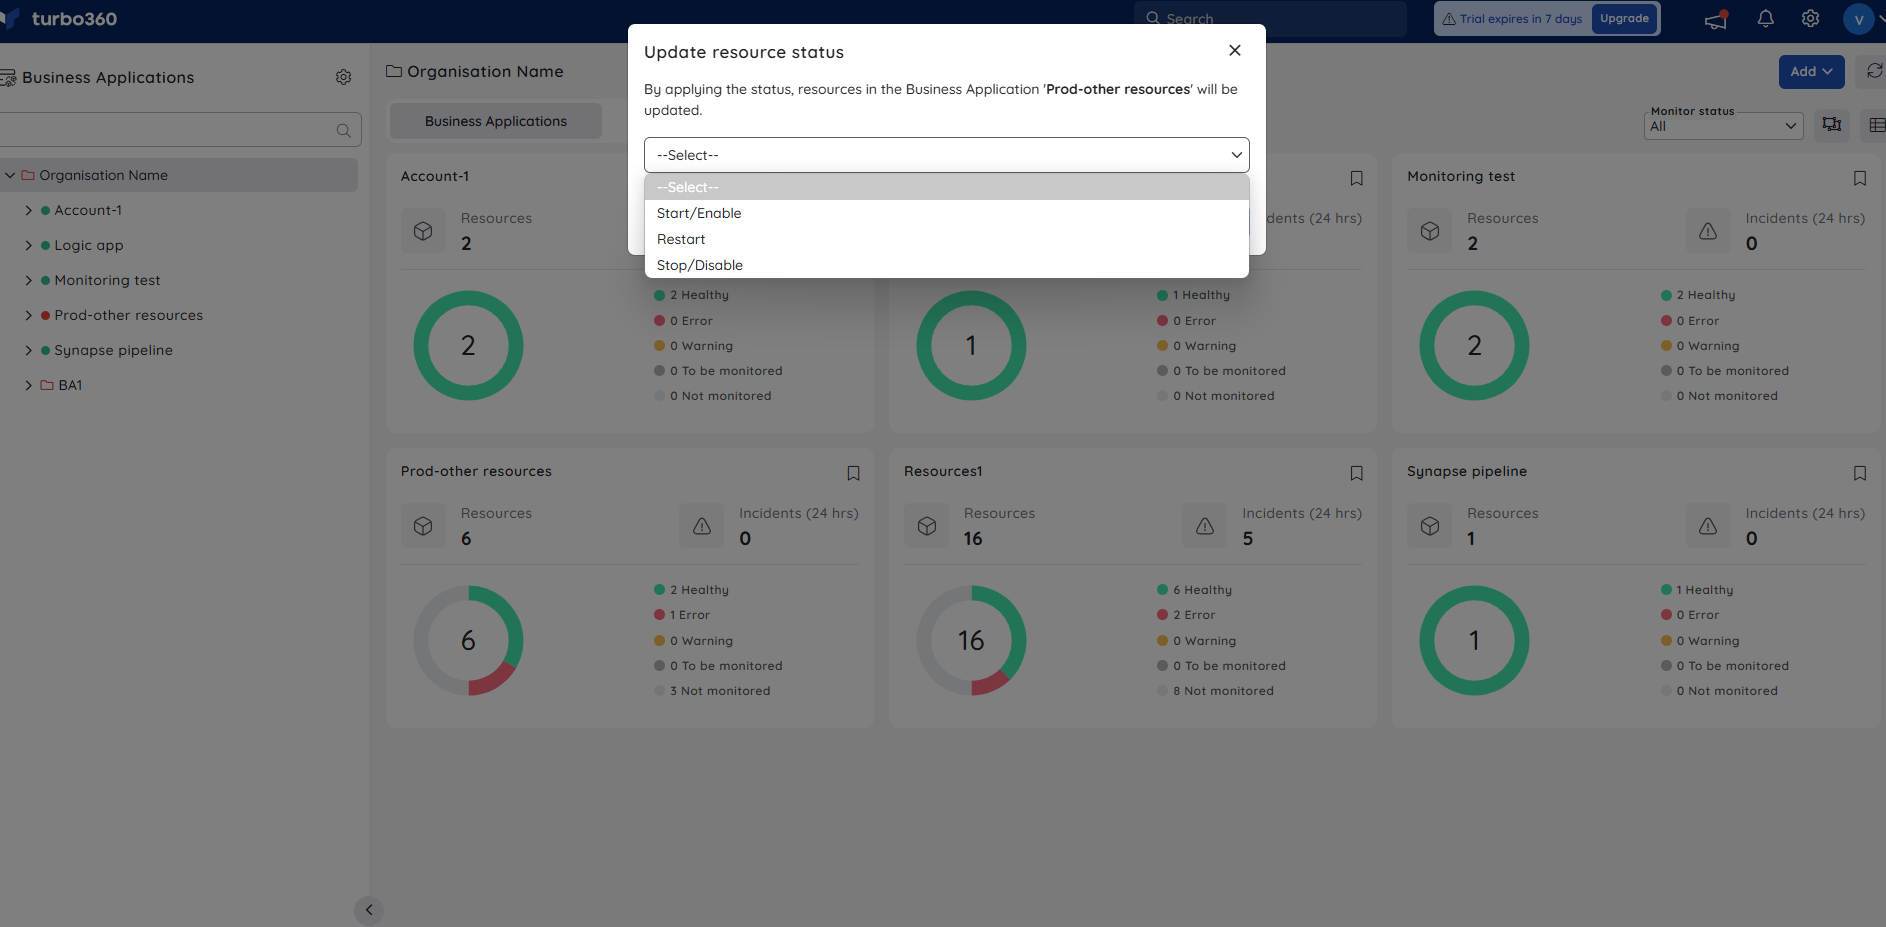
- Click Confirm.
The status updates across all compatible resources in the Business Application.
Quick Access
Quick Access lets you pin high-priority Business Applications to a dedicated section at the top of the tree view for faster navigation.
To add a Business Application to Quick Access, use the Quick Access option in the card view or the Context menu ( ⋮ ).
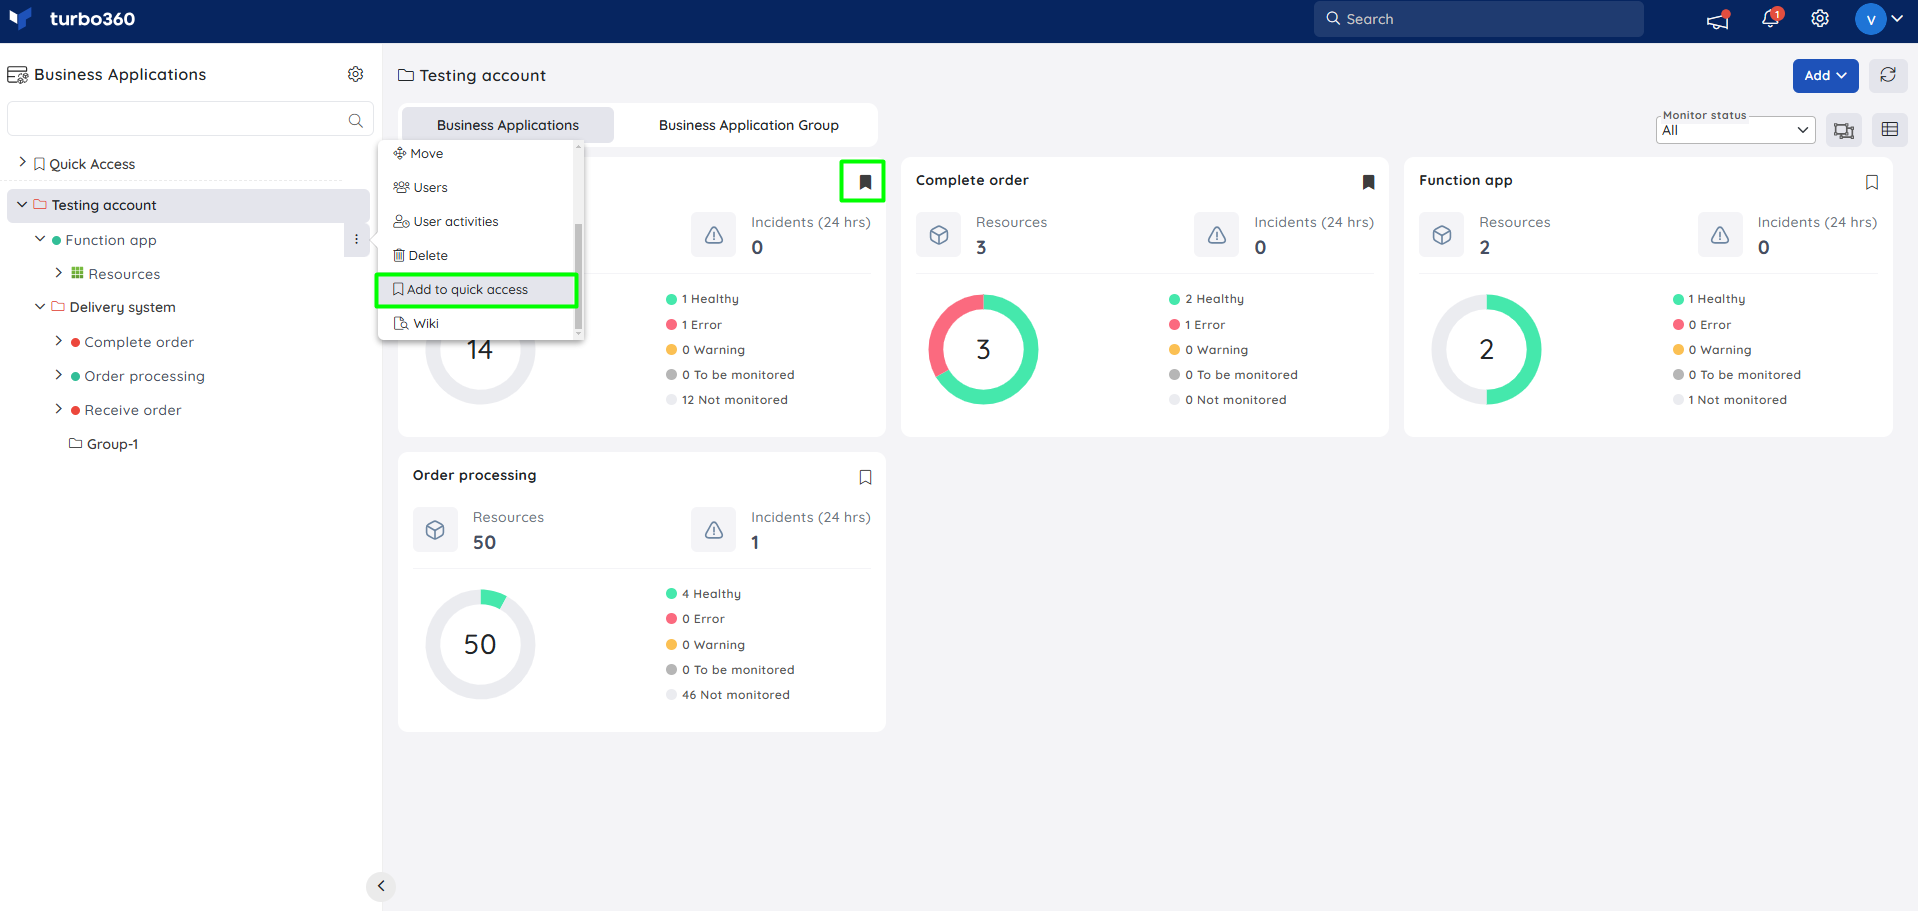
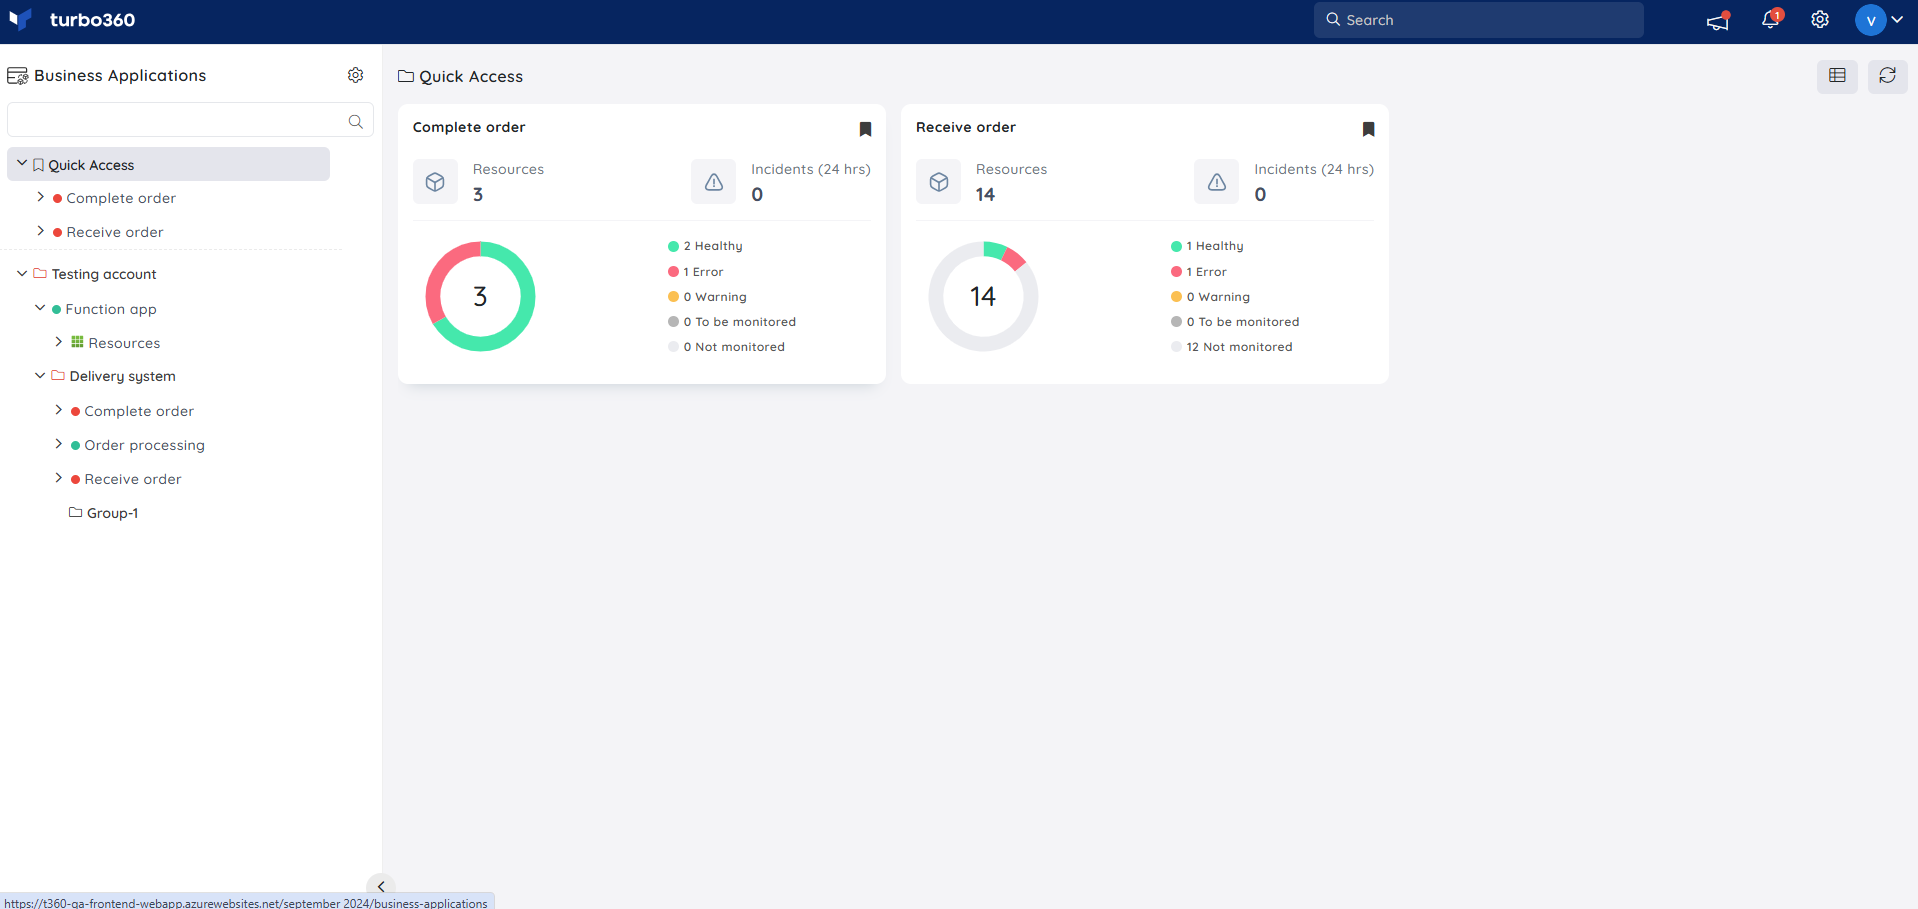
Pinned Business Applications appear under the Quick Access grouping on the Business Applications home screen.
Access permissions
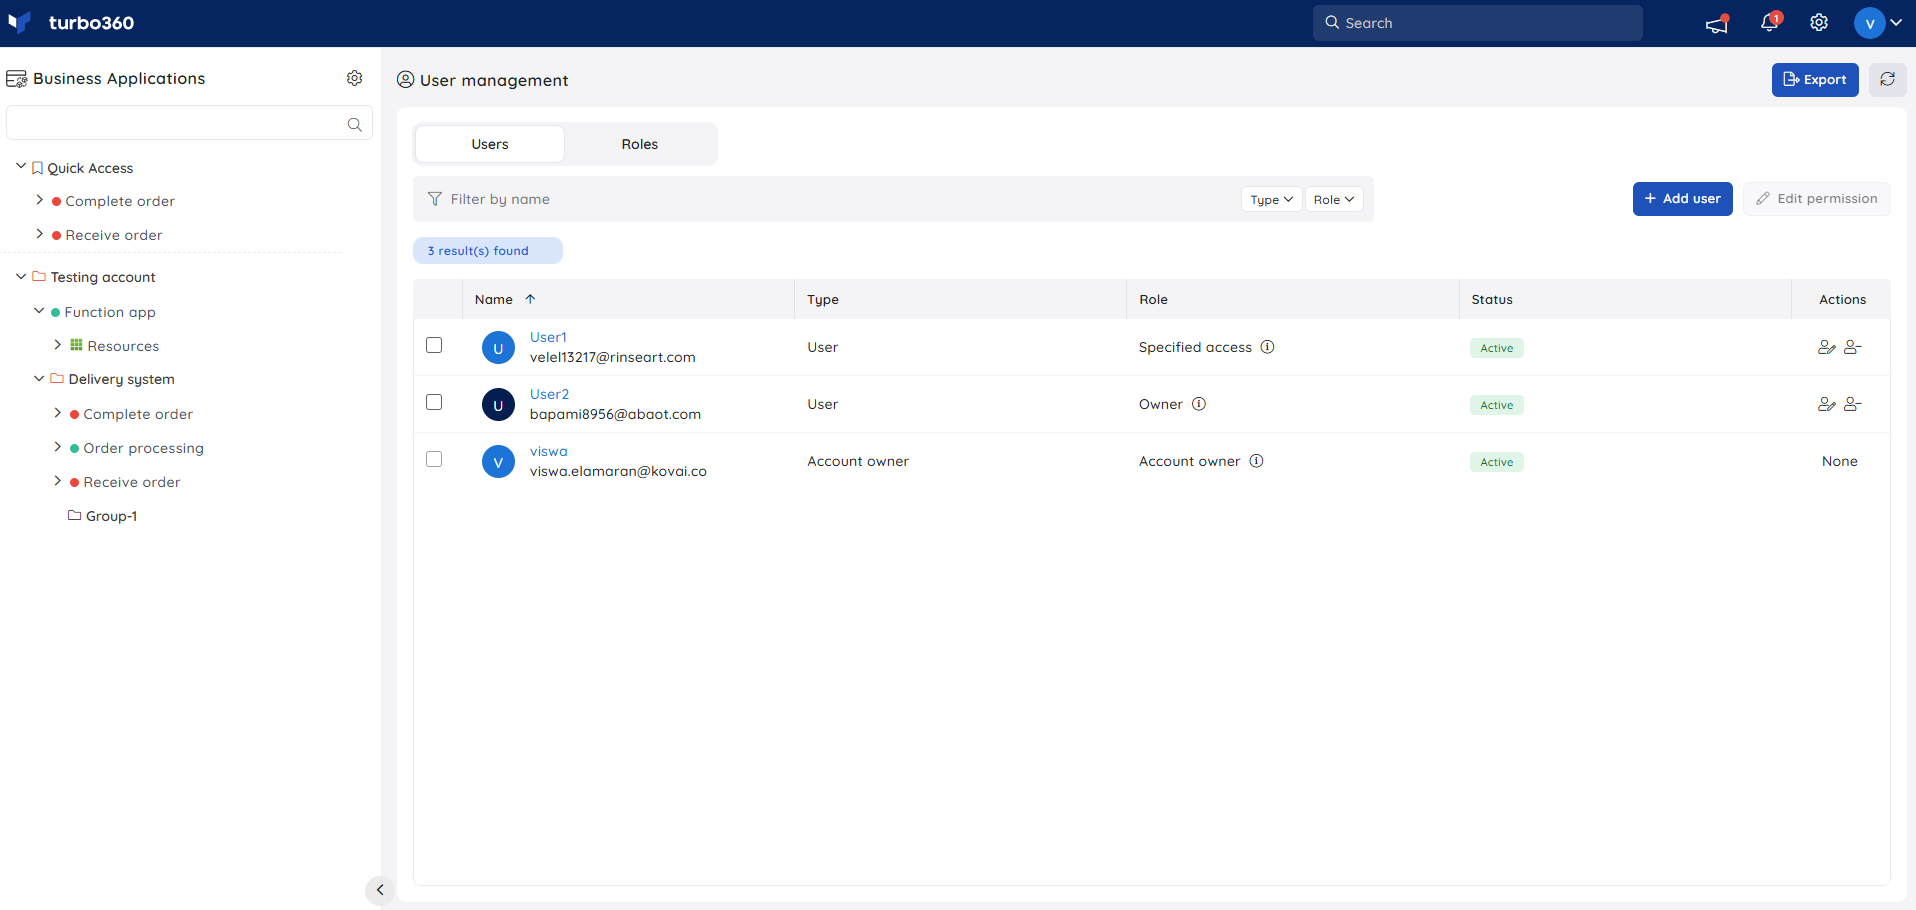
You can grant access to a Business Application in two ways:
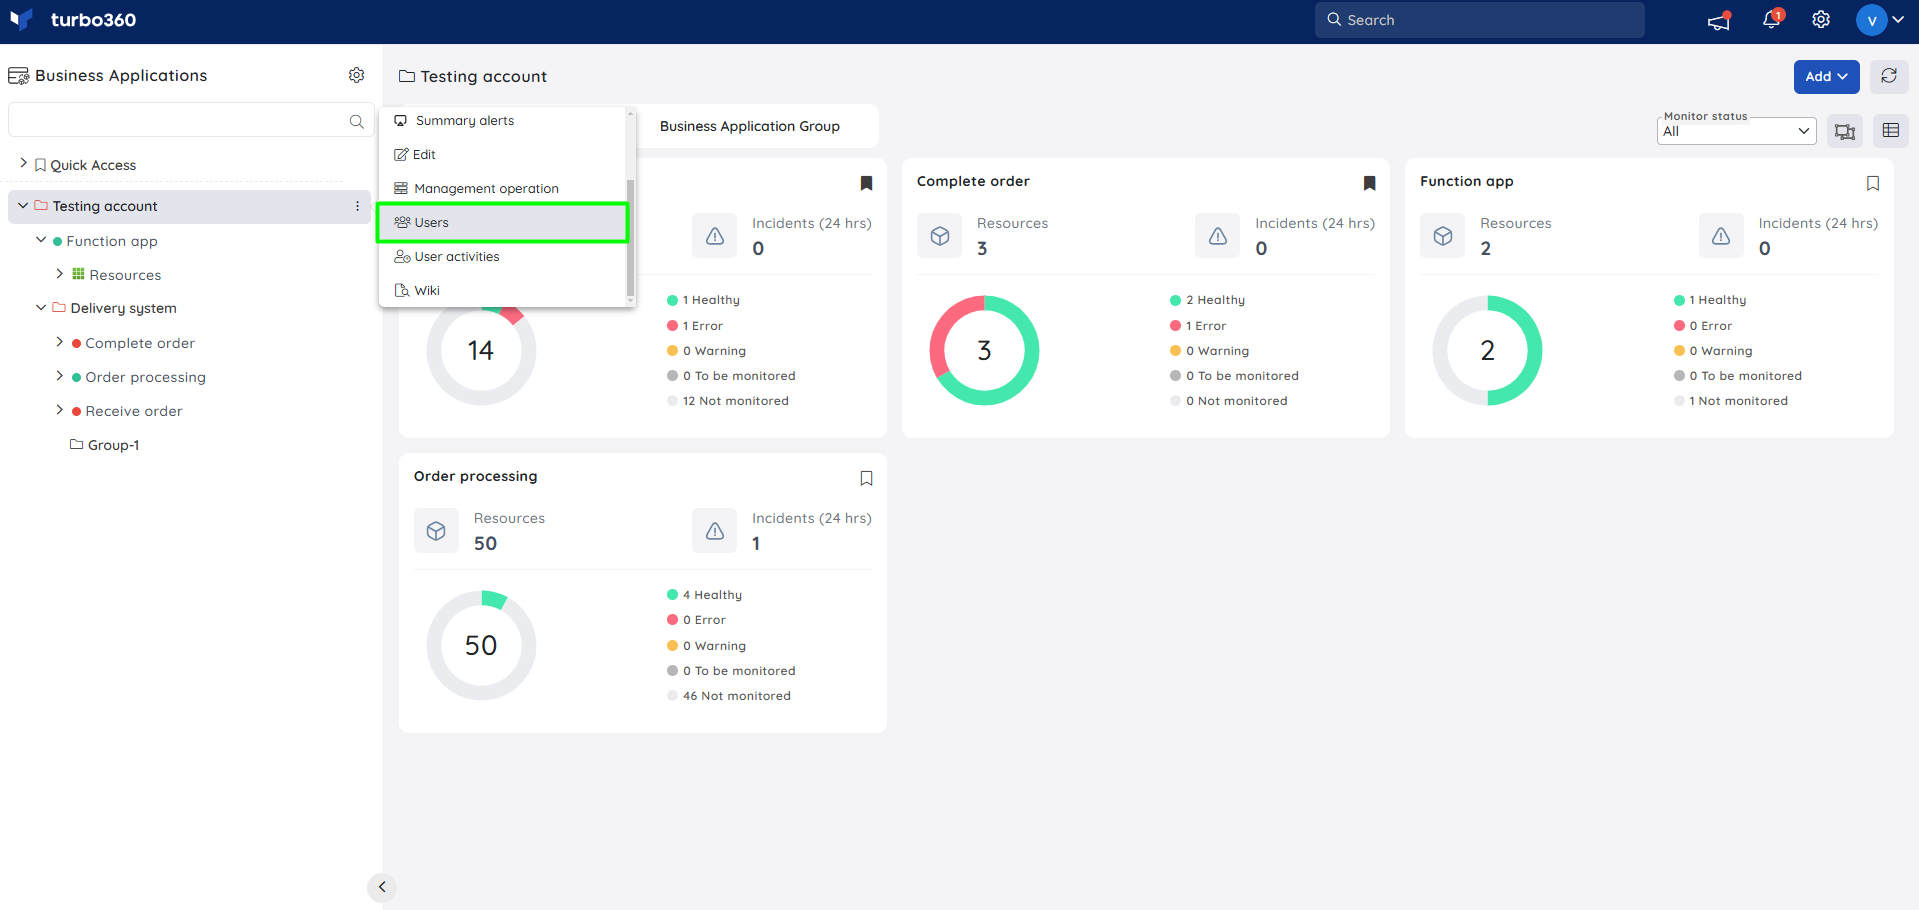
- Assign user roles in the User Management section.
- Click the Context menu ( ⋮ ) next to the Business Application in the tree view and select Users.
Limitations
- No performance metrics are available for the duration of a pause monitoring window.
- Alerts triggered before a pause monitoring window begins remain open until resolved or acknowledged.
- Pause monitoring does not stop other background operations or module dependencies.
Troubleshooting
Business Application health status does not reset to healthy after closing incidents.
Cause: Alert incidents exist across multiple monitoring profiles or resource-level rules, and not all have been closed.
Fix: Close the most recent alert incident for every active monitoring profile and every resource-level monitoring rule associated with the Business Application.Pause monitoring does not take effect at the scheduled time.
Cause: The recurrence configuration may have an incorrect time zone or the toggle was not saved.
Fix: Re-open the pause monitoring configuration, verify the time zone and recurrence settings, and click Save again.Management operation completes but some resources are not updated.
Cause: The resource type is not in the list of compatible resources for management operations, or the resource is in a state that does not support the selected operation.
Fix: Review the compatible resources table and confirm the resource's current state. Unsupported resource types must be managed individually from their respective resource pages.Business Application permissions do not match expectations after a move.
Cause: Moving a Business Application to a new group replaces its permissions with those of the destination group.
Fix: After the move, review and reassign permissions from the User Management section or the Business Application's Context menu ( ⋮ ) if the inherited permissions are not appropriate.Business Application deletion is still pending after several minutes.
Cause: Large Business Applications with many associated resources may take longer than one minute to fully delete.
Fix: Wait a few additional minutes and refresh the page. If the application still appears, raise a support ticket.
Related articles
Was this article helpful?