

Managing optimization schedules
- 05 Aug 2026
- 9 Minutes to read
- Print
- DarkLight
- Download PDF
Managing optimization schedules
- Updated on 05 Aug 2026
- 9 Minutes to read
- Print
- DarkLight
- Download PDF
Article summary
Did you find this summary helpful?
Thank you for your feedback!
Overview
An optimization schedule automates the start, stop, and SKU-change operations for your Azure resources on a defined timetable. You create a schedule, define its timing and recurrence, assign resources, and Cost Analyzer handles the rest — running once per hour based on the configured timezone.
Business value
Optimization schedules reduce idle resource spend by automatically stopping or downscaling resources outside business hours, without requiring manual intervention. You retain full control through pause settings, on-demand runs, and per-user access policies that allow team members to manage schedules without elevated module-level permissions.
Prerequisites
- A Cost group must exist before you can create an optimization schedule.
- The Service Principal associated with the Cost group must have Contributor access to apply SKU changes to resources.
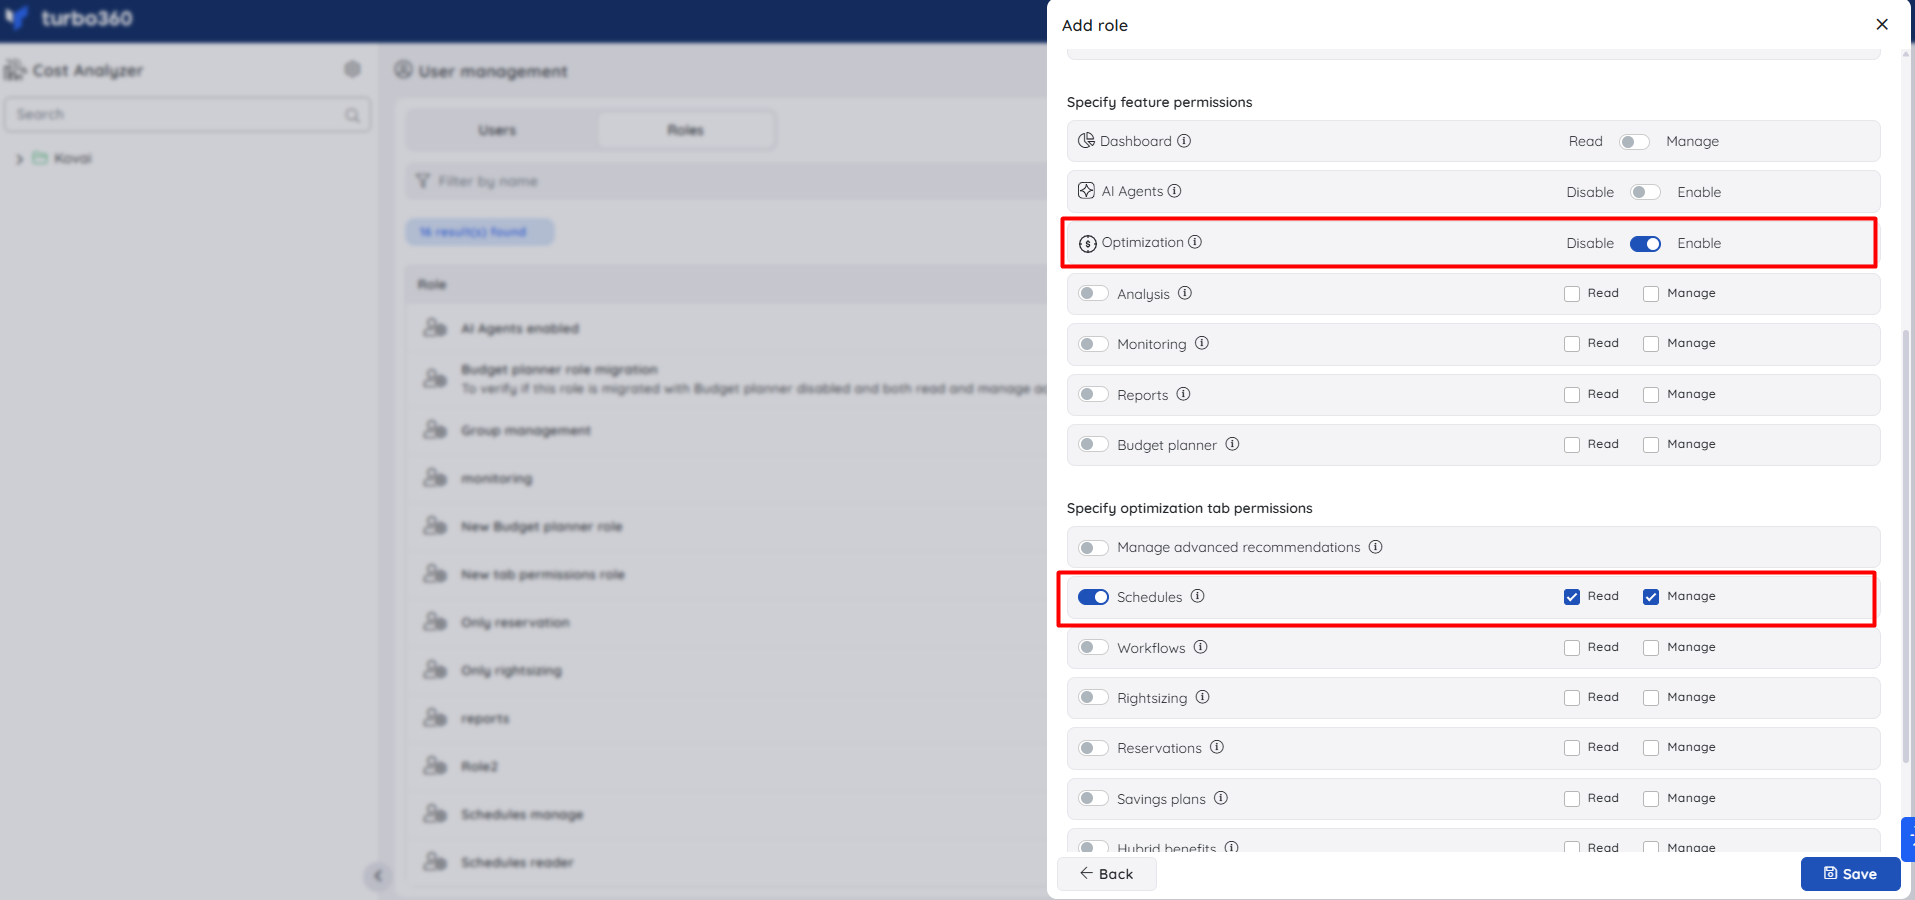
Required permissions
| Permission | Access |
|---|---|
| Account owner / Owner / Contributor | Full access — create, update, delete, run schedules, manage user access |
| Custom role — Schedules: Read | View schedules and run history |
| Custom role — Schedules: Manage | Edit, enable/disable, and run schedules |
The Schedules toggle must be enabled in the custom role configuration for either Read or Manage to take effect. The Optimization feature toggle must also be enabled before the Schedules permission becomes available.
How it works
- The schedule runs once per hour based on the configured timezone, regardless of how many Up or Down hours are defined.
- At the start of each Up hour, resources are started or scaled to the Up SKU configuration.
- At the start of each Down hour, resources are stopped or scaled to the Down SKU configuration.
- At the start of each Skip hour, resources are left unchanged.
- The History section records a run only when the previous and next state differ.
- A paused schedule skips all processing for the configured pause window. No alerts fire during the pause period.
- A paused schedule can still be triggered manually using the Run schedule option.
Steps
Use the following steps to create, update, and delete optimization schedules in Cost Analyzer. Navigate to your Cost group and open Optimization > Schedules to get started.
Create a schedule
Creating a schedule defines the timing, resource selection, and notification configuration for an automated optimization run.
- Go to Optimization > Schedules in a Cost group.
- Click Add / Create optimization schedule.
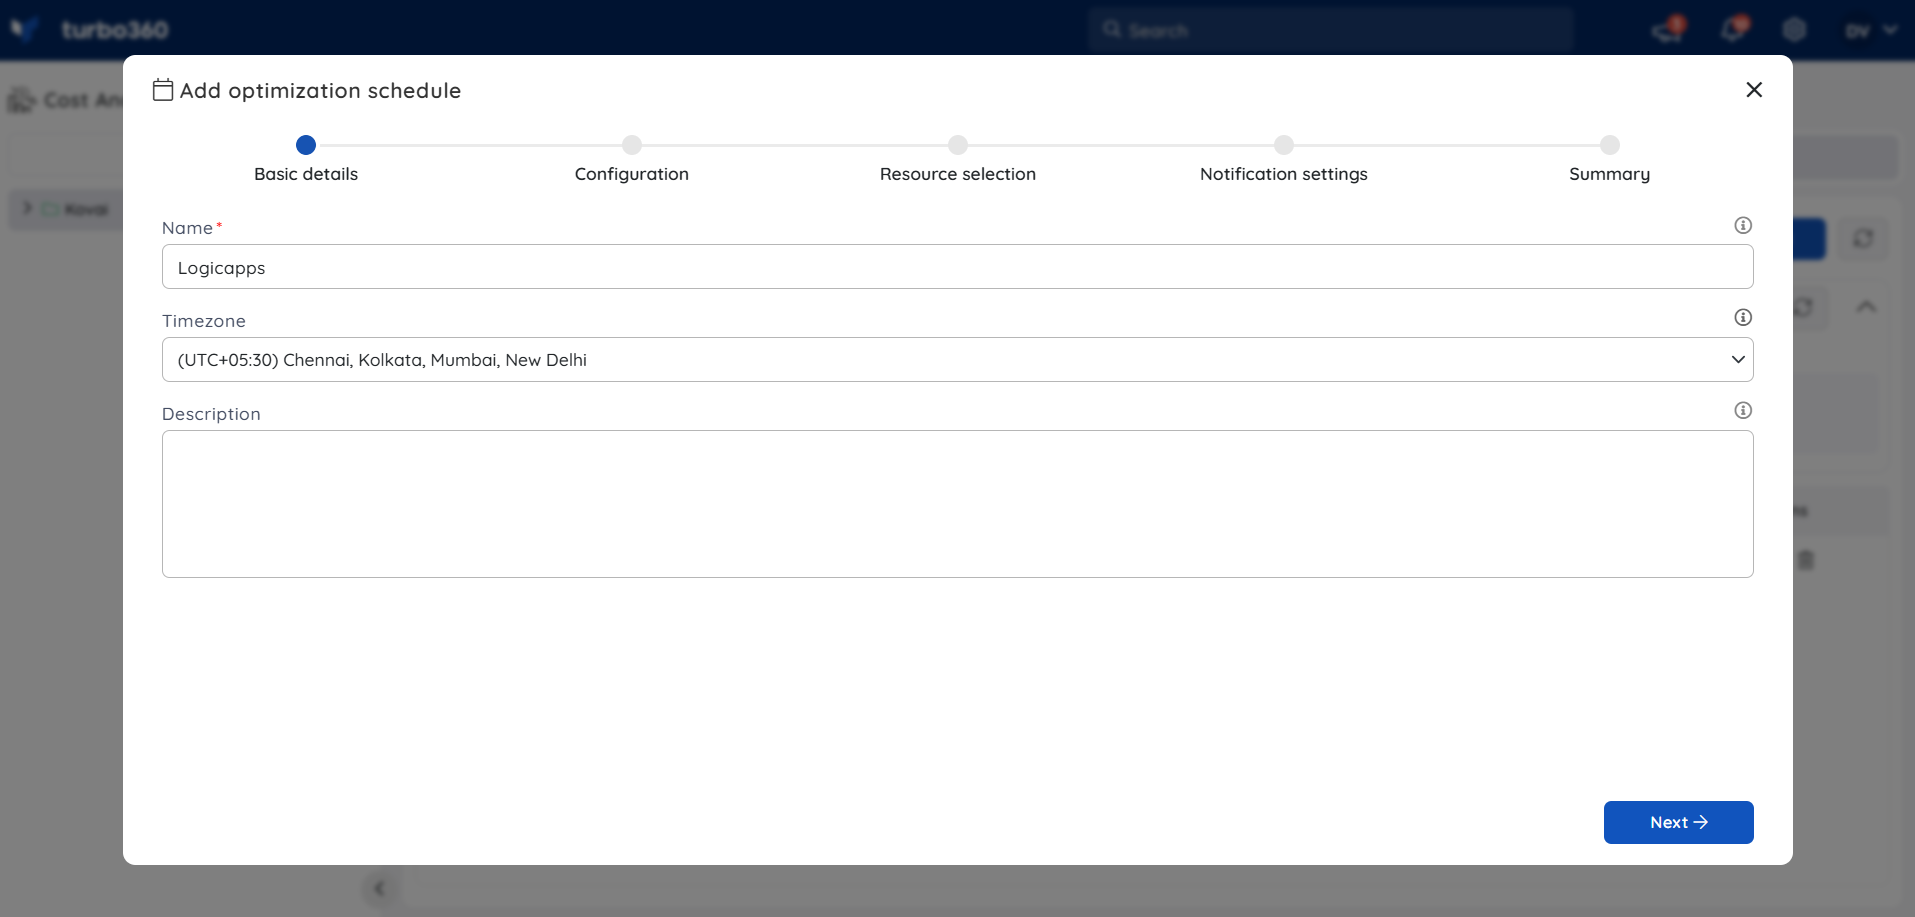
- Enter a name for the schedule.
- Set a timezone for the schedule.
- Click Next.
Scheduling configuration
- Specify the Up, Down, or Skip hours for the selected schedule type and set recurrence as required.
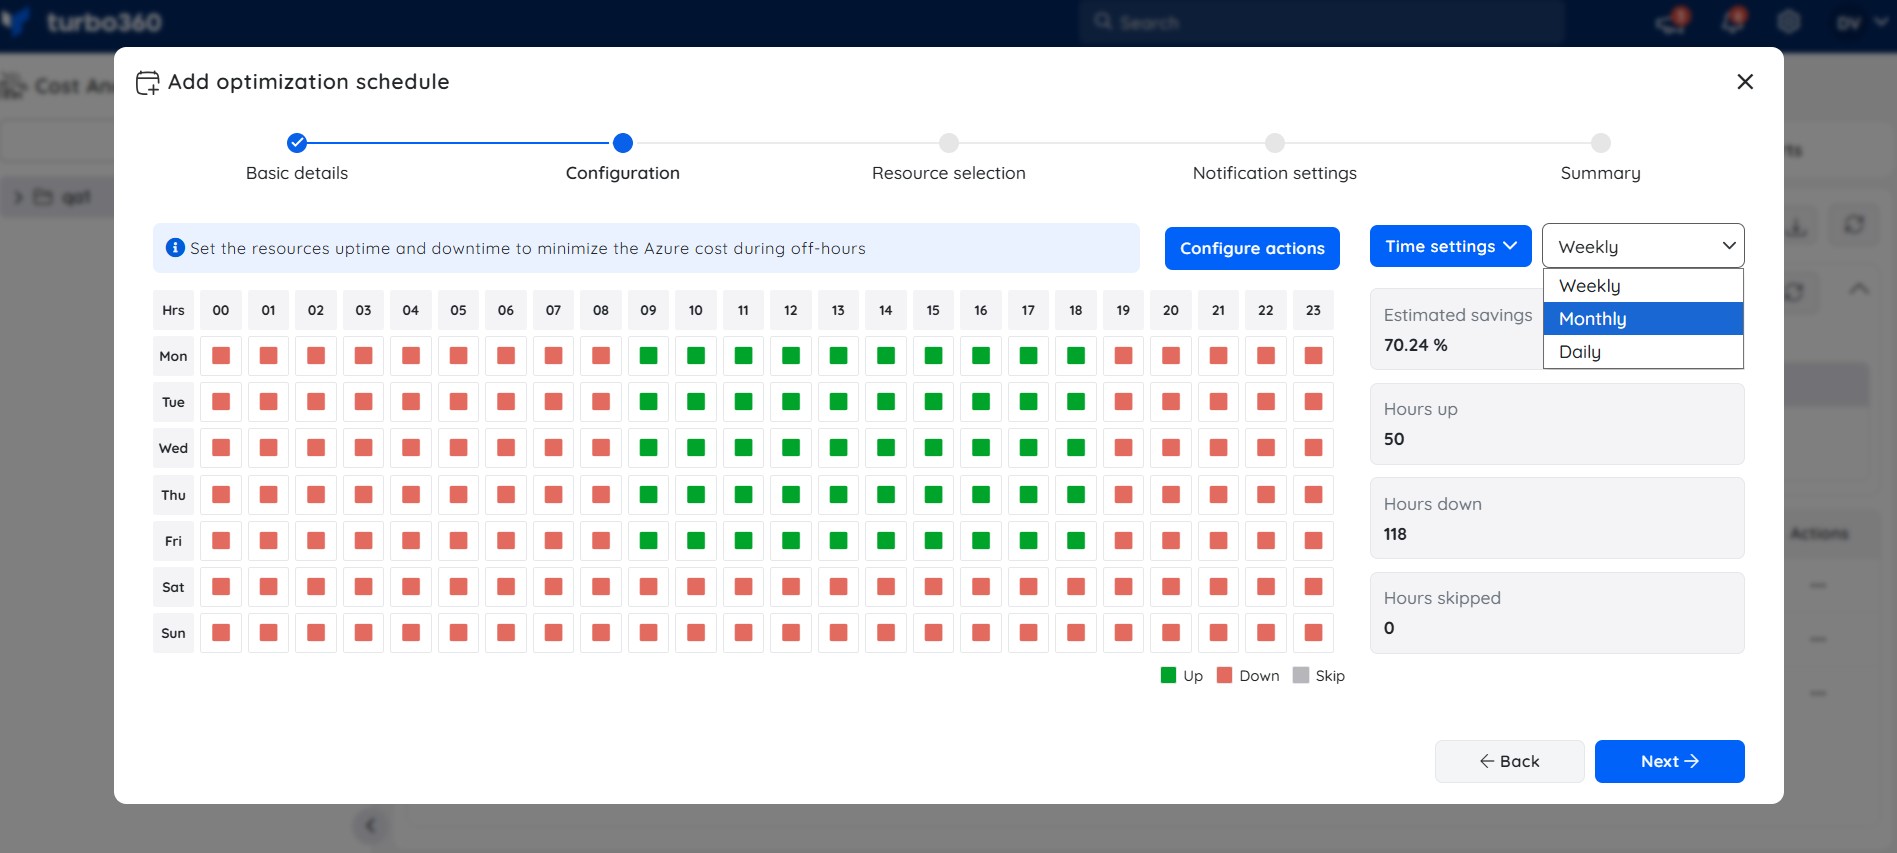
Three schedule types are available:
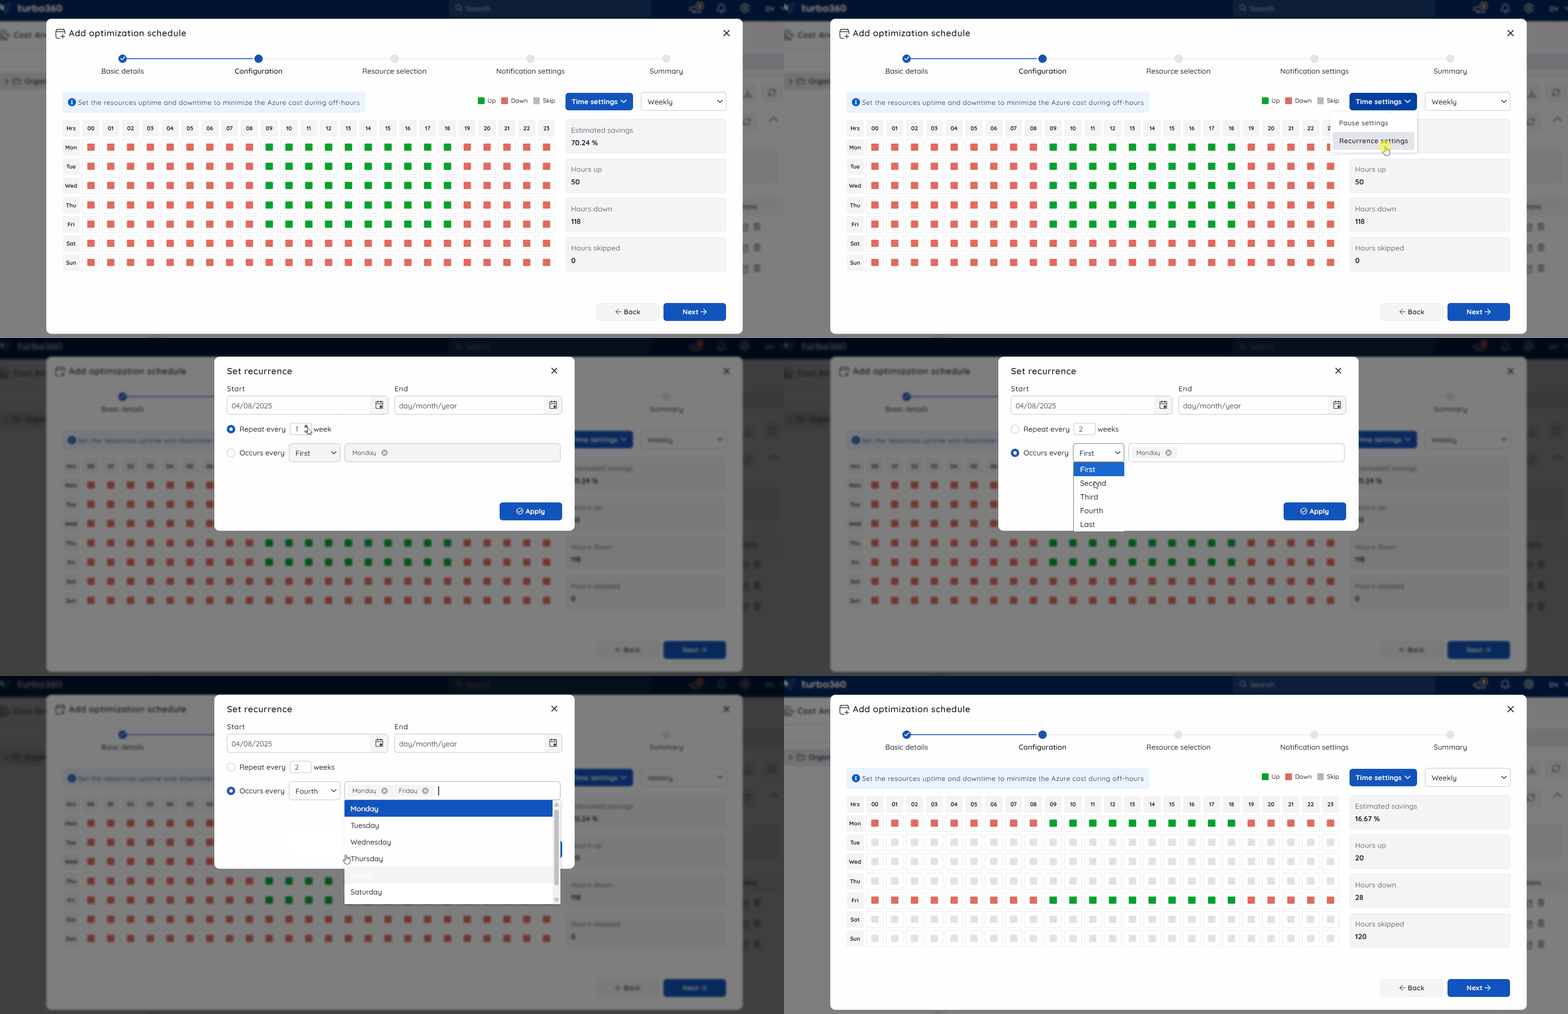
Weekly — configure uptime and downtime on a weekly basis. Supports custom recurrence patterns, such as repeating every second Wednesday and Friday.
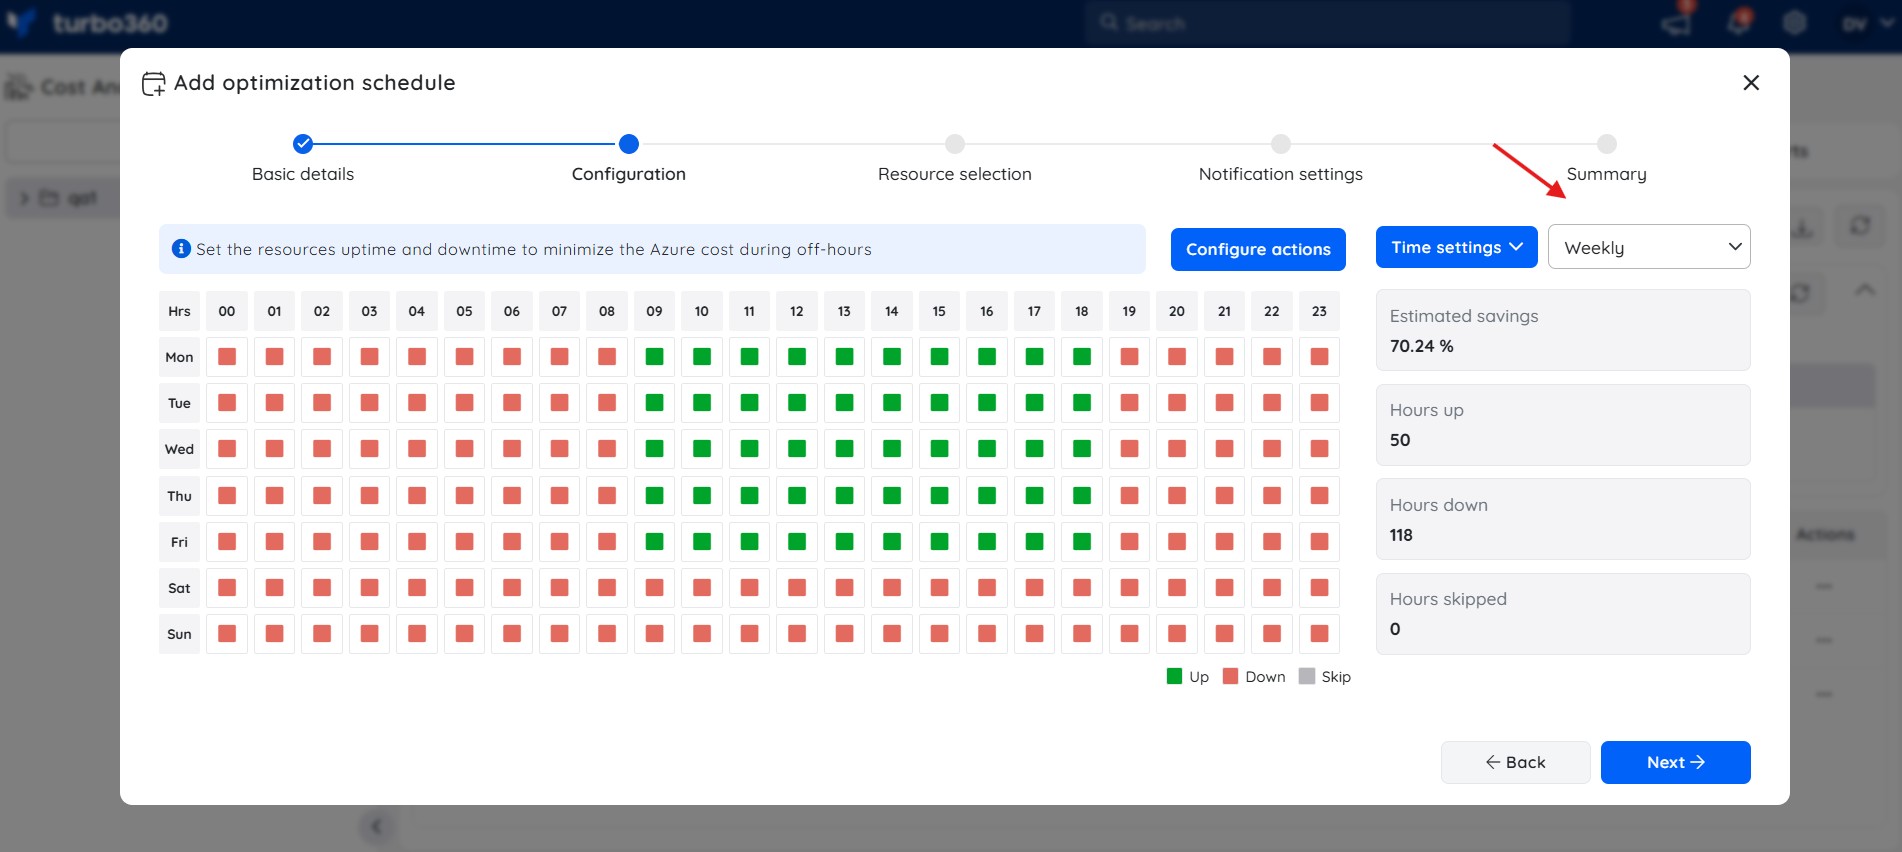
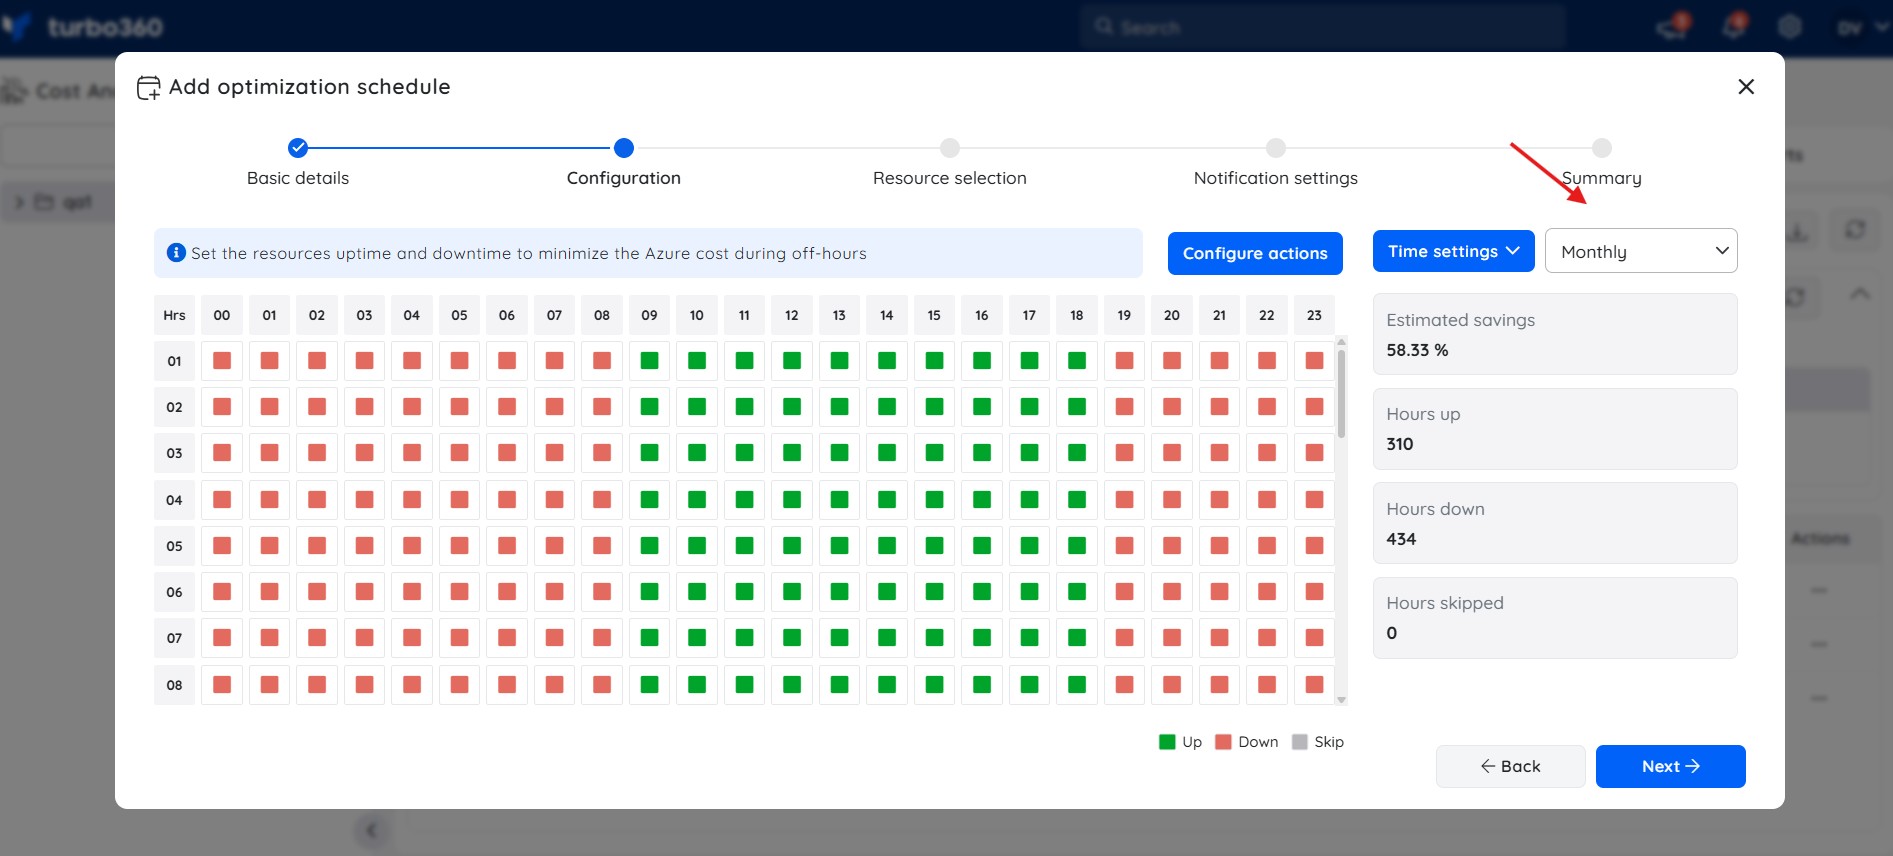
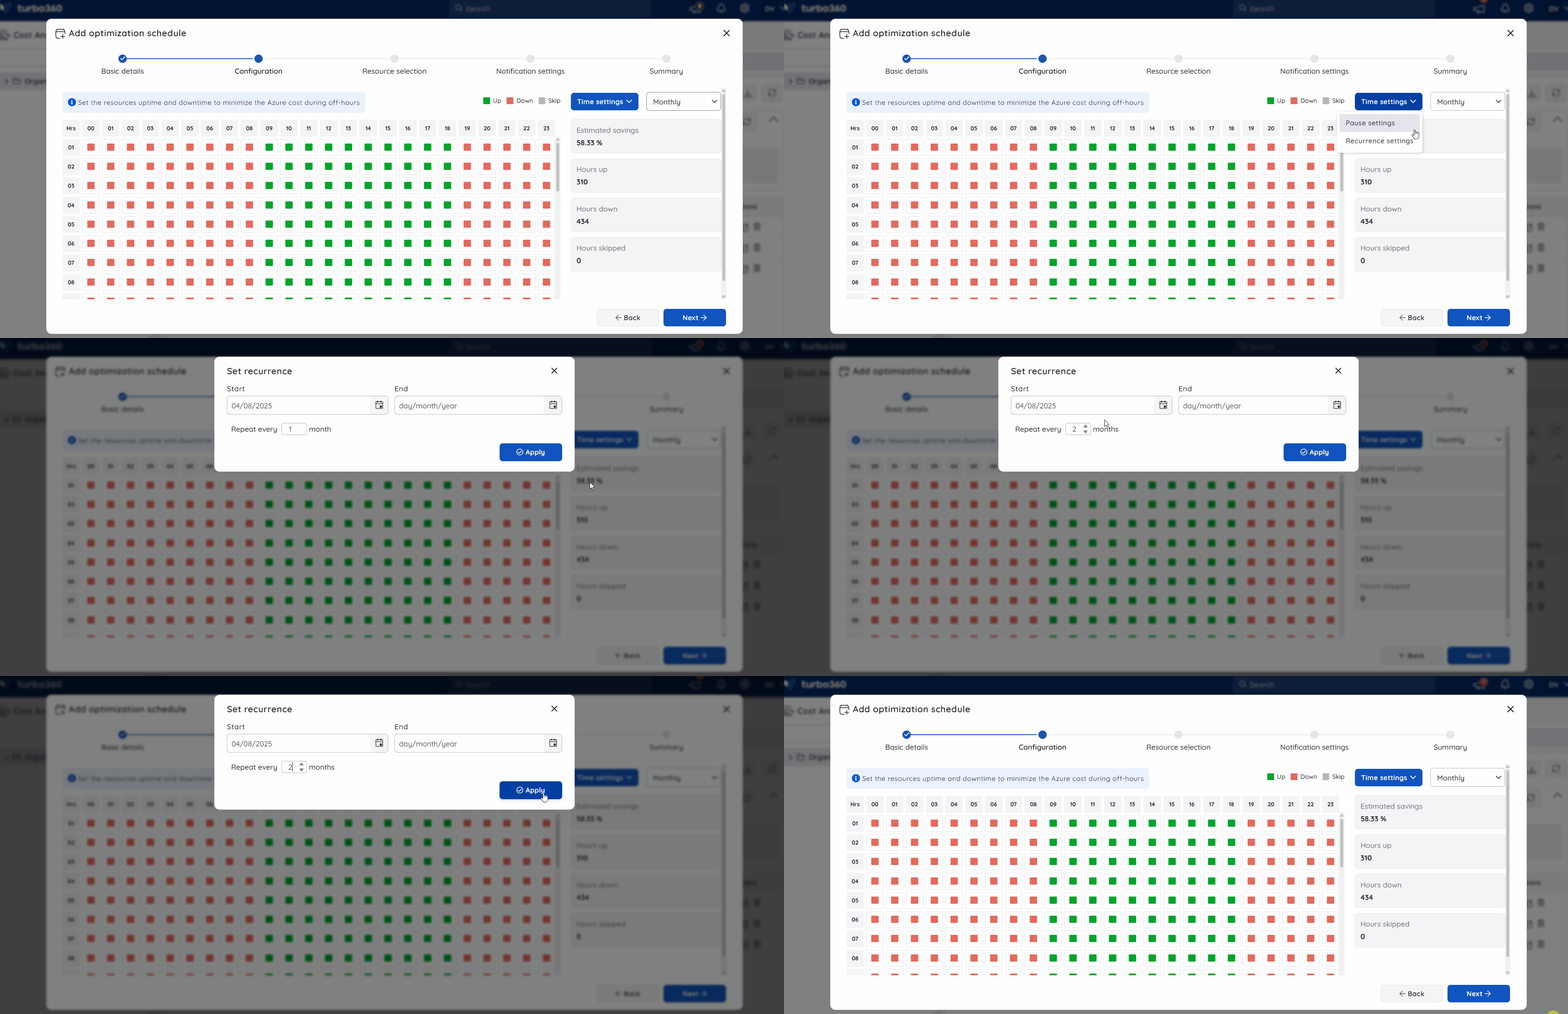
Monthly — configure uptime and downtime on a monthly basis. Supports regular monthly intervals with a defined recurrence end date.
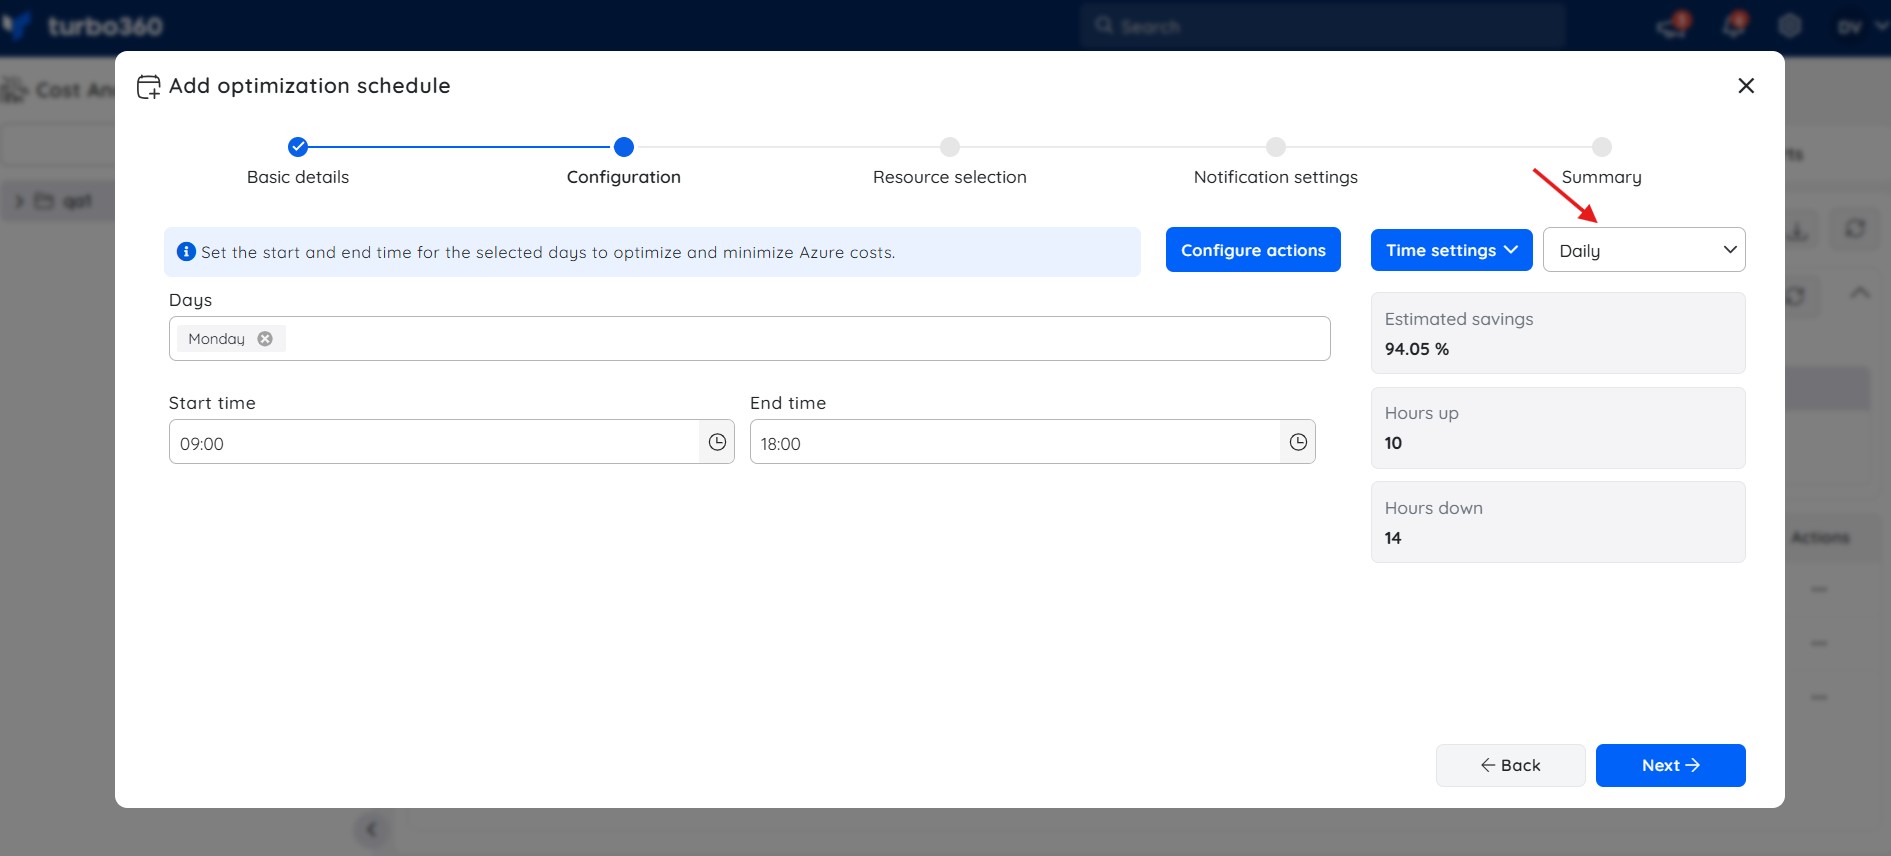
Daily — define start and end times for selected days. At the start time, the resource is started or scaled to the Up SKU. At the end time, it is stopped or scaled to the Down SKU.
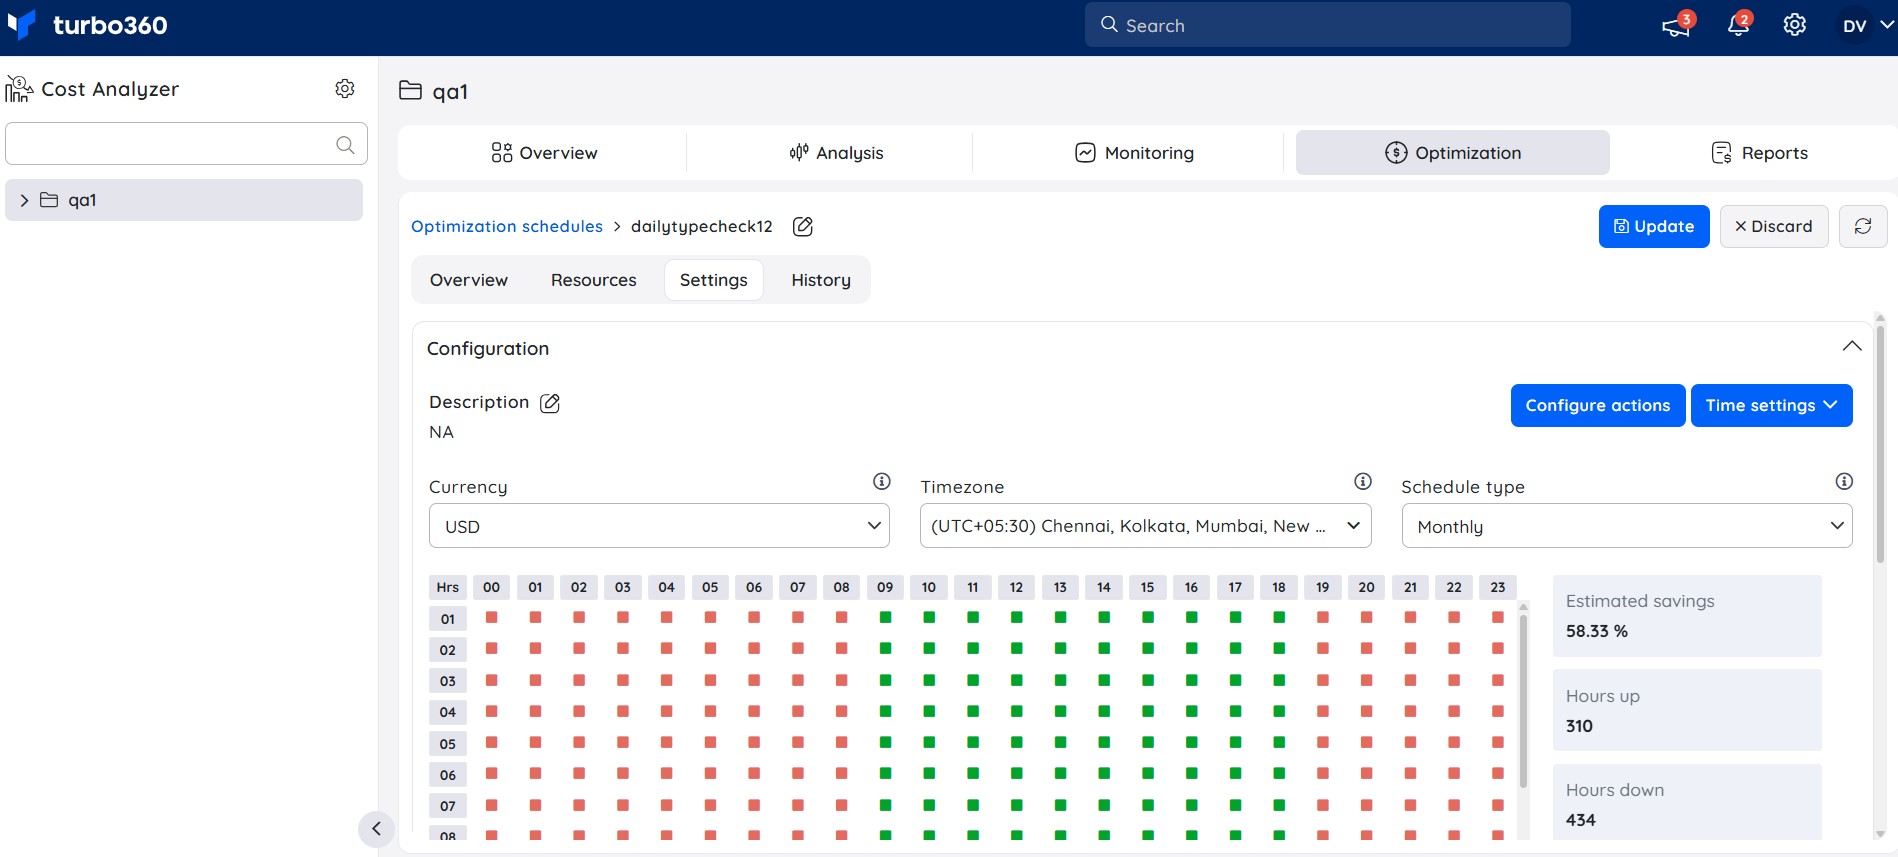
The hours shown in green are Up hours, red are Down hours, and grey are Skip hours.
Pause settings
To temporarily suspend schedule execution during critical periods such as deployments or business hours, enable pause settings during schedule creation.
- In the configuration table, click the Time settings dropdown.
- Select Pause settings.
- Toggle the Pause switch to enable the configuration panel.
- Choose a recurrence type:
- No recurrence — define a one-time pause window with a start and end time.
- Weekly recurrence — pause on selected days and time ranges, repeating weekly.
- Monthly recurrence — pause at regular monthly intervals using a custom pattern.
- Use Add rule to define multiple pause rules if needed.
- Click Save.
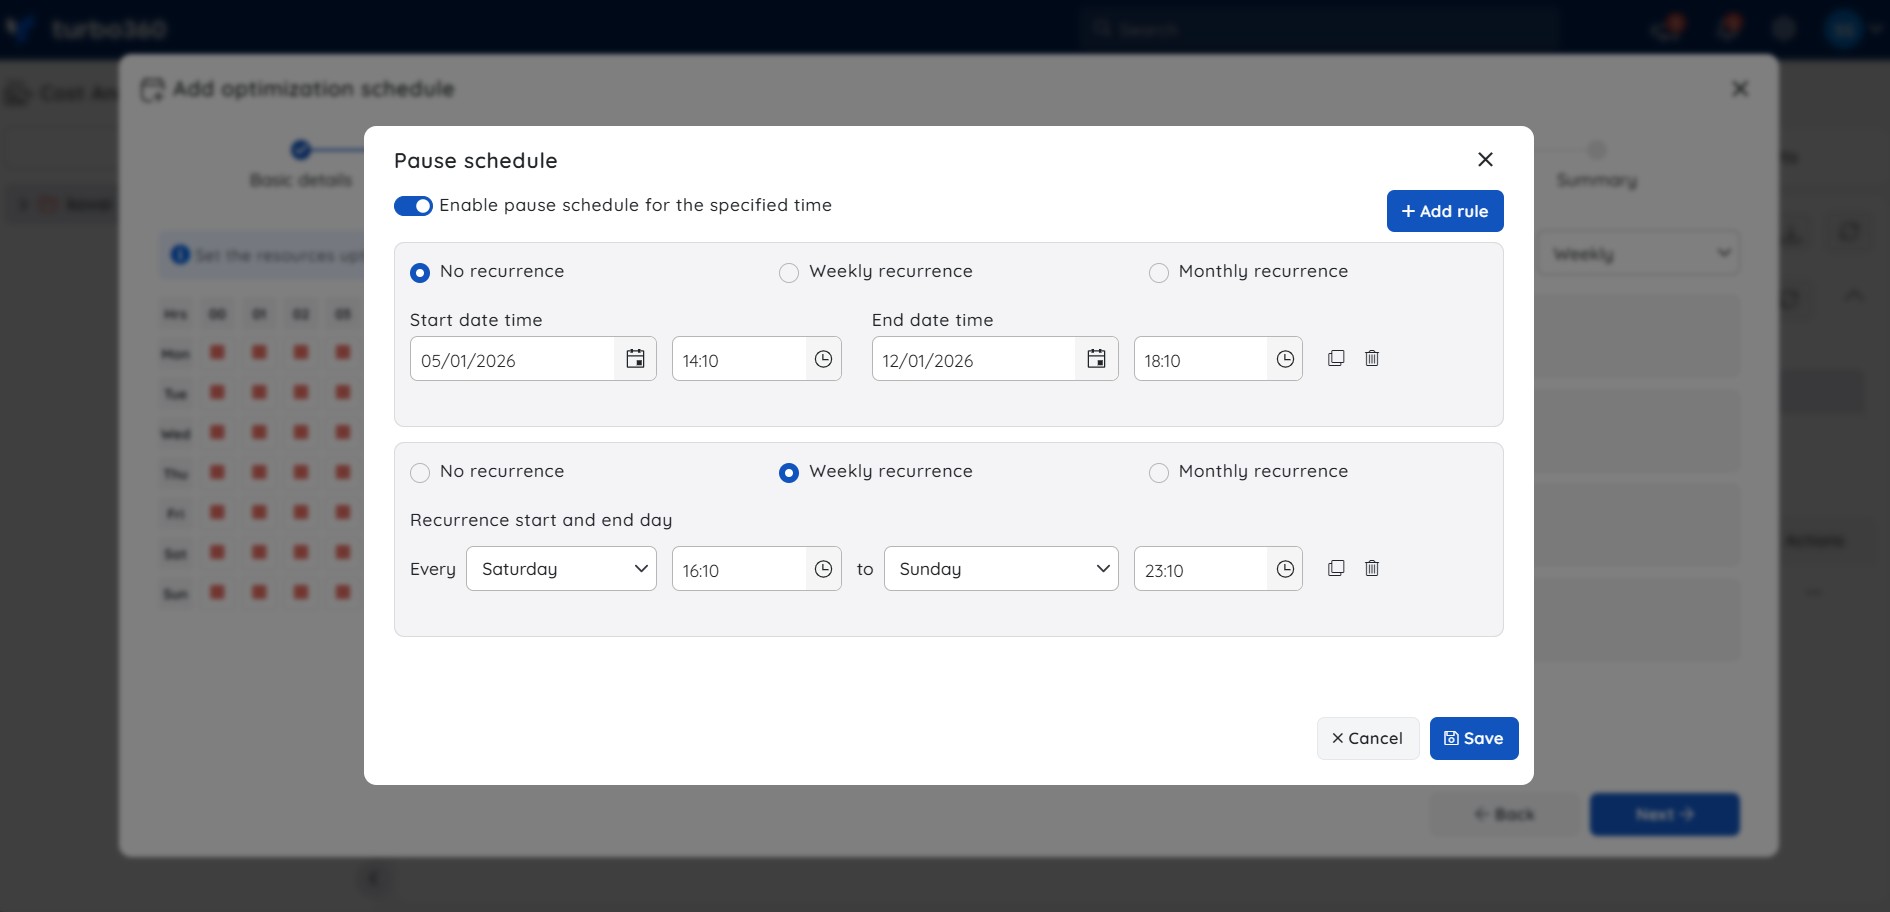
When a schedule is paused:
- The schedule does not execute during the configured pause period.
- All associated resources are skipped regardless of their individual settings.
- No alerts or notifications fire while the schedule is paused.
- All configurations and logs remain accessible.
- The schedule resumes automatically after the pause end time, or you can re-enable it manually by disabling the pause setting.
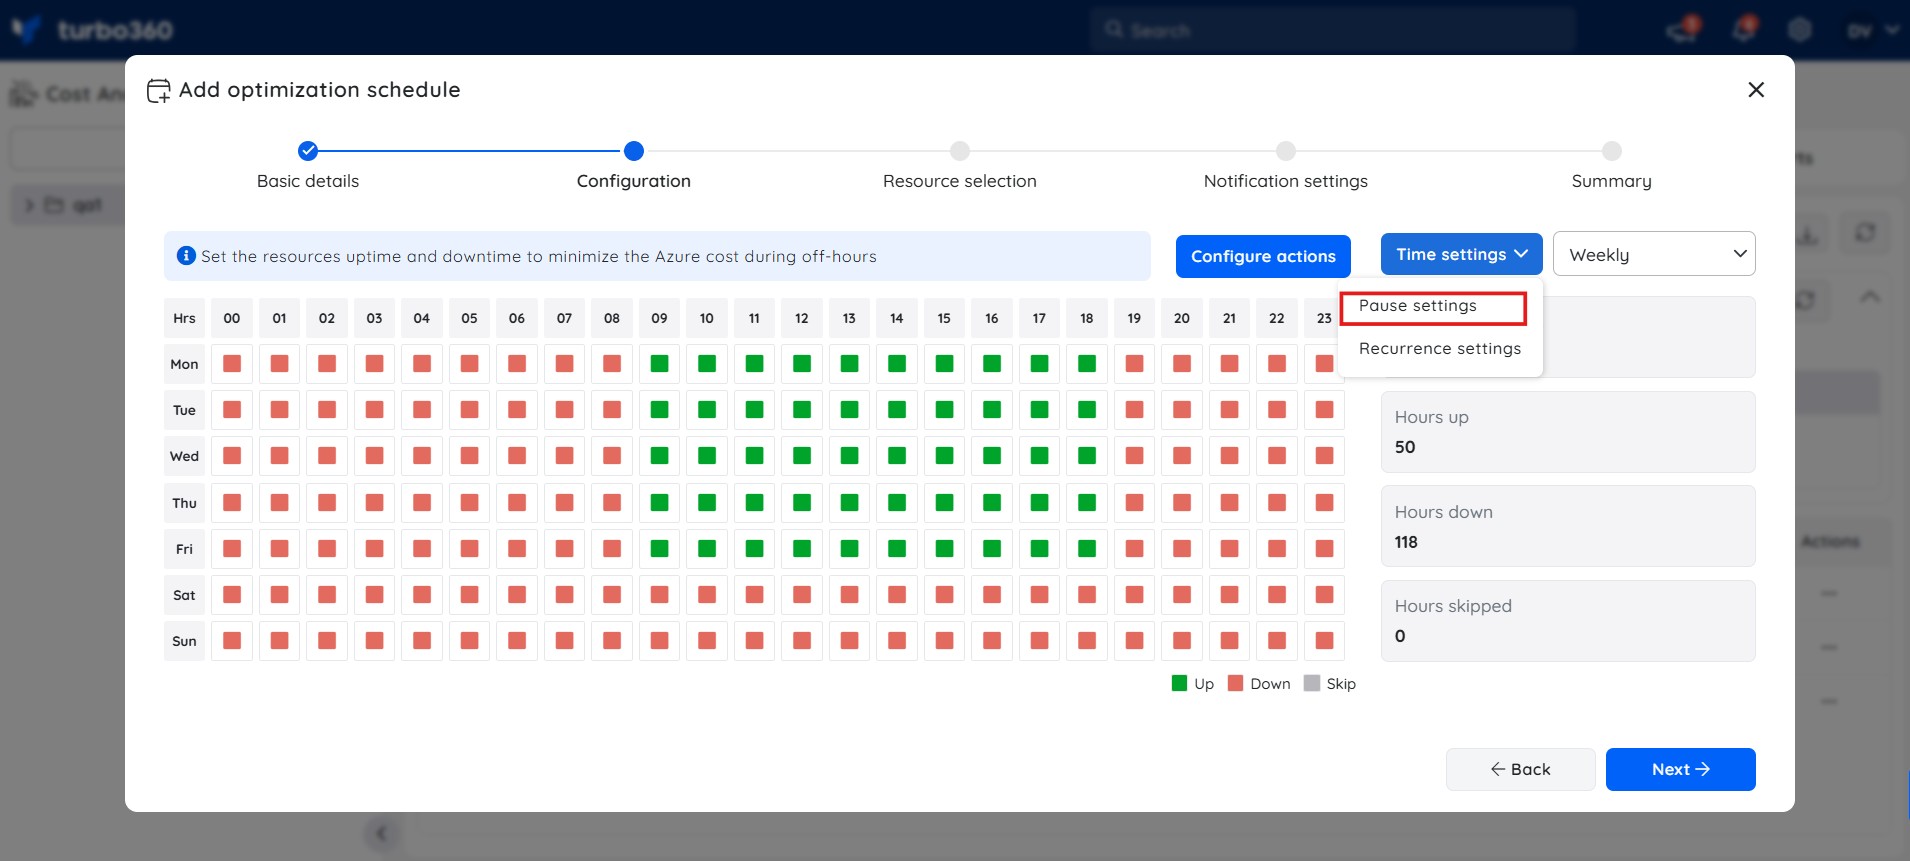
- Click Next.
Resource selection
The Resource selection screen lets you customise which resources are included in the schedule, assign execution priority, and add comments per resource.
Use the column configuration grid to add, remove, or reorder columns to match your scheduling preferences.
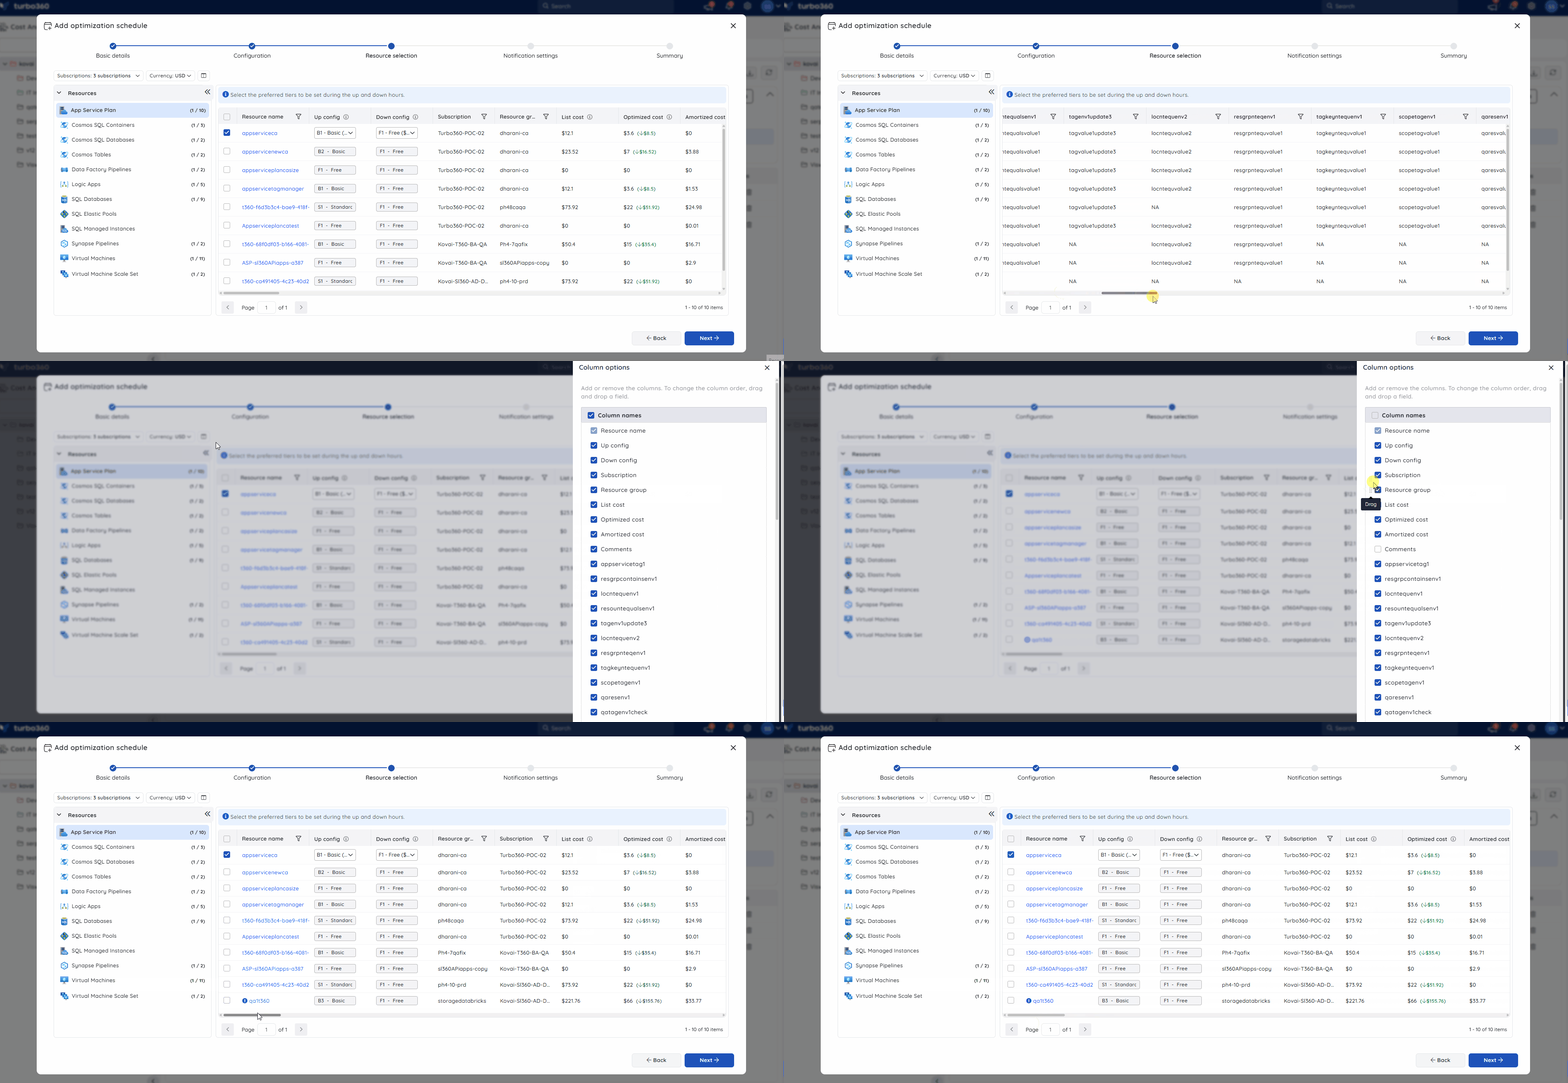
- Select resources from the relevant subscriptions.
- Assign a priority value to each resource. Lower values execute first.
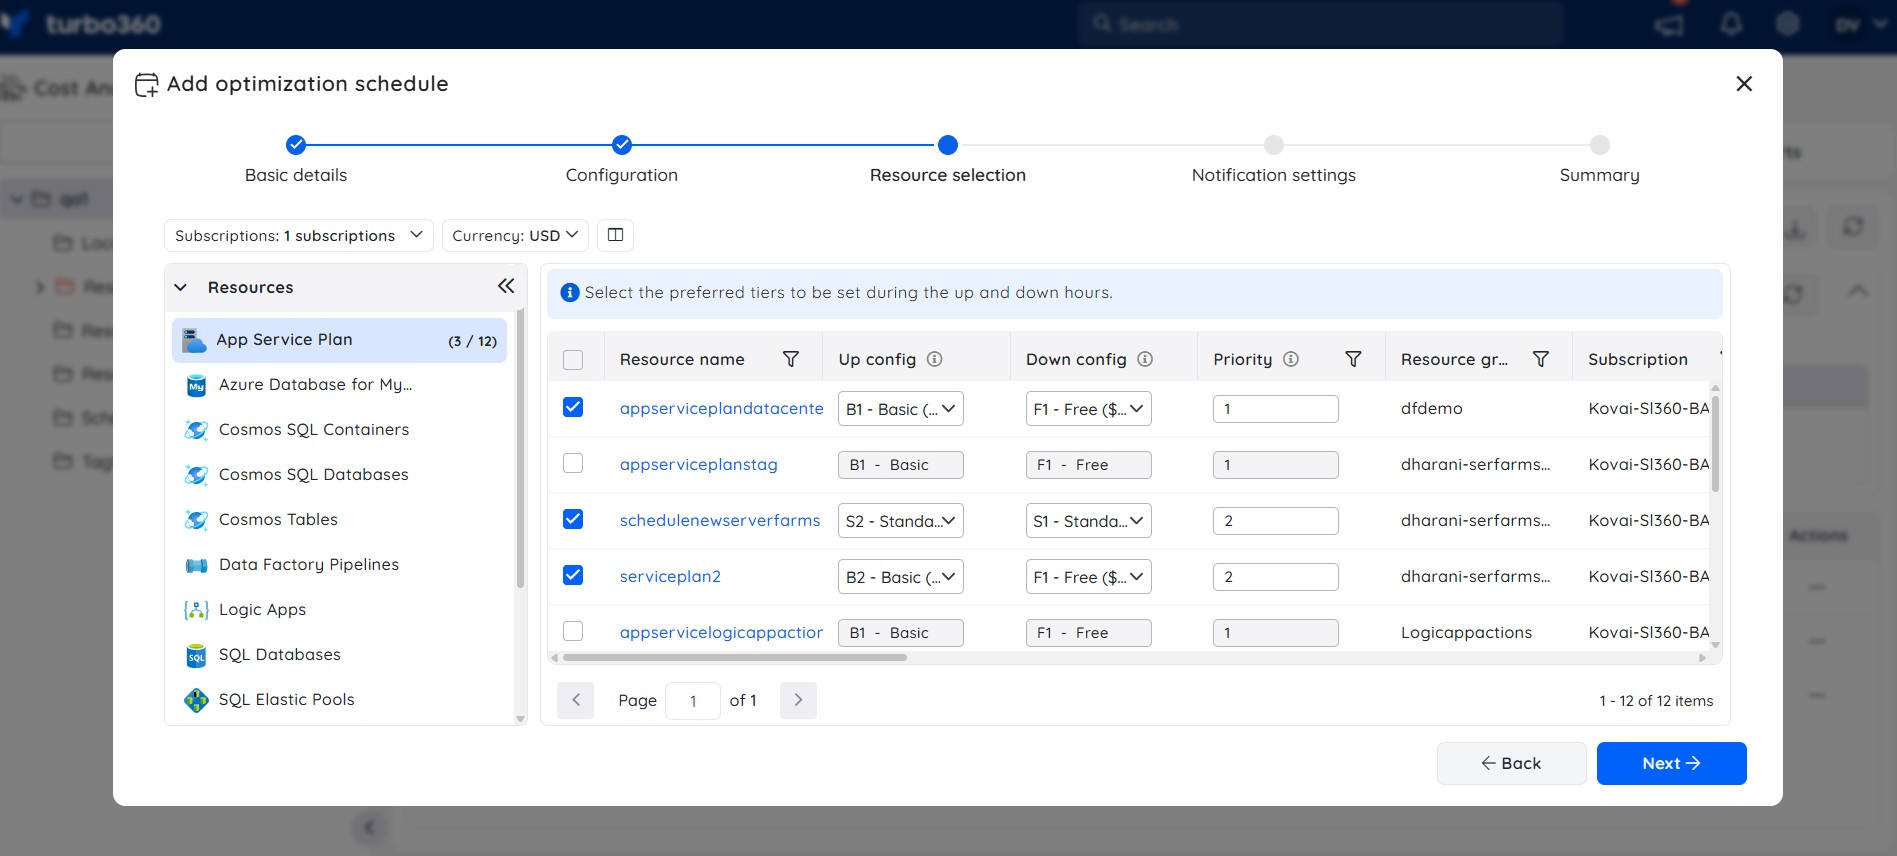
- Optionally, add a custom comment to any resource.
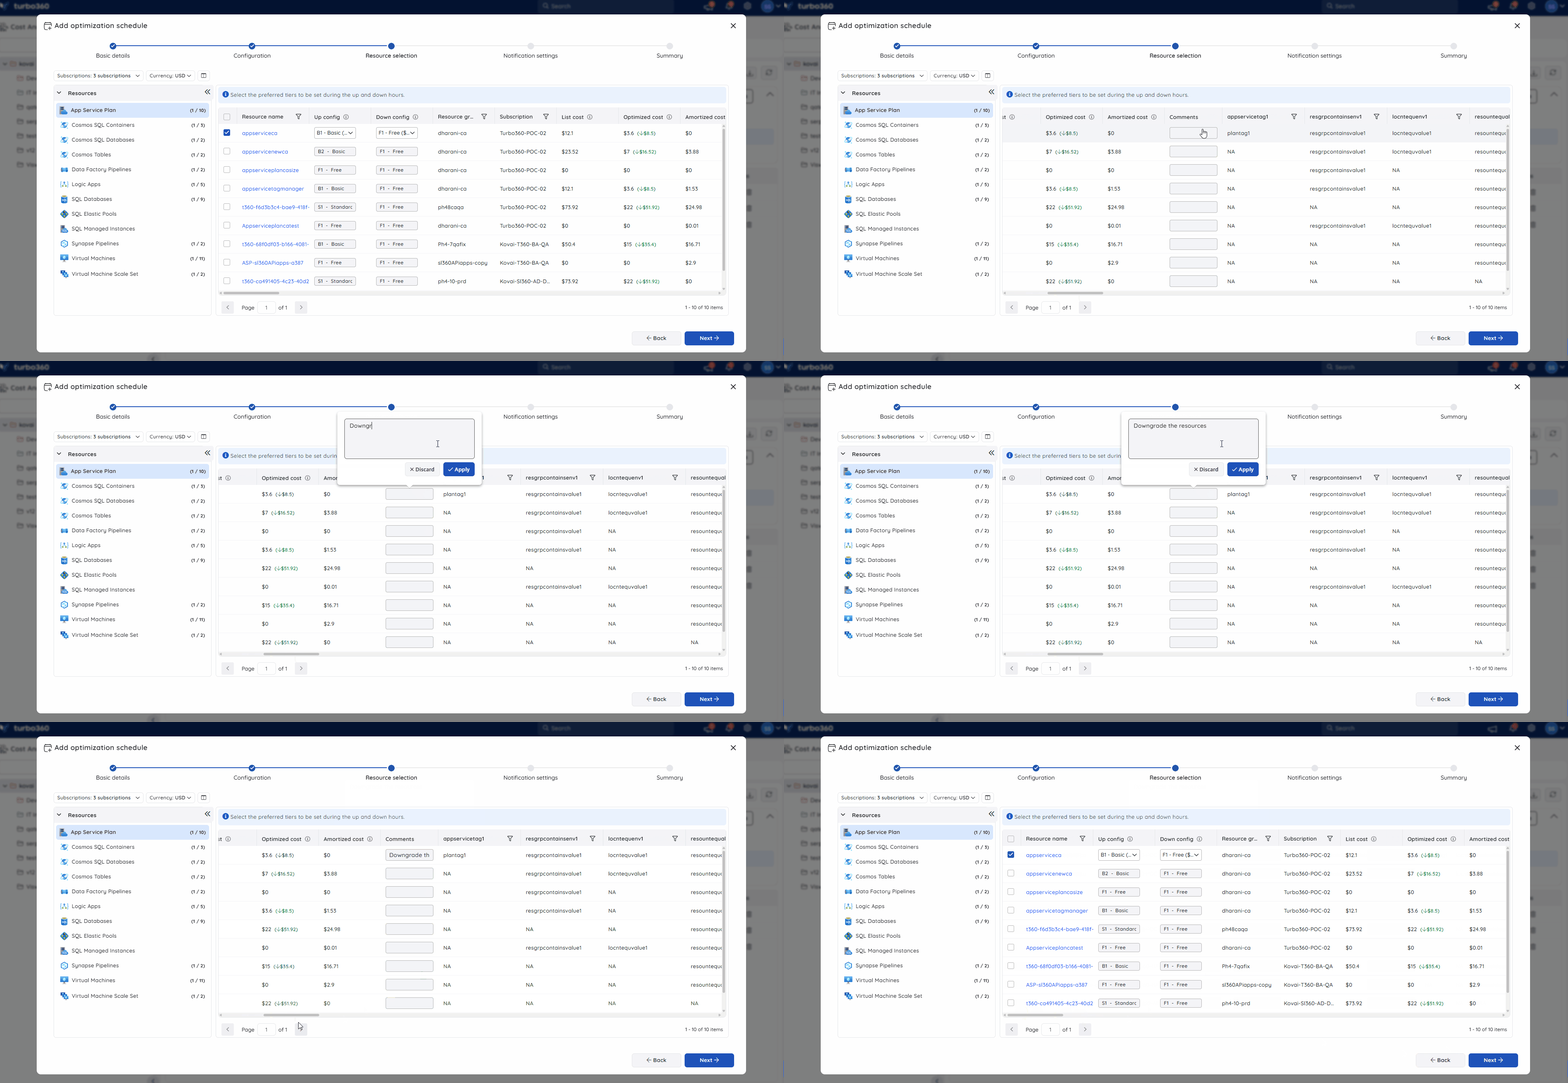
- Provide the Up and Down configuration values for each resource.
- Click Next.
Note:
The same resource can be added to multiple optimization schedules.
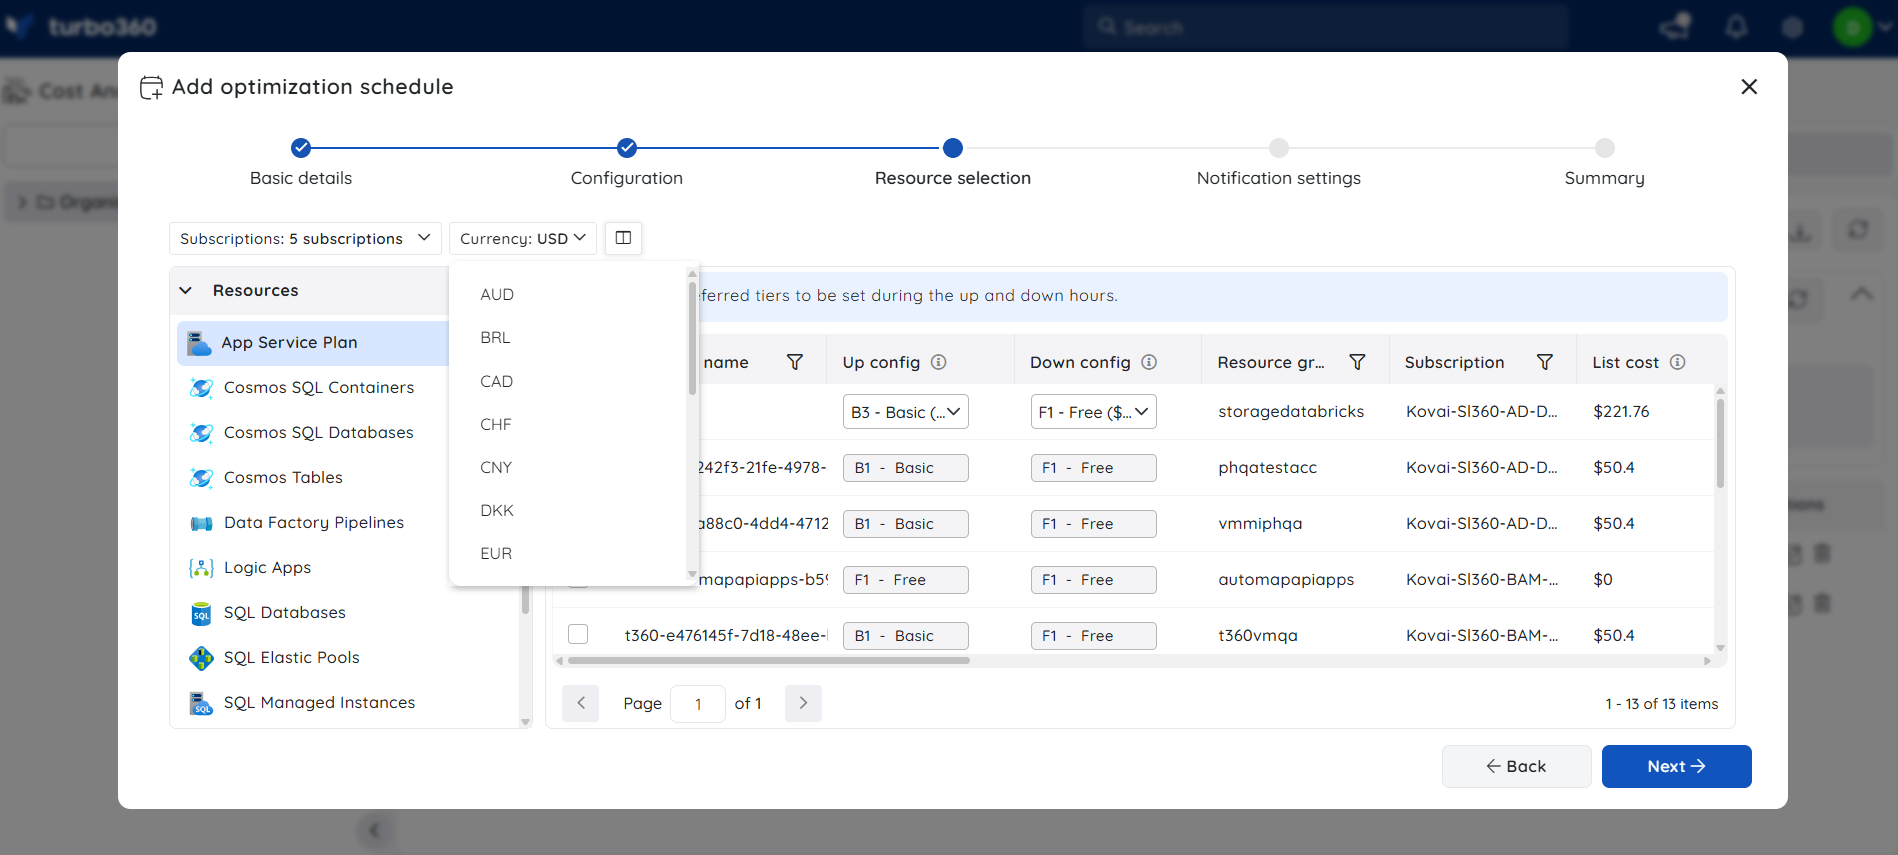
Currency selection
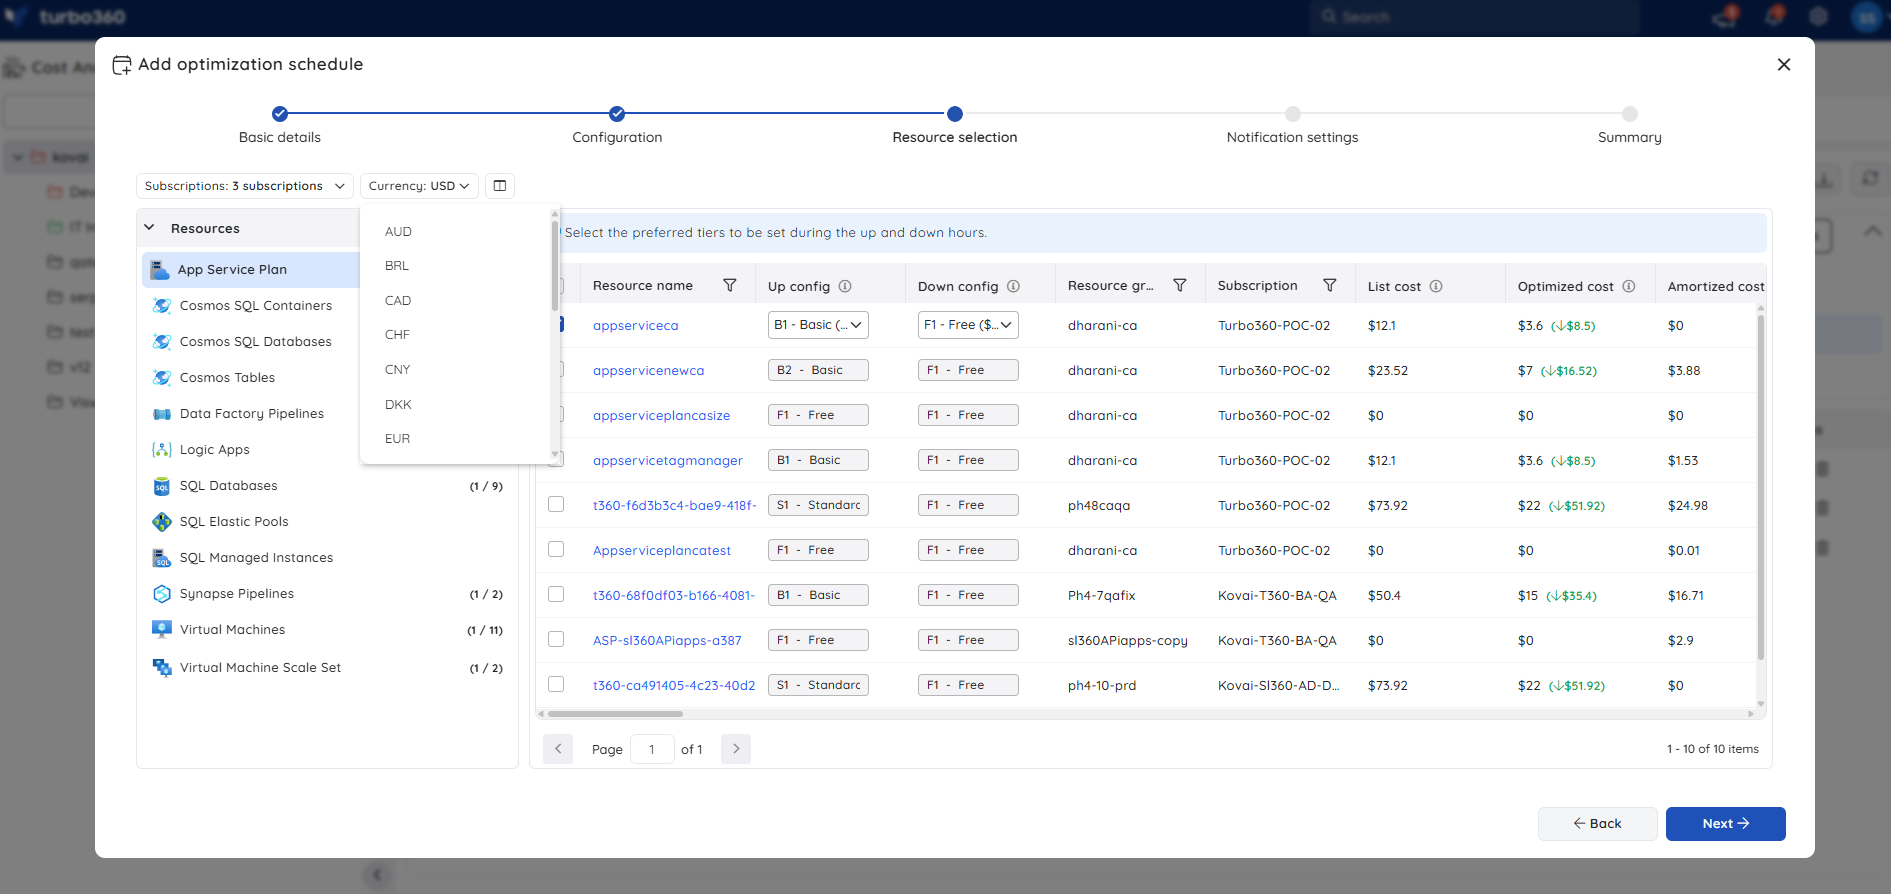
The Currency filter in the Resource selection screen lets you choose the currency used to display cost values during schedule creation. If you update the currency filter, all previously selected resources are updated to the new currency type.
You can also update the currency type from Schedule settings after the schedule is created.
Notification settings
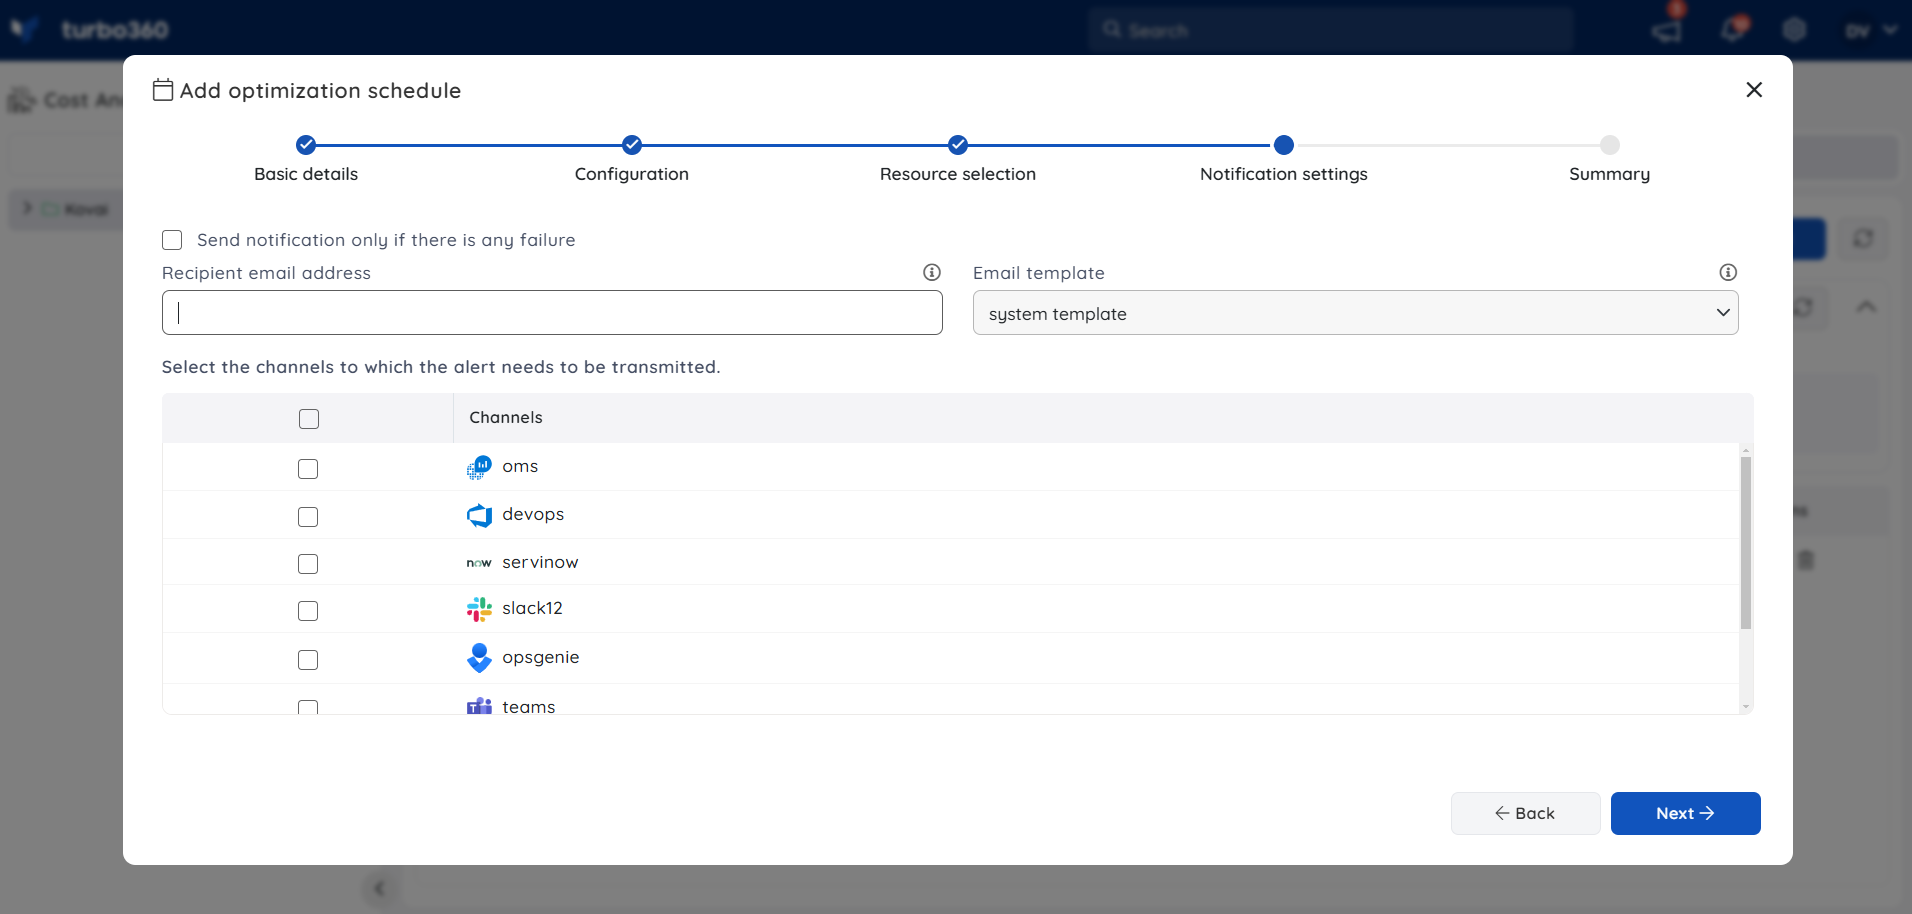
- Configure notification channels to receive an alert when the schedule run completes.
- Optionally, enable the failure-only setting to receive alerts only when a resource fails during the run.
- Click Next.
Summary
The summary screen displays the schedule configuration and a Cost Savings chart showing the estimated savings when resources run on this schedule.
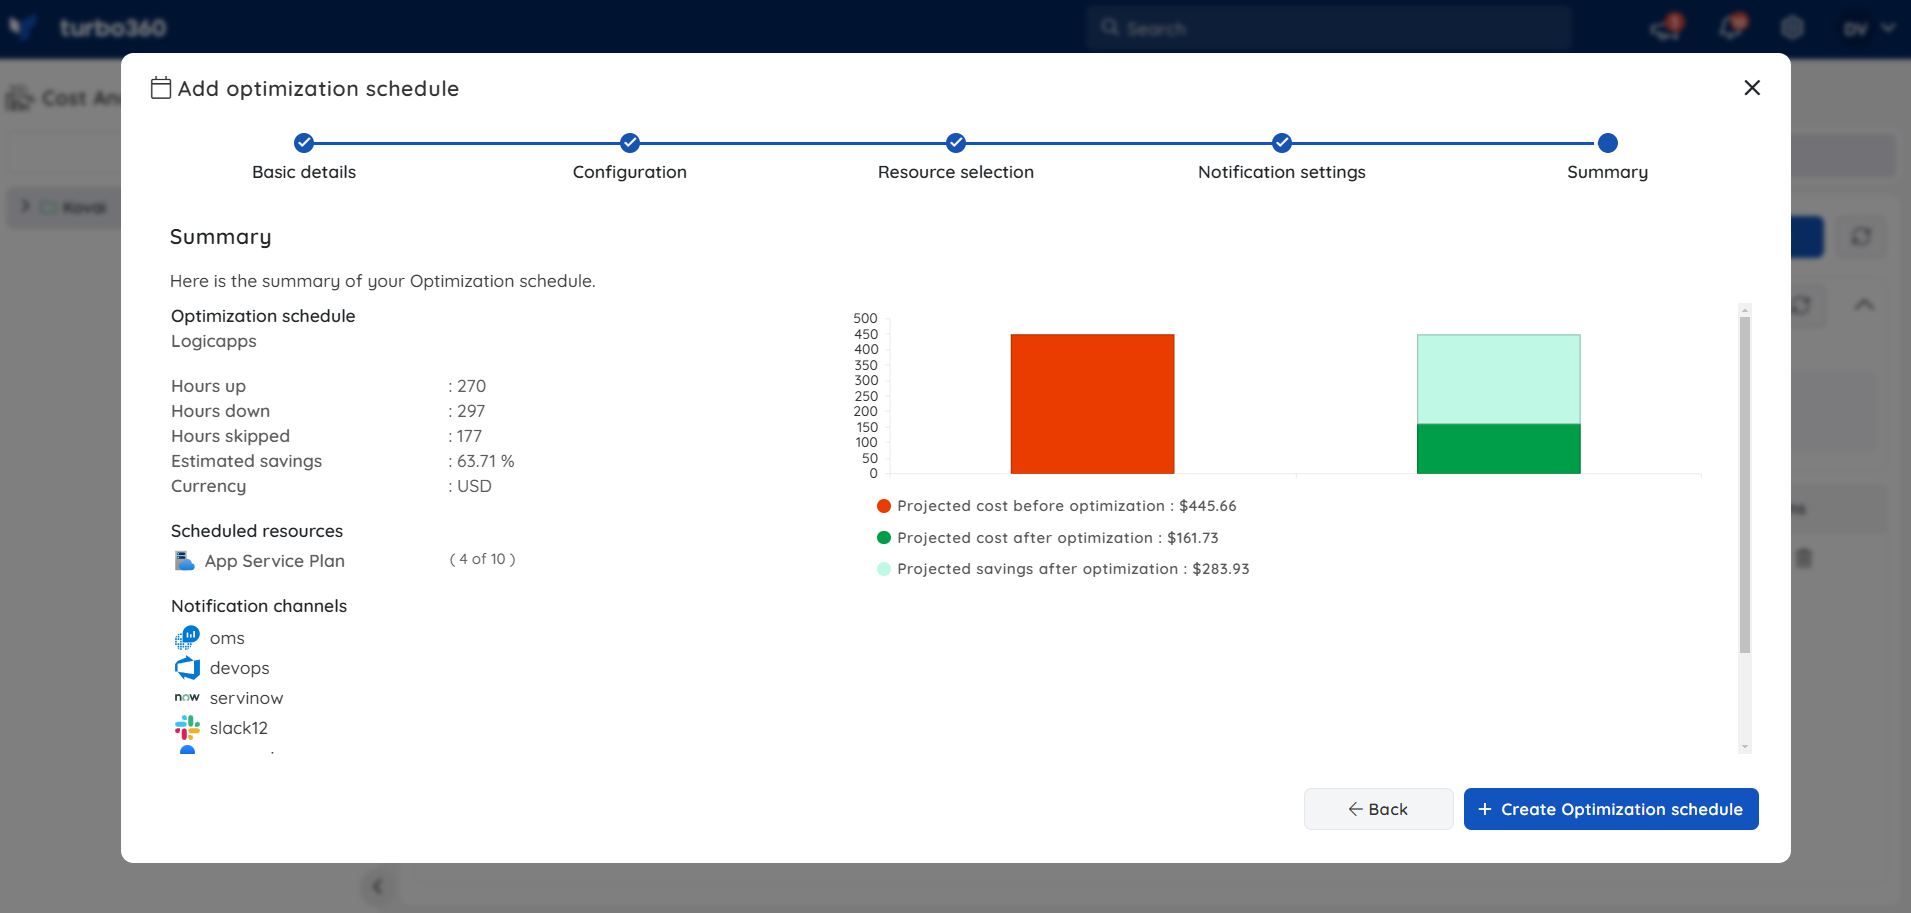
- Click Create optimization schedule.
Note:
The optimized SKU can only be applied when the Service Principal has Contributor access.
Update a schedule
Updating a schedule lets you change its name, currency type, timezone, and scheduling configuration after creation.
- Open the schedule and go to Settings.
- Modify the schedule name, currency type, timezone, or scheduling configuration as needed.
- Click Update.
Delete a schedule
Deleting a schedule permanently removes it and its configuration from the Cost group.
- Go to Optimization > Schedules in a Cost group.
- Click the Actions menu next to the schedule to delete.
- Select Delete.
- Confirm the deletion.
.png)
Export schedules
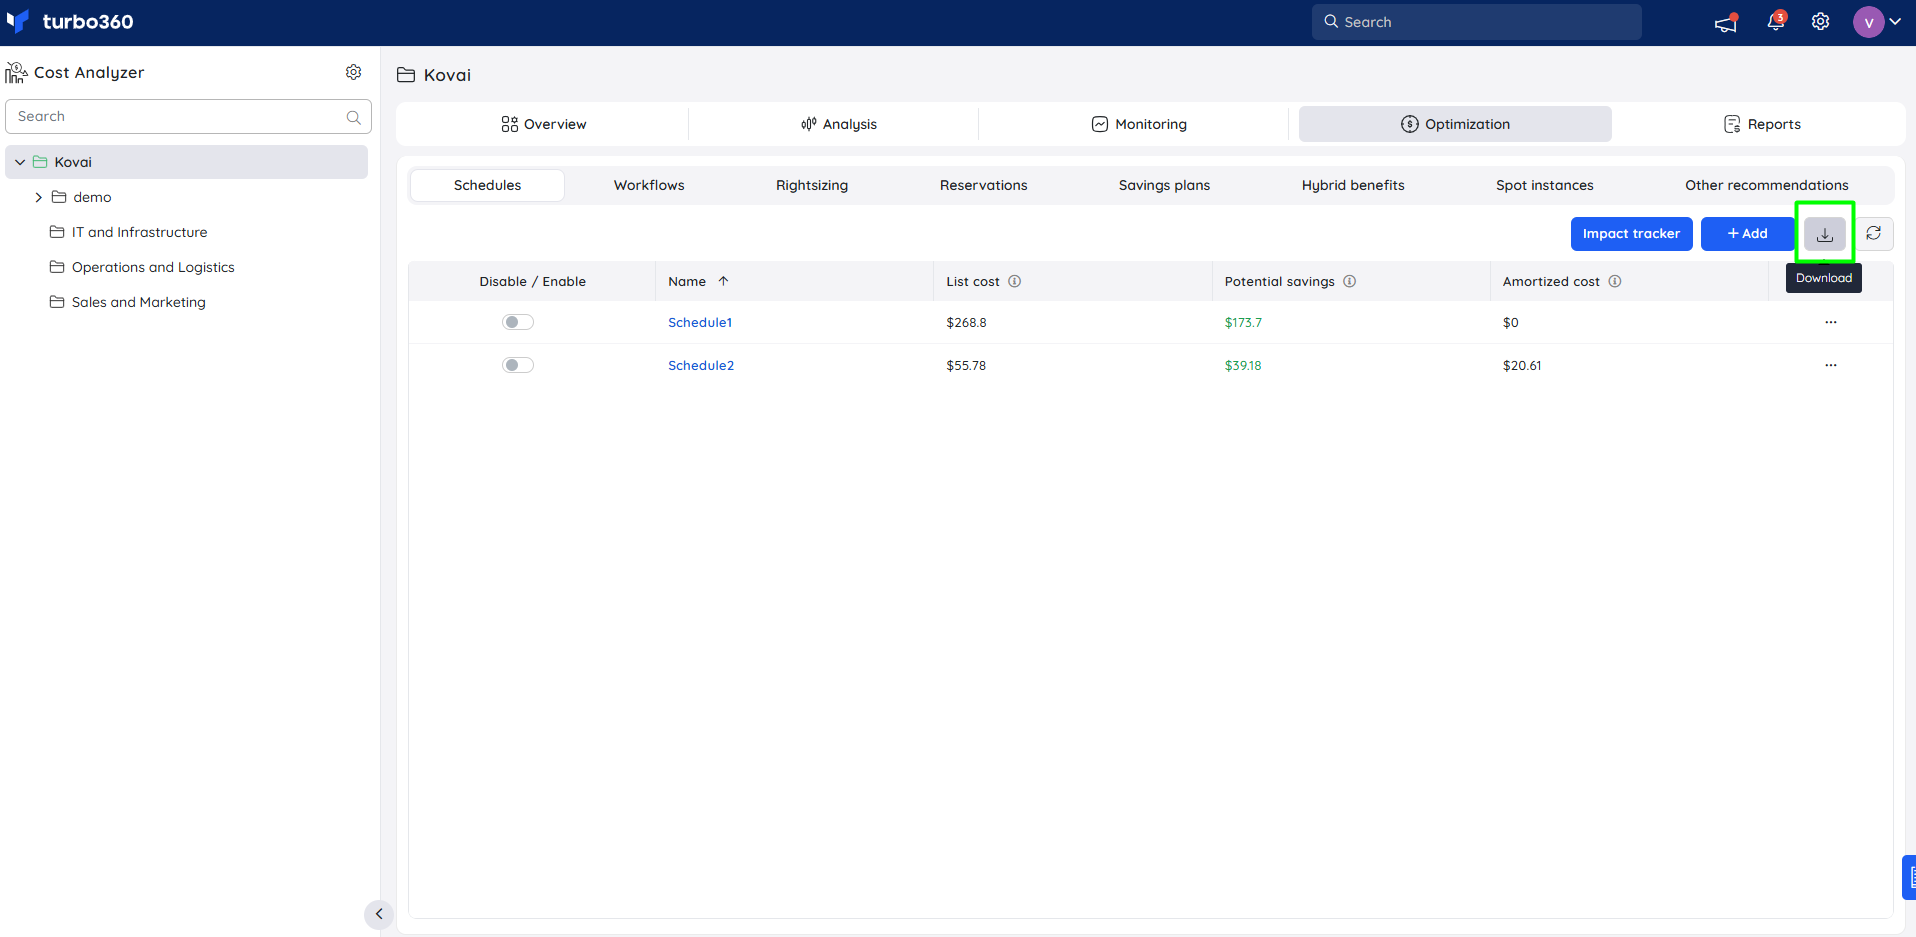
Optimization schedules can be downloaded as an Excel workbook containing all schedules and their associated cost details.
- Go to the Schedules section.
- Click the Download icon.
On-demand runs
On-demand runs let you trigger a schedule immediately without waiting for the next scheduled hour.
- Go to Cost group > Optimization > Schedules.
- Click the Actions menu next to the relevant schedule.
- Select Run schedule. The resources mapped to the schedule are listed for selection.
.png)
- Choose Start (Scale Up) or Stop (Scale Down) to match the desired operation.
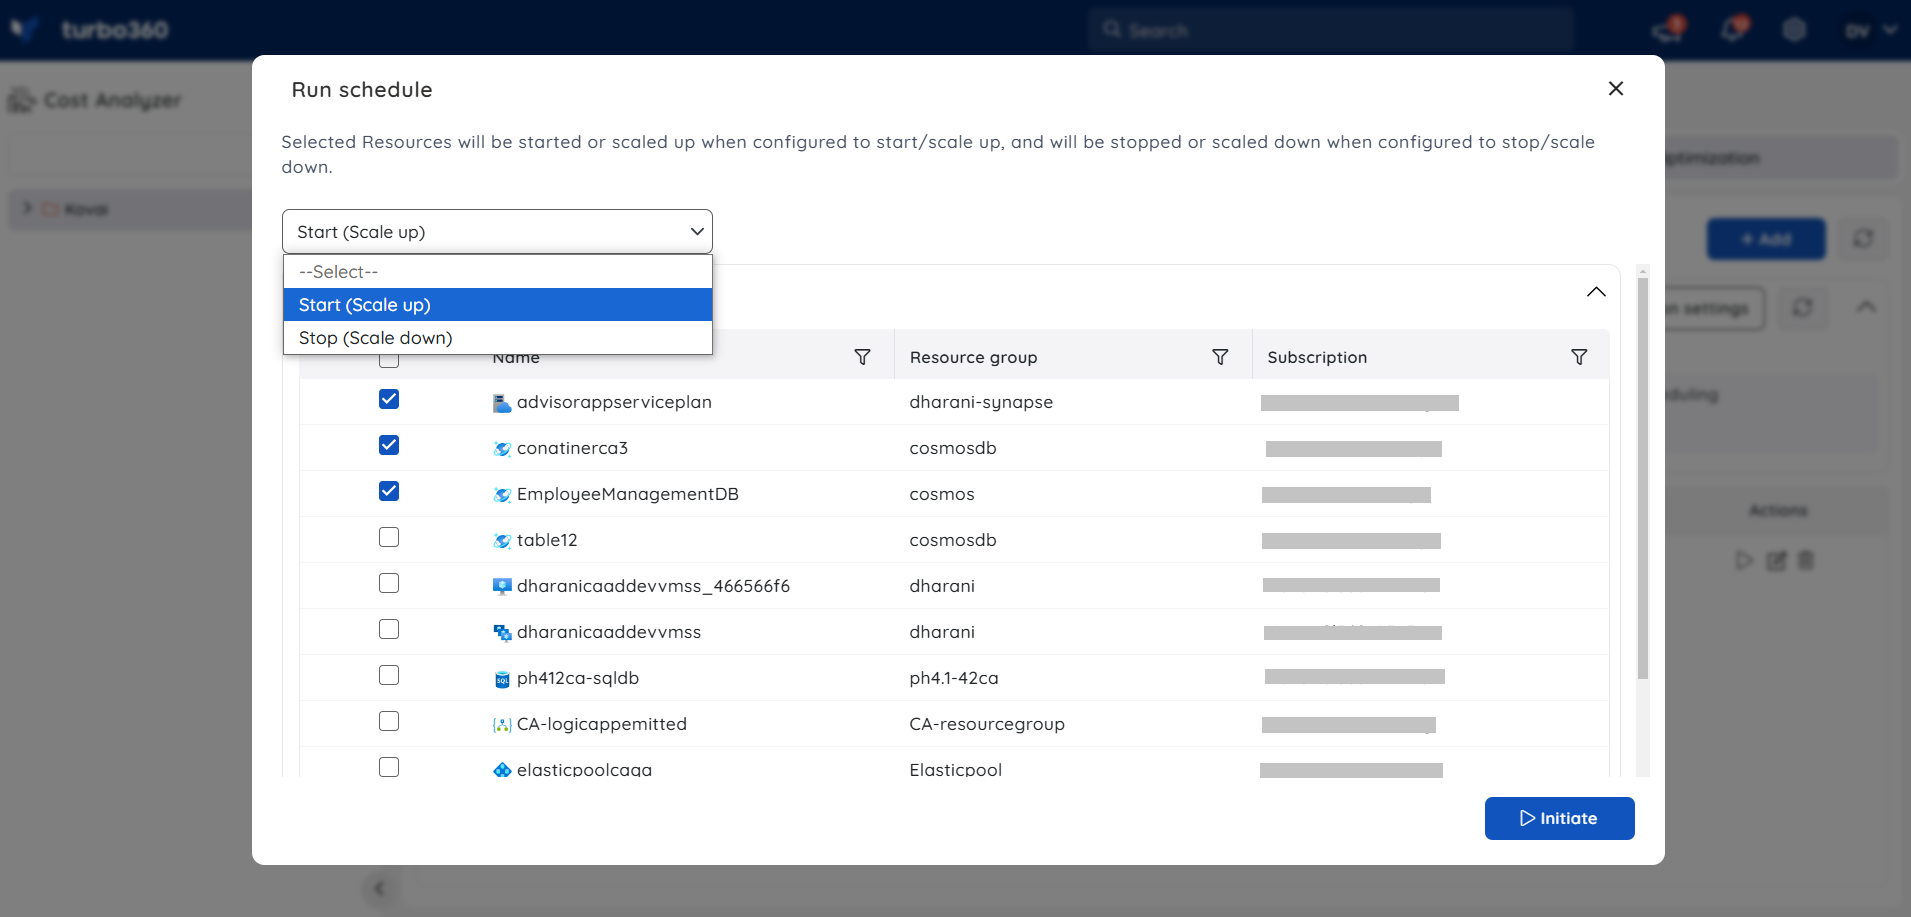
- Click Initiate.
Configuration
| Option | Description |
|---|---|
| Schedule type | Weekly, Monthly, or Daily — how Up/Down/Skip hours repeat. |
| Recurrence | Custom repeat pattern within the schedule type. |
| Currency | Currency shown for cost values in Resource selection; changing it also updates already-selected resources. Editable later from Schedule settings. |
| Pause recurrence | No recurrence, Weekly, or Monthly — when the schedule auto-pauses. Multiple rules can be added via Add rule. |
| Configure actions headers | Default headers (schedule name, group name, action type, resource ID at resource level) are auto-added; customizable or removable. |
Configure actions
Configure actions lets you trigger HTTP endpoints before and after a schedule run, at both the schedule level and the resource level. See Scheduler extensibility points for setup steps, configuration options, and an example scenario.
Scheduled resources
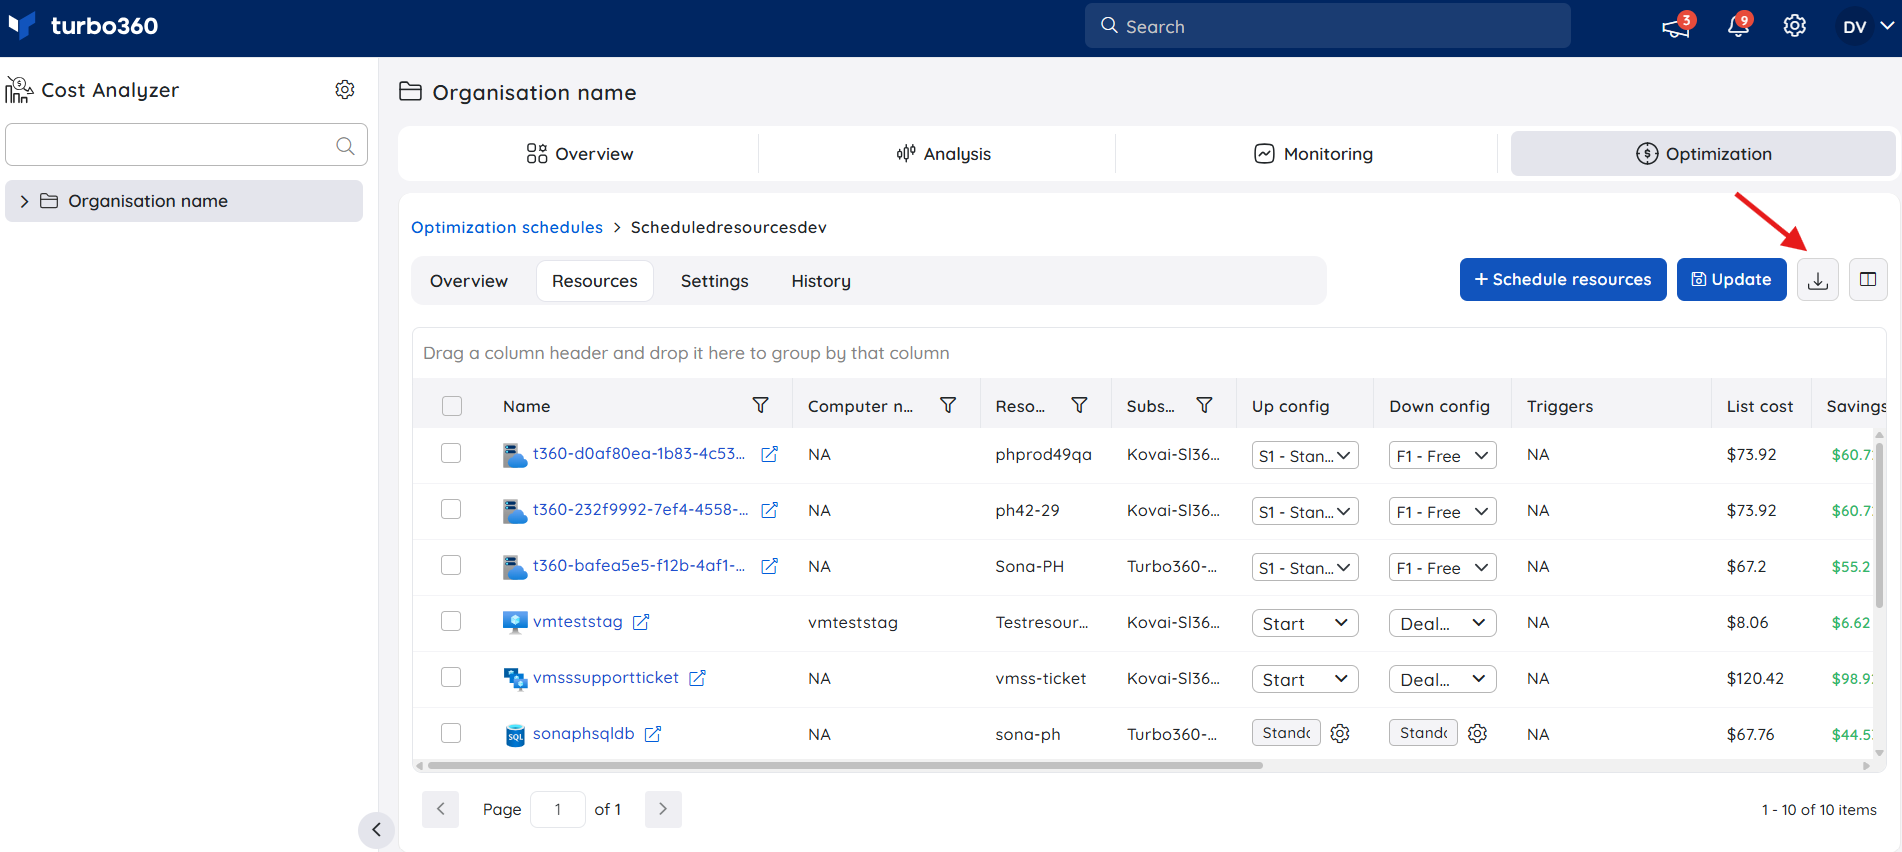
All scheduled resources are listed in the Scheduled Resources tab within the Resources section.
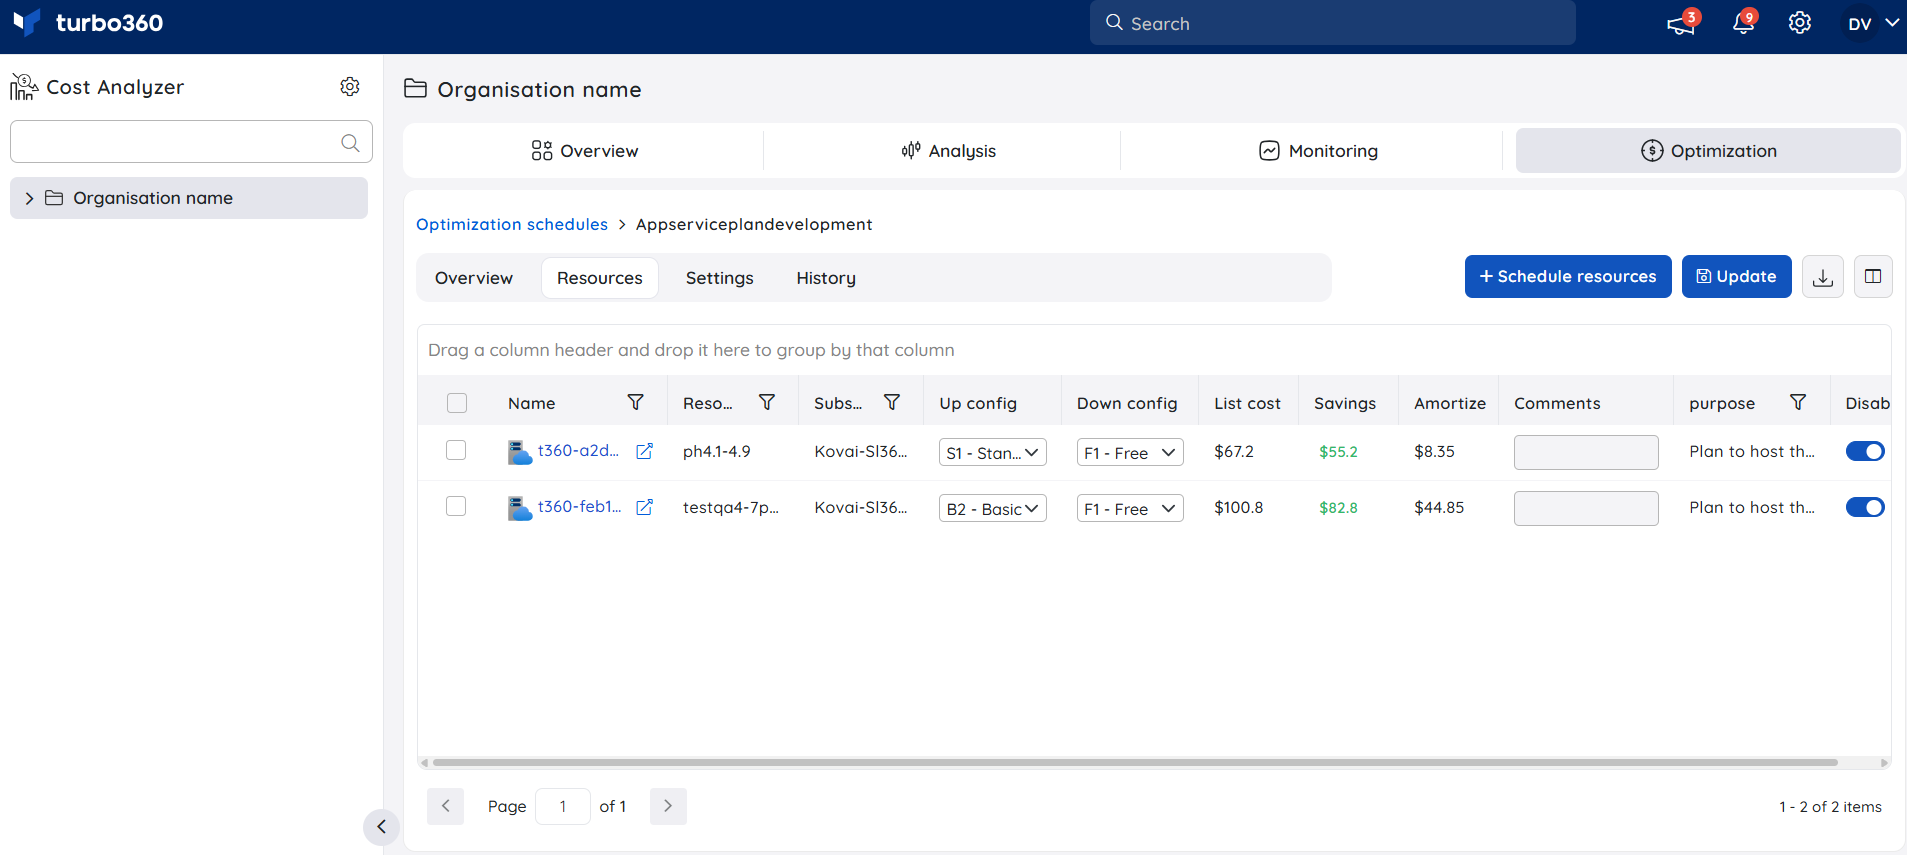
Note:
The same resource can be added to multiple optimization schedules.
Add a resource to an existing schedule
You can add a resource to a schedule at any time after the schedule is created.
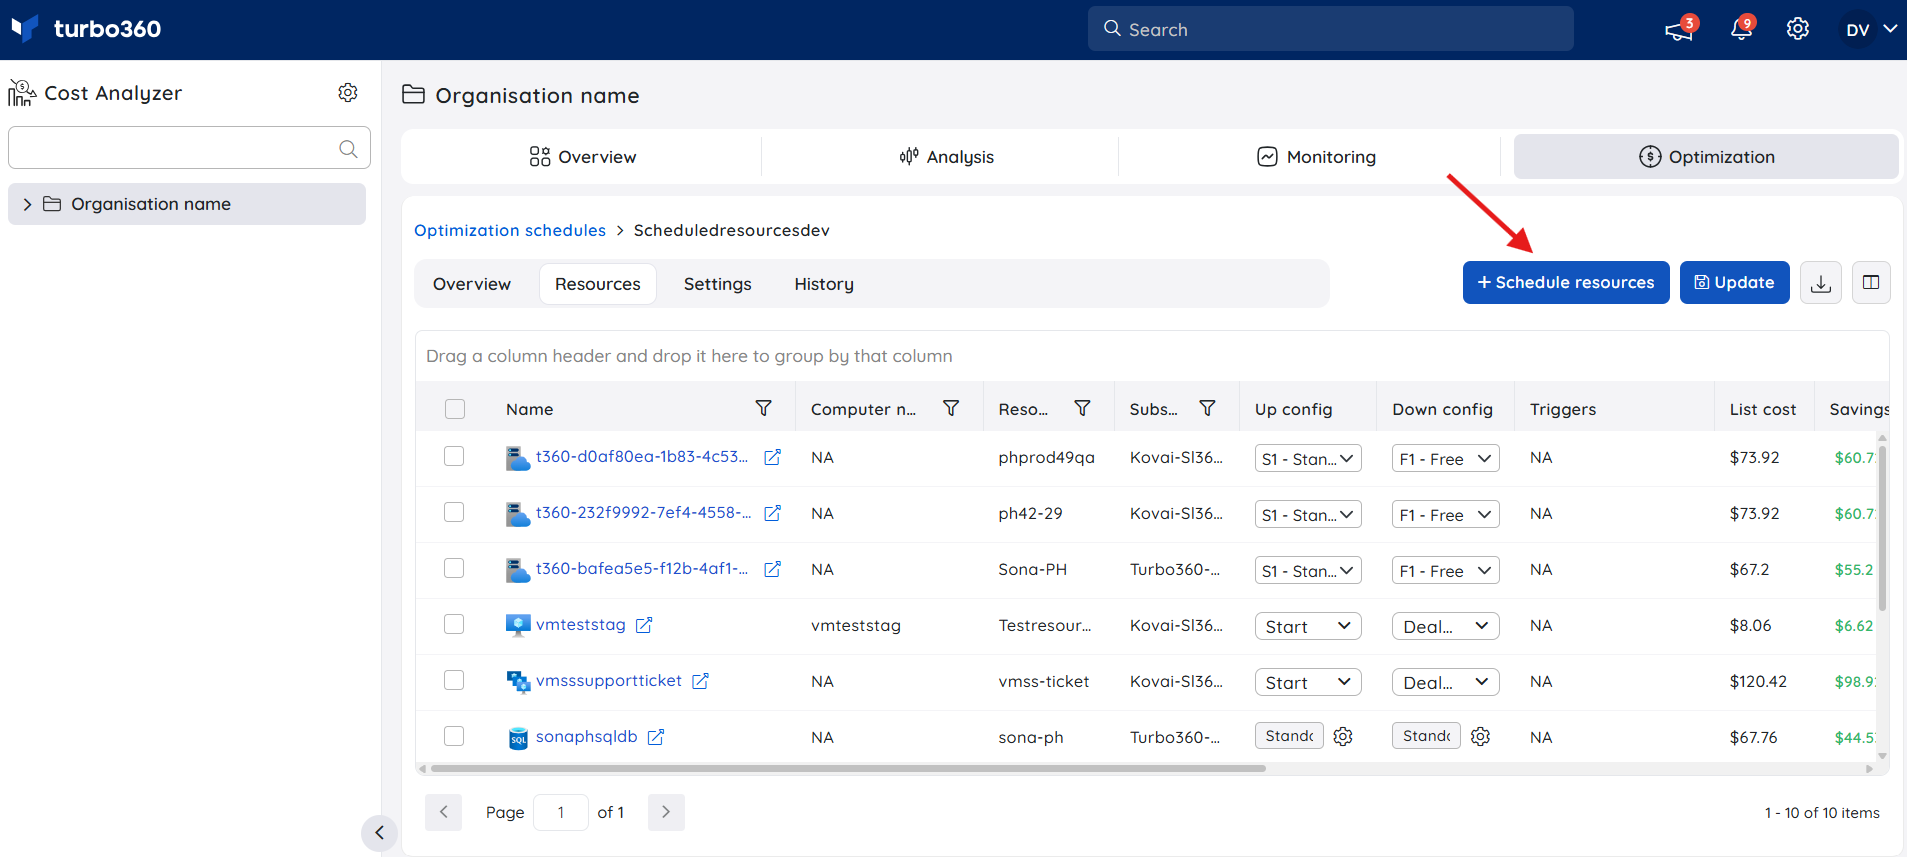
- Go to the Scheduled Resources tab within the Resources section.
- Click Schedule resources and select the resource to add.
Enable or disable a scheduled resource
Enabling or disabling a resource determines whether it is included or excluded in the next schedule run.
- Toggle the switch next to the resource in the Scheduled Resources tab.
- Click Update.
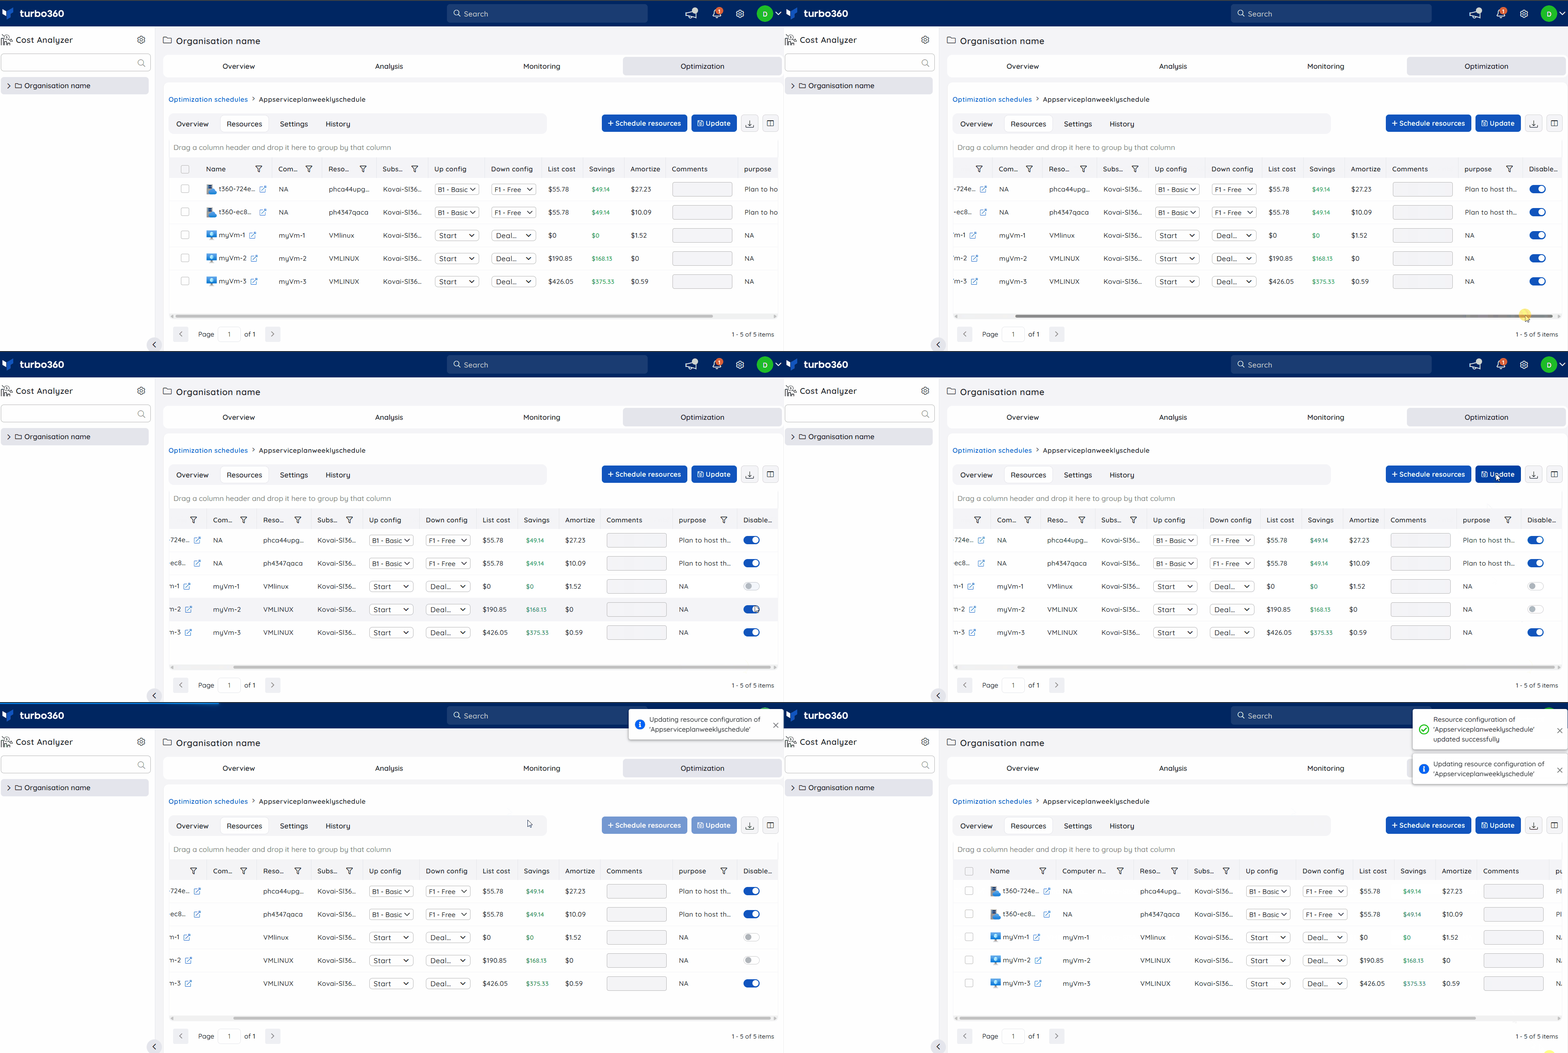
The schedule reflects the updated toggle status from the next run onward.
Update configuration values
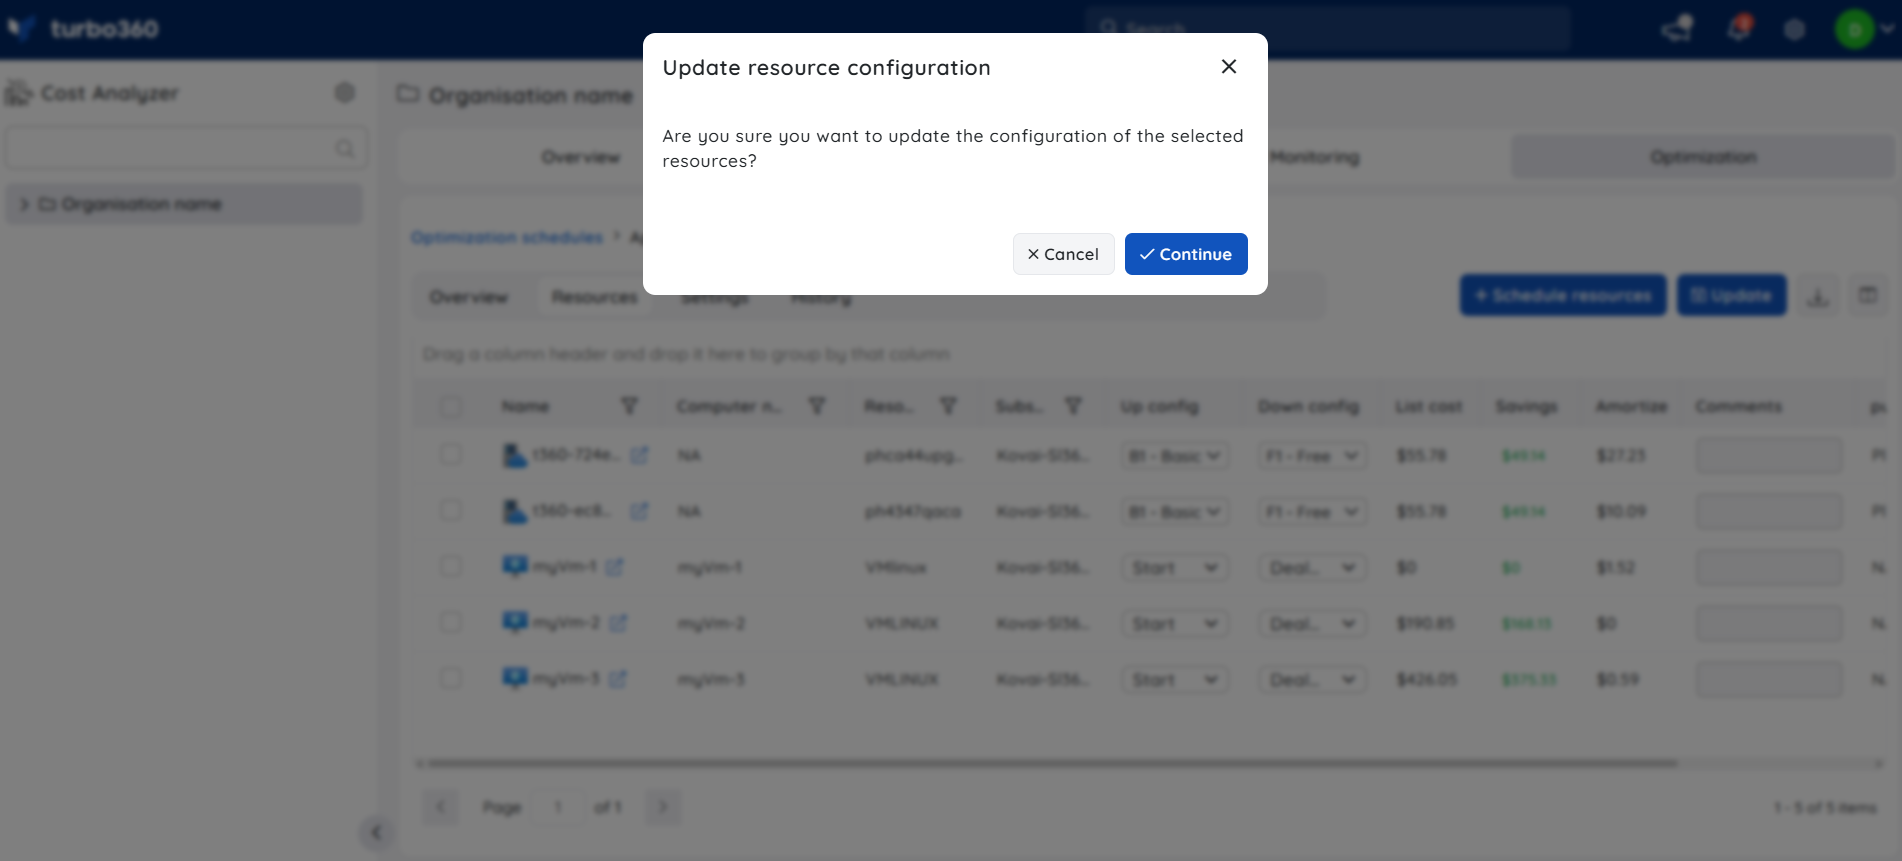
You can update the Up and Down configuration values for App Service Plans and Cosmos resources after the schedule is created.
- Go to Optimization schedule > Resources > Scheduled Resources.
- Modify the Up and Down configuration values as needed.
- Click Update.
Export scheduled resources
Exporting scheduled resources downloads a detailed Excel workbook of resource information and their schedule configuration.
- Go to the Scheduled Resources section.
- Click the Download icon.
The downloaded file includes resource details and scheduled configuration values.
Run history
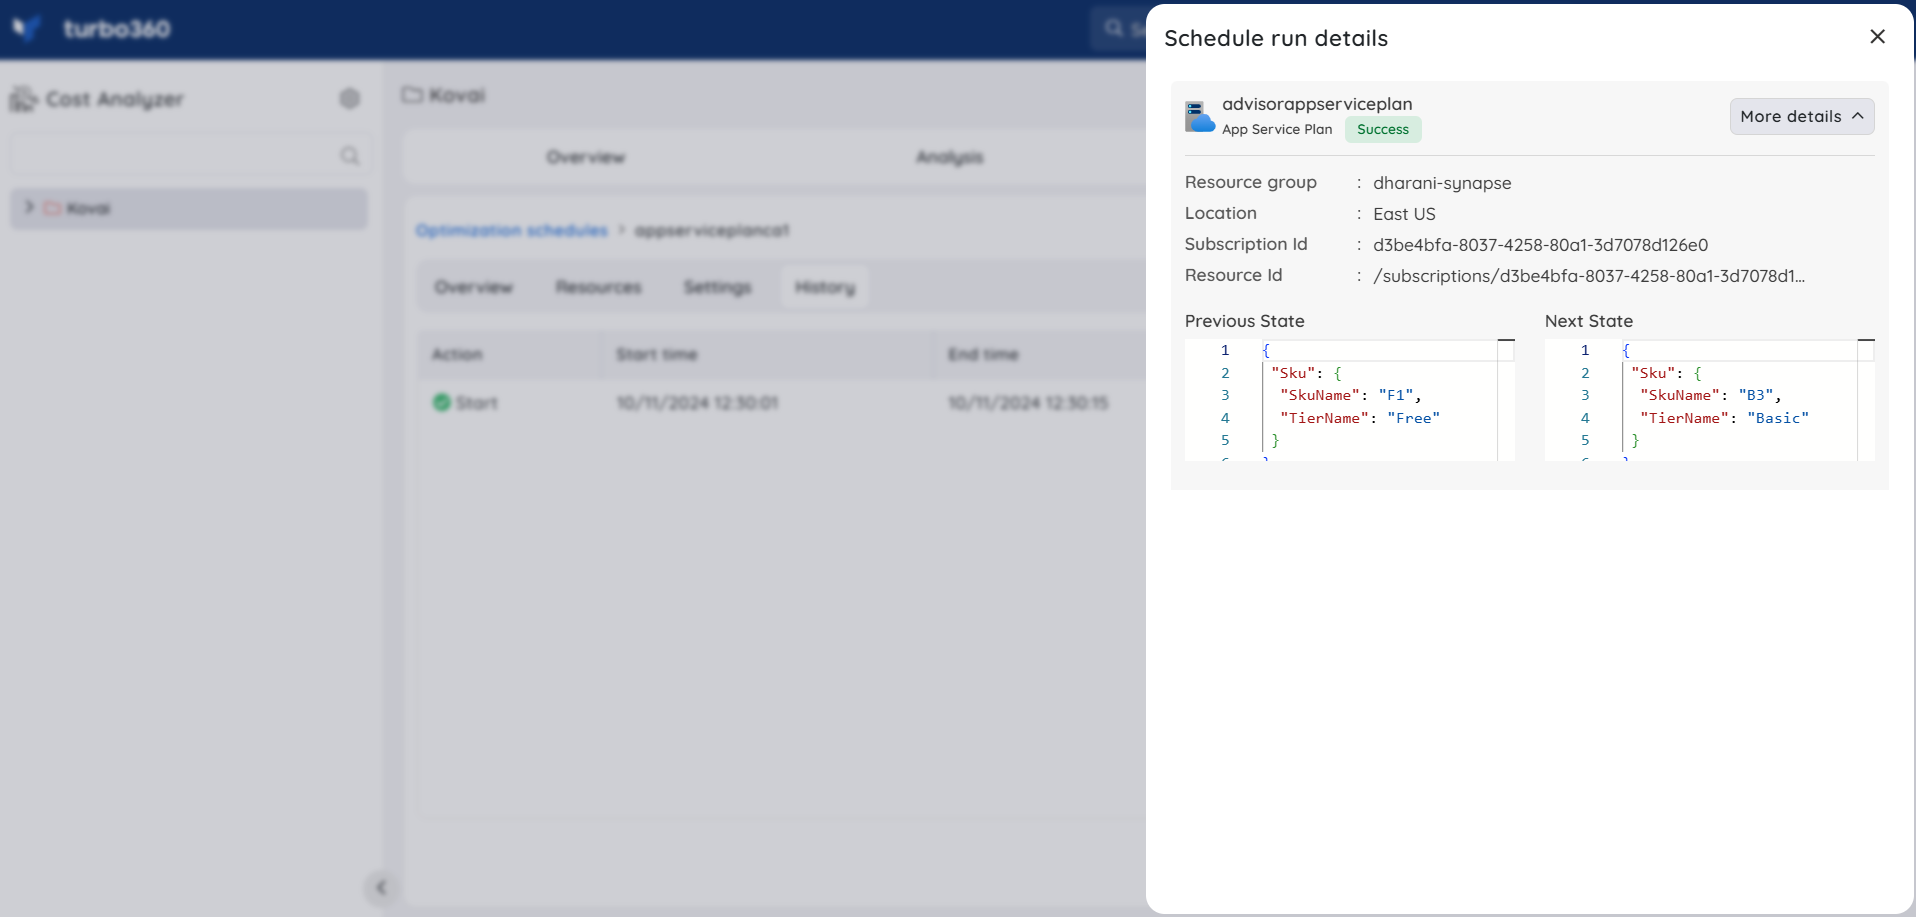
The History section shows the details of each schedule run. A run appears in the history only when the previous and next resource state differ.
The schedule runs once per hour regardless of the number of Up or Down hours configured.
User access policy
Account owners and owners can grant schedule-level permissions to individual users without changing their overall Cost Analyzer module permissions. This allows team members with restricted access to perform specific schedule actions.
.png)
The Manage users option is available in the Actions menu of each schedule. It lists all users in the Cost Analyzer module and lets you grant or revoke the following schedule-level permissions:
- Run schedules on demand
- Add or remove resources
- Update schedule settings
- Pause schedules
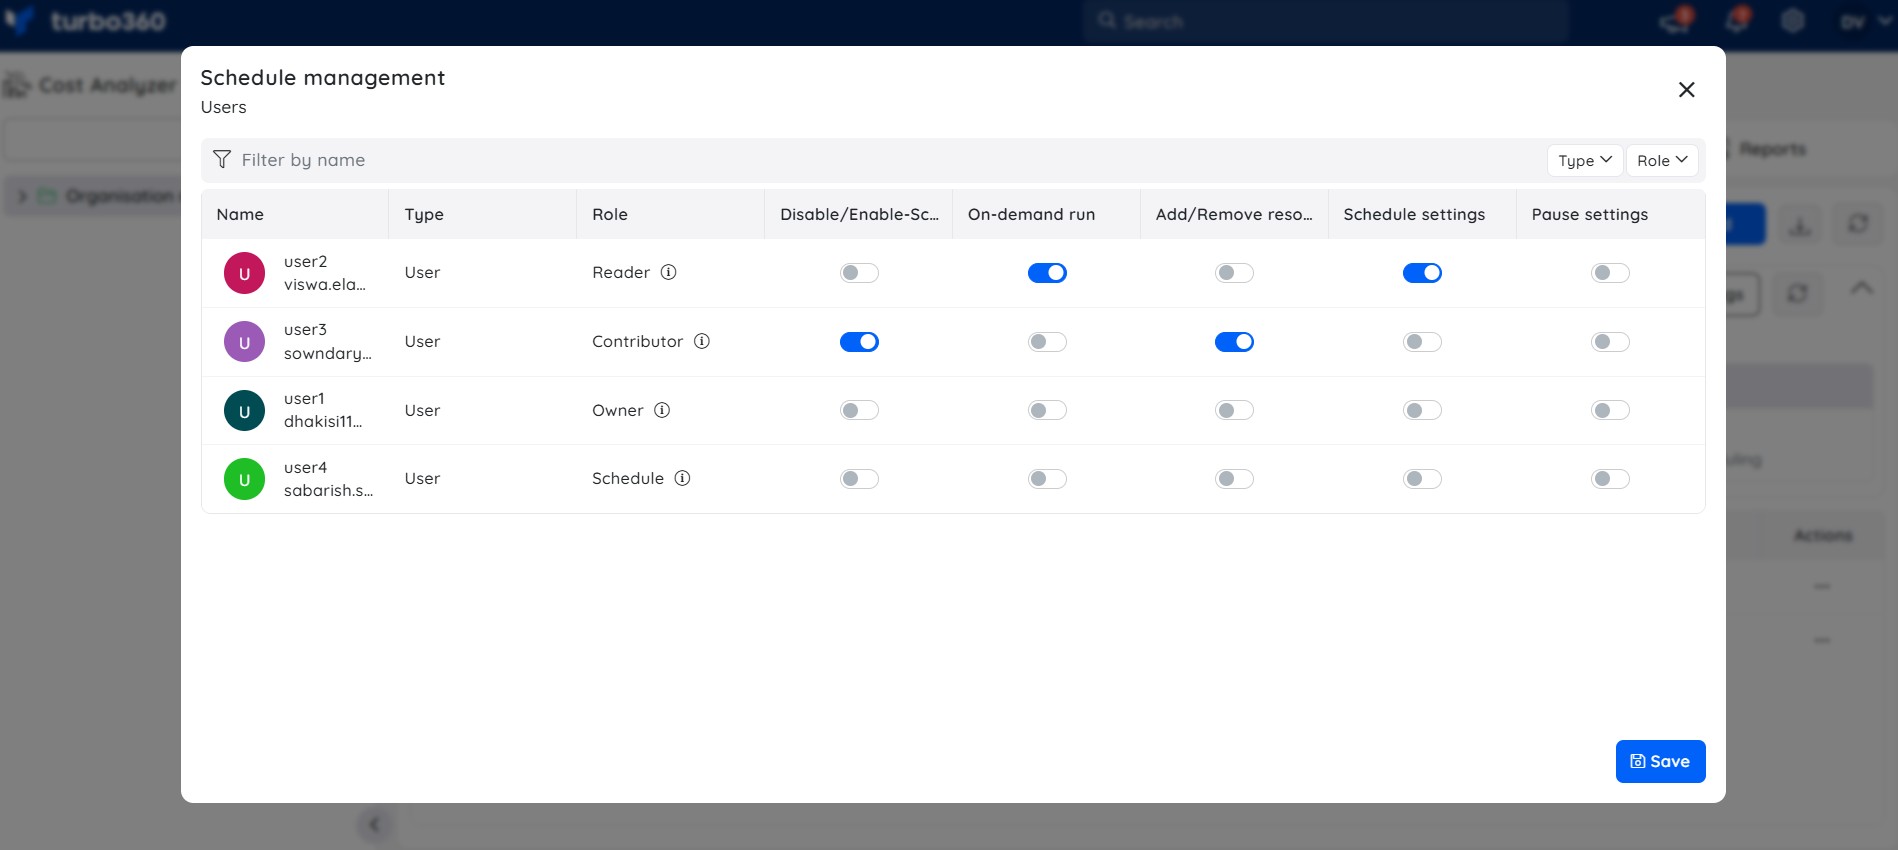
This reduces dependency on Owner or Contributor roles for routine schedule management tasks.
Example scenario
A team wants to cut cost on a development VM used only 9 AM–6 PM, Monday–Friday. They create a Weekly schedule with Up hours set to business hours and Down hours for the remaining 118 hours/week, then add the VM as a scheduled resource. Turbo360 deallocates the VM outside business hours and restarts it at 9 AM — cutting its weekly runtime from 168 hours to 50 and lowering compute cost accordingly.
Limitations
- The schedule runs once per hour. Sub-hourly execution is not supported.
- SKU changes can only be applied when the Service Principal has Contributor access. Schedules without Contributor access can start and stop resources but cannot apply SKU modifications.
- Configuration values for Up and Down SKUs can be updated post-creation only for App Service Plans and Cosmos resources.
- MySQL flexible server storage size cannot be scaled down once the server is created.
Troubleshooting
Schedule is not executing at the expected time
Cause: The configured timezone may differ from the timezone you are observing results in.
Fix: Verify the timezone set on the schedule under Settings. Adjust if needed and confirm the next expected run aligns with your local time.SKU change is not applied to a resource
Cause: The Service Principal does not have Contributor access on the subscription or resource group.
Fix: Update the Service Principal role assignment to Contributor in the Azure portal, then re-run the schedule.History section shows no run entries
Cause: The schedule ran but the resource state did not change between runs — the History section only records state transitions.
Fix: Confirm the Up and Down configuration values differ from the resource's current state. Check that the resource is enabled in the Scheduled Resources tab.Resource is not being processed during a scheduled run
Cause: The resource may be disabled in the Scheduled Resources tab, or the schedule is within a configured pause window.
Fix: Check the toggle status of the resource in the Scheduled Resources tab and enable it if needed. Review pause settings to confirm no active pause window covers the run time.On-demand run option is not available for a user
Cause: The user does not have the required schedule-level permission to run schedules on demand.
Fix: An account owner or owner must grant the Run schedules on demand permission to the user via Manage users in the schedule's Actions menu.
FAQs
Does changing the currency affect resources already selected?
Yes — already-selected resources update to the new currency type.Can the same resource be added to multiple schedules?
Yes. A resource can be added to multiple optimization schedules simultaneously.
Related articles
Was this article helpful?